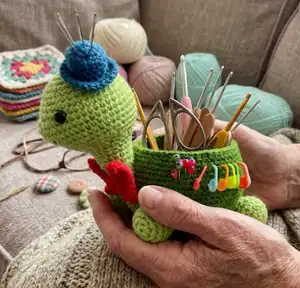
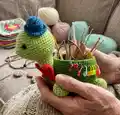
Make a charming Turtle Bowl amigurumi that doubles as a handy yarn or plant pot cover. This pattern guides you through a layered crochet bowl, a cute head, four legs, a tiny hat and a bow — perfect for gifting or organizing your hooks. Clear step-by-step rounds and photos help you stitch with confidence and add personal touches.
Progress Tracker
0% Complete
— Notes :
Infos :
This pattern uses US terminology. This amigurumi is worked in continuous rounds. Do not join or turn unless otherwise instructed. Mark the beginning of each round with a stitch marker. You can use a different color of yarn as an alternative to a stitch marker for marking the rounds. Just place it into the first stitch of every row/round as you go. Gauge is not important in this project. Use MR (magic ring) as an alternative of ch 2. Measurement: approximately 16 cm tall. Skill Level: Intermediate.
— Body :
— Inner Layer :
Use navy blue
Round R1 :
ch 2, Starting from the second chain from hook, 6 sc (6)
Round R2 :
inc, rep 6x (12)
Round R3 :
sc, inc, rep 6x (18)
Round R4 :
sc, inc, [2 sc, inc = rep 5x], sc (24)
Round R5 :
3 sc, inc, rep 6x (30)
Round R6 :
2 sc, inc, [4 sc, inc = rep 5x], 2 sc (36)
Round R7 :
FLO, 5 sc, inc, rep 6x (42)
Round R17 :
3 sc, inc, [6 sc, inc = rep 5x], 3 sc (48)
Round R20 :
7 sc, inc, rep 6x (54)
Info :
F/O. Turn the inner layer inside out
— Outer Layer :
Info :
Use the same color yarn. Start from the loop of R6.
Round R1 :
3 sc, inc, rep 9x (45)
Round R2 :
2 sc, inc, rep 15x (60)
Round R5 :
9 sc, inc, rep 6x (66)
Round R12 :
9 sc, dec, rep 6x (60)
Round R15 :
8 sc, dec, rep 6x (54)
Info :
Stuff, but don’t too much
Round R19 :
Join both layers by crocheting them together, sl st around.
— Head :
Round R1 :
ch 2, Starting from the second chain from hook, 6 sc (6)
Round R2 :
inc, rep 6x (12)
Round R3 :
sc, inc, rep 6x (18)
Round R4 :
sc, inc, [2 sc, inc = rep 5x], sc (24)
Round R5 :
3 sc, inc, rep 6x (30)
Round R7 :
2 sc, inc, [4 sc, inc = rep 5x], 2 sc (36)
Round R8 :
5 sc, inc, rep 6x (42)
Round R9 :
19 sc, (inc=4x), 19 sc (46)
Round R10 :
22 sc, (inc=2x), 22 sc (48)
Round R12 :
22 sc, (dec =2x), 22 sc (46)
Round R13 :
19 sc, (dec=4x), 19 sc (42)
Info :
Attach safety eyes between R9-10, and give 12 stitches (count from R10) between them
Round R14 :
5 sc, dec, rep 6x (36)
Round R15 :
2 sc, dec, [4 sc, dec = rep 5x], 2 sc (30)
Round R16 :
3 sc, dec, rep 6x (24)
Round R18 :
2 sc, dec, rep 6x (18)
Round R23 :
4 sc, dec, rep 3x (15)
Round R25 :
3 sc, dec, rep 3x (12)
Round R27 :
Flatten the round; crochet both sides together by using sl st to close the hole, 4 sl st
Info :
F/O leaving a long tail for sewing
— Legs (make 4) :
Round R1 :
ch 2, starting from the second chain from hook, 6 sc (6)
Round R2 :
inc, rep 6x (12)
Round R3 :
sc, inc, rep 6x (18)
Round R5 :
4 sc, dec, rep 3x (15)
Round R7 :
3 sc, dec, rep 3x (12)
Info :
F/O leaving a long tail for sewing
— Accessories :
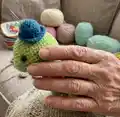
— Hat :
Use contrasting yarn, I used dark brown.
Round R1 :
ch 2, starting from the second chain from hook, 5 sc (5)
Round R2 :
inc, rep 5x (10)
Round R3 :
sc, inc, rep 5x (15)
Round R8 :
2 sc, inc, rep 5x (20)
Round R9 :
3 sc, inc, rep 5x (25)
Round R1 :
ch 11, starting from the second chain from hook, sc in each sts (10), ch 1, turn
Round R2 :
dec, 6 sc, dec (8), ch 1, turn
Round R3 :
dec, 4 sc, dec (6), ch 1, turn
Round R4 :
dec, 2 sc, dec (4), ch 1, turn
Round R5 :
dec, dec (2), ch 1, turn
Round R6 :
sc in each st (2), ch 1, turn
Round R7 :
inc, inc (4), ch 1, turn
Round R8 :
inc, 2 sc, inc (6), ch 1, turn
Round R9 :
inc, 4 sc, inc (8), ch 1, turn
Round R10 :
inc, 6 sc, inc (10)
Info :
F/O. Wrap the yarn around the center of the piece.
— Finishing :
Info :
Sew the head to the body.
Info :
Sew the legs under the body.
Info :
Sew the hat on the head.
Info :
Sew the bow on the neck.
Info :
Sew the mouth by using black embroidery thread.
Info :
This turtle bowl is also can be used as a plant pot cover.
This delightful Turtle Bowl pattern turns yarn and hooks into a lovable, useful companion. 🧶
It doubles as a storage bowl or plant pot cover and makes a lovely handmade gift. 🌿
Enjoy stitching each detail and proud moments when your turtle comes to life! 🧵