🧢 Beautiful ✨ Detailed πŸ’ Adorable

Squirtle Amigurumi Pattern

Squirtle Amigurumi Pattern
4.4β˜… Rating
2-3 Hours Time Needed
2.5K Made This
βœ‚οΈ

Beginner Friendly Level

Perfect for those just starting their crochet journey, with clear instructions and simple techniques

⏱️

Bite-Sized Project

Finishes in 2-4 hoursβ€”perfect for an afternoon of creative relaxation.

🧸

Cute Companion

An adorable friend to cherish, handcrafted with love to bring comfort and joy for years to come.

About This Squirtle Amigurumi Pattern

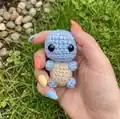
This pattern creates a small Squirtle amigurumi with a removable-looking shell and curled tail. The design uses basic single crochet stitches, increases, and decreases for shaping. Youll make a head, body, shell, arms, legs and tail then assemble them for the finished toy.

Squirtle Amigurumi Pattern crochet pattern - detailed view of completed project

Clear rounds and photos guide you through each piece step-by-step. Ideal for practicing shaping and small-piece assembly while producing a delightful finished toy.

Why You'll Love This Squirtle Amigurumi Pattern

I absolutely love this pattern because it captures Squirtles personality in a tiny, cuddly form that is quick to make. I enjoy how simple stitches create clear shaping, making it satisfying to see the character take shape. The little shell detail and curled tail add personality with minimal extra work. I love gifting these because they are small, portable, and always bring a smile. Working this pattern is a fantastic way to practice amigurumi assembly and finishing skills.

Squirtle Amigurumi Pattern step 1 - construction progress Squirtle Amigurumi Pattern step 2 - assembly progress Squirtle Amigurumi Pattern step 3 - details and accessories Squirtle Amigurumi Pattern step 4 - final assembly and finishing

Switch Things Up

I love changing the yarn color to create custom versions of this pattern; try pastel blues or mint greens for a soft look.

I sometimes use a smaller hook and thinner yarn to make tiny keychain versions that work perfectly as charms.

For a chunkier, cuddlier Squirtle, I use bulky yarn and a larger hook β€” it becomes much more plush and great for kids.

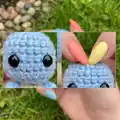
I like to embroider a smile or different expressions to give each piece a unique personality before attaching the eyes.

Swap the safety eyes for embroidered eyes if you need a child-safe version or prefer a handmade look.

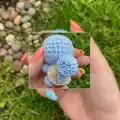
Try making a shell in different colors or stripes to create a whole family of unique turtles from the same pattern.

Add a little felt accessory like a tiny scarf or a miniature hat for seasonal variations and gifting ideas.

I sometimes stuff less for a softer, floppy toy and more for a firmer, display-friendly figure; adjust to suit your preference.

Use metallic or sparkly yarn for the shell trim when you want a more whimsical version that stands out.

Experiment with adding wire in the tail or limbs for posability if you want a poseable display piece.

Common Mistakes & How to Fix Them

βœ— Placing safety eyes too high or too low will change the expression; measure carefully and place them 6 stitches down from the top and 5 stitches apart as instructed. βœ— Forgetting to stuff as you go causes gaps or lumps when closing; stuff the head and body gradually and finish stuffing before completing final decreases. βœ— Not leaving a tail when switching yarn colors can make sewing difficult later; leave a long tail when you cut the blue yarn to switch to beige and use it for sewing. βœ— Skipping stitch counts during increases and decreases will distort the shape; count your stitches at the end of each round to ensure accuracy and correct any mistakes promptly. βœ— Tightening your tension too much on small pieces makes sewing them on awkward; maintain even, moderate tension so pieces match and sew together neatly.

Squirtle Amigurumi Pattern

Make a tiny, adorable Squirtle amigurumi you can cherish or gift. This sweet crochet toy uses simple single crochet stitches and small pieces for easy assembly. Youll love the compact size and charming shell detail that bring this little Pokemon to life. Perfect for quick handmade gifts and beginner-friendly practice.

Beginner Friendly 2-3 Hours

Materials Needed for Squirtle Amigurumi Pattern

β€” Main Fabric

  • 01
    Worsted weight yarn (#4) - Blue (main color for head, limbs, tail) - small amount
  • 02
    Worsted weight yarn (#4) - Beige (body) - small amount
  • 03
    Worsted weight yarn (#4) - White (shell trim) - small amount
  • 04
    Worsted weight yarn (#4) - Light Brown (shell base) - small amount
  • 05
    Polyfil or another soft stuffing - small amount for stuffing head, body, limbs

β€” Tools Required

  • 01
    Crochet hook size 3.5mm
  • 02
    Scissors
  • 03
    Tapestry needle
  • 04
    1 pair 10mm safety eyes
  • 05
    Polyfil (or another soft stuffing)

Progress Tracker

0% Complete

β€” Head :

Info :

Using the blue yarn

Round 1 :

CH 2, SC 8 in first stitch. (8 stitches)

Info :

Alternatively, SC 8 into a magic circle

Round 2 :

INC x 8 (16 stitches)

Round 3 :

*SC, INC* x 8 (24 stitches)

Round 4-6 :

SC x 24 (24 stitches)

Round 7 :

*SC x 7*, INC, *SC x 8*, INC, *SC x 7* (26 stitches)

Info :

Place eyes 5 stitches apart, and 6 stitches down from the top of the head, between the two increases.

Round 8 :

SC x 26 (26 stitches)

Round 9 :

*SC x 2*, *DEC x 11*, *SC x 2* (15 stitches)

Info :

Stuff the head as much as possible

Round 10 :

SC, *DEC x 6*, *SC x 2* (9 stitches)

Info :

Finish stuffing the head

β€” Body :

Infos :

Cut the blue yarn, leaving a tail, but don't fasten off, and switch to the beige yarn. Stuff any extra yarn into the head.

Round 1 :

INC x 9 (18 stitches)

Round 2-6 :

SC x 18 (18 stitches)

Round 7 to close :

DEC to close, FO.

Info :

Stuff the body before you complete the DEC.

β€” Shell :

Info :

With light brown

Round 1 :

CH 2, SC 7 in first stitch. (7 stitches)

Info :

Alternatively, SC 7 into a magic circle

Round 2 :

INC x 7 (14 stitches)

Round 3 :

*SC x 3, INC x 4* x 2 (22 stitches)

Info :

With white

Round 4 :

SC x 22 (22 stitches)

Info :

FO with SlSt.

Info :

Sew shell onto body. (As pictured)

β€” Arms :

Round 1 :

CH 2, SC 6 into first stitch. (6 stitches)

Info :

Alternatively, make a magic circle and SC 6 into it.

Round 2 :

SC x 6 (6 stitches)

Infos :

FO with SlSt. Sew on arms using the tapestry needle (use picture for guidance.)

β€” Legs :

Round 1 :

CH 2, SC 7 into first stitch. (7 stitches)

Info :

Alternatively, make a magic circle and SC 7 into it.

Round 2 :

SC x 7 (7 stitches)

Infos :

FO with SlSt. Sew on arms using the tapestry needle (use picture for guidance.)

β€” Tail :

Round 1 :

CH 2, SC 10 in first stitch. (10 stitches)

Info :

Alternatively, SC 10 into a magic circle

Round 2 :

*SC x 2*, INC, *SC x 4*, INC, *SC x 2* (12 stitches)

Round 3-7 :

SC x 12 (12 stitches)

Round 8 :

*SC x 2*, DEC, *SC x 4*, DEC, *SC x 2* (10 stitches)

Round 9 :

SC x 10 (10 stitches)

Round 10 :

*SC x 4*, DEC, *SC x 4* (9 stitches)

Round 11 :

SC x 9, FO with a SlSt.

Infos :

Using the same shade of blue yarn, fold over the top (row 1) and sew to fasten, creating the curl. Sew the tail to the base of the shell.

Info :

Weave in any remaining loose ends, and trim off.

Assembly Instructions

  • Place safety eyes between the increases on round 7; position them 5 stitches apart and 6 stitches down from the top before continuing.
  • Sew the shell onto the back of the body using the tail from the shell and a tapestry needle, matching the photo for placement.
  • Attach arms to either side of the body using the tapestry needle and the tails left from the arm pieces; use the reference photos to angle them slightly forward.
  • Sew the legs to the bottom front of the body, spacing them evenly so the amigurumi stands, using the tails to secure firmly.
  • Fold the tail top and sew to create the curl, then attach the tail to the base of the shell and weave in any remaining ends.

Important Notes

  • πŸ’‘Place safety eyes before stuffing too much so they sit correctly between the stitches and dont shift during assembly.
  • πŸ’‘Stuff head and body gradually and finish stuffing before completing the final decreases to avoid lumps and gaps.
  • πŸ’‘Leave yarn tails when switching colors (blue to beige) to use for sewing pieces together securely.
  • πŸ’‘Use a tapestry needle and small whipstitches to attach small limbs and the shell for a neat, secure finish.

This charming Squirtle amigurumi pattern is a delightful quick project to make for friends or yourself. It blends simple shaping and tiny details to create a lovable mini Pokemon companion. Happy crocheting and enjoy bringing your tiny turtle to life! 🐒🧢

You ask,

we answer.

FAQs

What size will the finished piece be?

The finished amigurumi measures approximately 8-12 cm tall depending on yarn tension and exact hook used; using the recommended worsted yarn and 3.5mm hook yields a small pocket-sized toy.

Can I use different yarn weights for this pattern?

Yes, you can use different yarn weights, but that will change the final size; if you use a bulkier yarn, use a larger hook and adjust stuffing and assembly accordingly.

Do I need prior crochet experience for this pattern?

This pattern is beginner friendly and requires only basic stitches (SC, INC, DEC, CH, SlSt); basic knowledge of working in rounds and sewing pieces is helpful.

How long does this project typically take to complete?

Most crocheters finish this small amigurumi in about 2-3 hours, though time may vary based on your experience and how many breaks you take.