About This Ravenclaw scarf Pattern
This pattern creates a long Ravenclaw-inspired scarf worked in single crochet using color-change techniques to create stripes and motif panels. The design uses worsted weight yarn and a 4.5mm hook for a warm, structured fabric. The row-by-row chart lists stitch counts and color segments so you can follow the motif precisely.

The scarf is worked flat from bottom to top with repeated 30-stitch rows and several colorwork sections for the crest and decorative elements. The pattern includes a full color legend and recommended yarn and hook.
Why You'll Love This Ravenclaw scarf Pattern
I absolutely love this pattern because it combines classic single crochet simplicity with striking colorwork panels that really pop. I enjoy how the structured 30-stitch rows make it easy to keep consistent tension while still creating detailed motifs. The scarf is versatile — you can wear it casually or as a statement piece for themed events. I also love that the pattern maps each row clearly, which makes following the color changes straightforward and satisfying.
Switch Things Up
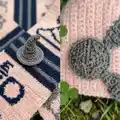
I love experimenting with color when I make this scarf; try switching the Ravenclaw palette to create a custom house or a neutral everyday version.
I sometimes use a slightly larger hook for a softer drape or a smaller hook for a denser, warmer scarf—adjust your hook to change the finished feel.
If you want a shorter or longer scarf, simply add or remove full 30-stitch rows at the wide plain sections to tailor the length to your needs.
I also enjoy substituting yarn textures such as a soft acrylic blend for easier care or a wool blend for extra warmth and character in the colorwork.
To make a mini or keychain-sized version, use a DK or sport weight yarn and smaller hook to scale the pattern down while keeping the motif central.
I sometimes add embroidered accents over the finished motifs to enhance contrast and define small details after blocking the scarf.
If you prefer no fringe, finish with a neat single crochet border around the short edges to tidy and stabilize the ends.
I recommend testing one motif section with your chosen yarn colors to ensure contrasts read well before committing to the full chart.
For a reversible look, experiment with intarsia-style blocks rather than carried floats, although this requires more yarn bobbins and management.
When making gifts, I like adding a small hanging loop or a custom label sewn into the wrong side so the recipient knows it was handmade just for them.
Common Mistakes & How to Fix Them
✗ Skipping stitch counts when following the row chart can cause the motif to drift out of position; count every stitch at the end of each row and compare to the chart to catch mistakes early.
✗ Not carrying or securing yarn correctly during color changes creates loose floats or knots; use the color-change method shown and twist or catch the unused yarn on the wrong side as you work.
✗ Working with inconsistent tension in different colors makes stripes and motifs look uneven; try to maintain the same tension across color joins and check gauge periodically.
✗ Forgetting to weave in ends as you go can make finishing tedious and messy; weave in ends after each significant color block or section to keep the back tidy and manageable.