🧢 Beautiful ✨ Detailed πŸ’ Adorable

Hoppy Spring Wreath Crochet Pattern

Hoppy Spring Wreath Crochet Pattern
4.9β˜… Rating
5-7 Hours Time Needed
1.3K Made This
βœ‚οΈ

Intermediate Level

Ideal for those with basic crochet experience, featuring slightly more advanced stitches and techniques to expand your skills.

⏱️

Weekend Treat

Takes 5-7 hours, making it an enjoyable project to finish over a couple of days.

🏑

Cozy Accent

A warm touch for your space that transforms ordinary corners into inviting nooks filled with handmade charm.

About This Hoppy Spring Wreath Crochet Pattern

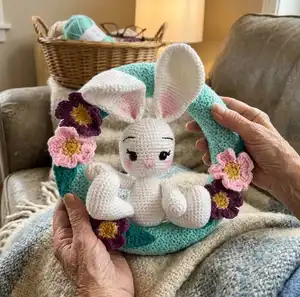
This pattern creates a mint-wrapped spring wreath decorated with five layered flowers and five leaves for a bright, seasonal look. You will crochet a textured band to slide over a foam wreath, then make flowers and leaves to sew on. The pattern includes color change tips and finishing instructions to help you assemble a polished, professional-looking wreath.

Hoppy Spring Wreath Crochet Pattern crochet pattern - detailed view of completed project

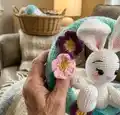
Designed for worsted weight yarn and a 4.0 mm hook, the instructions are clear and photographed for reference. The bunny shown is made using a separate scrappy bunny pattern referenced in the finishing notes.

Why You'll Love This Hoppy Spring Wreath Crochet Pattern

I absolutely love this pattern because it brings fresh spring colors to your front door with minimal fuss and big visual impact. I enjoy the textured stitch used for the mint wrap because it creates a neat, consistent fabric that hugs the foam wreath beautifully. The small flowers and leaves let me practice color changes and tiny motif assembly, which I find relaxing and satisfying. I also love that this pattern is adaptable β€” you can change colors or make extra flowers to suit your decor. It's a joyful project that finishes quickly and makes a lovely handmade gift.

Hoppy Spring Wreath Crochet Pattern step 1 - construction progress Hoppy Spring Wreath Crochet Pattern step 2 - assembly progress Hoppy Spring Wreath Crochet Pattern step 3 - details and accessories Hoppy Spring Wreath Crochet Pattern step 4 - final assembly and finishing

Switch Things Up

I love customizing this wreath by swapping colors to match my seasonal decor, and you can tooβ€”try pastel tones for a soft spring look or bold brights for a fun statement.

I often change the number and color of flowers; you could make more or fewer flowers and alternate colors to create a fuller or more minimalist wreath.

Want a smaller or larger wreath? I recommend changing the foam wreath size and adjusting the chain length and number of rows to fit the new form proportionally.

I sometimes use variegated yarn for the flowers to add subtle color shifts without changing yarns between petals.

Try adding a ribbon or bow at the top for hanging and extra decoration β€” a wired ribbon can make it easy to create a perfect bow that holds its shape.

For a rustic touch, swap the acrylic yarn for a cotton blend and pair with natural twine accents or wooden beads glued into the flower centers.

I like to make matching sets by crocheting extra small flowers and leaving them loose so they can be pinned or rearranged on the wreath for a different look later.

Embellish with small faux greenery or beads sewn into the flower centers for sparkle and texture if you want a more decorative finish.

Make it holiday-themed by changing the flower palette and adding small crocheted ornaments or hearts to the wreath base for seasonal variations.

If you enjoy amigurumi, consider adding other small crocheted characters instead of the bunny for a personalized scene that reflects your style or the recipient's interests.

Common Mistakes & How to Fix Them

βœ— Skipping the gauge check causes the wrap to be too loose or too tight on the foam wreath; try a small swatch and adjust hook size or stitch count before making the full wrap. βœ— Not weaving color ends in as you go results in many loose tails at the end; weave ends into stitches while changing colors to minimize finishing work. βœ— Joining the wrap edges without matching rows will create a misaligned seam; align rows carefully and check placement as you sew to maintain an even pattern. βœ— Overstuffing or uneven stuffing of decorative motifs creates lumps; stuff flowers and any motifs lightly and evenly, adding small amounts at a time for smooth shapes. βœ— Failing to leave a long tail when joining the wrap makes sewing tedious; leave the long tail (about 45ish inches as suggested) to make sewing the seam around the wreath easier.

Hoppy Spring Wreath Crochet Pattern

Create a cheerful spring wreath with a minty crocheted wrap, bright flowers, and delicate leaves. This pattern guides you through making the wreath cover and floral embellishments with clear step-by-step instructions so you can celebrate spring in handmade style. Perfect for gifting or welcoming guests at your door, the finished wreath looks fresh and inviting.

Intermediate 5-7 Hours

Materials Needed for Hoppy Spring Wreath Crochet Pattern

β€” Main Fabric

  • 01
    Size 4 worsted weight yarn in light green (Color A) - used for minty wreath wrap (brand used: Red Heart Minty)
  • 02
    Size 4 worsted weight yarn in bright yellow - used for flower centers (Big Twist used for some colors)
  • 03
    Size 4 worsted weight yarn in light yellow - used for flower inner petals
  • 04
    Size 4 worsted weight yarn in light pink - used for flower petals
  • 05
    Size 4 worsted weight yarn in purple - used for flower accents
  • 06
    Size 4 worsted weight yarn in teal green - used for leaves
  • 07
    Fiber fill stuffing for motifs (as needed)
  • 08
    Foam 11.75" wreath form

β€” Tools Required

  • 01
    4.0 mm crochet hook
  • 02
    Needle and scissors
  • 03
    Yarn needle for sewing and weaving ends
  • 04
    Foam 11.75" wreath
  • 05
    Pink acrylic paint and a dry brush (for ear and cheek details on bunny, optional)

Progress Tracker

0% Complete

β€” Materials :

Info :

Size 4 worsted weight yarn in light green, bright yellow, light yellow, light pink, purple and teal green. I used Red Heart Minty, and big twist in the other colors. Fiber fill Stuffing. 4.0 mm hook. Needle/Scissors. Foam 11.75" wreath. *Bunny Materials seen on combined additional pattern. Pink Acrylic Paint and dry brush.

β€” Terms :

Infos :

Yarn Over – YO. Stitch – ST. Chain - CH. Single Crochet – SC. Double Crochet - DC. Slip Stitch – SL ST. Half Double Crochet – HDC. Triple Crochet - TR. Magic Circle – MC. Great tutorial for MC: https://www.youtube.com/watch?v=p298HxgsO1s. Half Double Crochet Foundation Stitch - HDCFS. Great Tutorial if this is unfamiliar: https://www.youtube.com/watch?v=19Og5cd2L0o. Bubble Stitch – BS (explained in beard section). Between * * repeat this many additional times "x". End of row (Parenthesis) total number of stitches in row. Note: when changing colors work ends into stitches as you go along. This allows for less end weaving at the end of project. Also, when changing colors, always finish previous stitch with new color this makes for a smoother color change. Big Note: I’m left-handed; all pictures are shown with left handed progress unless otherwise stated. Pattern works for both left and right-handed crafters.

β€” Minty Green Wreath :

Round 1 :

1 – With Color A - Chain 23, sc into 2nd chain from the hook and dc in next *sc, dc* repeated until the end. Ch 1, Turn (22)

Round 2 :

2 – *sc, dc* repeat to the end, ch 1, turn (22) This is a good time to wrap this piece around your wreath, it should wrap just right around. If not, start over and add 2 stitches, if it’s too loose, do 2 less. (Pattern made in multiples of 2)

Info :

Every row is crochet exactly as row 2. 22 stitches in each row.

Info :

This pattern is repeated in every row 97 more rows. (99 total rows)

Info :

Bring ends right sides together. Put hook into each 1st st, in row 99 and row 1. Sl ST across joining ends together and making a circle. Tie off. Leave long length (45ish inches for sewing together.)

Info :

Slide onto foam wreath right side out. Sew sides together around the wreath. Be sure to match up rows as you sew along. Weave end ends.

β€” Flower :

Round 1 :

Flower: Make 5. With Bright Yellow 4mm hook 1 – Sc 10 in MC, Pull tight, sl st in first sc. (10)

Round 2 :

2 – Change color to light yellow. *Sc, ch 1* repeat 9x, sl st in first st (10)

Round 3 :

3 – Change color to pedal color. *Sl St in first sc, ch 3, Tr in same st, Tr in same st, DC in ch 1 space, Tr next st, Tr same st, ch 3, sl st in same st* repeat around making 5 pedals total. Tie off, leave length for sewing to wreath. Weave in ends.

β€” Leaf :

Info :

Leaf: Make 5 With teal green, 4mm hook

Round 1 :

1 – Ch 9, sl st 2nd chain from the hook, sc, sc, hdc, dc, dc, tr, tr last, ch 3, sl st in same st. Rotate now working on the other side. Ch 3, Tr in same st, tr, dc, dc, hdc, sc, sc, sl st. tie off. Weave in ends.

β€” Finishing :

Info :

Finishing: HDCFS 20, fold in half and sew ends to back/top of wreath. (Hook) Sew flowers on either side of wreath. And one on the bottom. Sew leaves to either side of flower bunches. Use Scrappy bunny pattern (attached) to make Bunny. Sew Bunny at his bum to the bottom edge of the wreath. It helps to omit the tail. Sew an ear to top of wreath. Hand paint ears and cheeks with dry brush and pink acrylic paint (optional). Hang and Celebrate.

Assembly Instructions

  • Slide the finished crocheted wrap onto the foam wreath right side out, matching the wrap orientation so the texture sits neatly on the outside.
  • Bring the wrap ends right sides together and join by inserting your hook into the first stitch of row 99 and row 1, then slip stitch across the seam to make a circle; leave a long tail (about 45ish inches) for final sewing if desired.
  • Sew the seam closed and secure the wrap to the wreath form by sewing the sides together around the foam, matching rows as you go for an even finish.
  • Sew flowers on either side of the wreath cluster and add one on the bottom; leave a length of yarn when tying off to weave in and secure each flower.
  • Position leaves beside the flower bunches and sew them in place so they frame the flowers naturally.
  • Use the scrappy bunny pattern to make a bunny and sew the bunny at its bum to the bottom edge of the wreath; optionally sew one ear to the top of the wreath and hand paint details with pink acrylic paint.

Important Notes

  • πŸ’‘When changing colors, work ends into stitches as you go along to reduce the number of loose ends you must weave in later.
  • πŸ’‘Always finish the previous stitch with the new color when doing a color change for a smoother, neater transition.
  • πŸ’‘Match up rows carefully when sewing the wrap seam and when attaching the wrap to the foam wreath to avoid mismatched textures.
  • πŸ’‘Leave a long yarn tail when making the wrap seam (around 45ish inches suggested) to make hand sewing and finishing much easier.

This Hoppy Spring Wreath is a bright, handmade way to welcome the season and add charm to your doorway. The mint wrap pairs beautifully with cheerful flowers and leafy accents for a fresh, welcoming look. Make one as a gift or keep it for yourself to celebrate spring! 🌸🧢

You ask,

we answer.

FAQs

What size will the finished wreath be?

The finished wreath fits an 11.75" foam wreath form as used in the pattern; the overall outer diameter will match that foam form once the crocheted wrap is slid into place.

Can I use a different yarn weight or hook size?

Yes, but changing yarn weight or hook size will affect the final fit on the foam wreath and the look of the texture; adjust stitch counts or hook size to maintain the correct wrap length and fabric density.

Do I need the scrappy bunny pattern to complete this wreath?

No, the wreath itself is complete without the bunny; the bunny shown is made from a separate scrappy bunny pattern mentioned in the finishing notes and is optional.

How long does this project typically take to complete?

Most crocheters complete this project in 5-7 hours, though time may vary depending on experience, speed, and whether you make the optional bunny.

Is this pattern suitable for beginners?

This project is suitable for beginners who are comfortable with basic stitches, but it is classified as intermediate due to assembly steps and color changes.