🧶 Beautiful ✨ Detailed 💝 Adorable

Halloween Bunting Pattern

Halloween Bunting Pattern
4.5★ Rating
2-4 Hours Time Needed
1.6K Made This
✂️

Intermediate Level

Ideal for those with basic crochet experience, featuring slightly more advanced stitches and techniques to expand your skills.

⏱️

Bite-Sized Project

Finishes in 2-4 hours—perfect for an afternoon of creative relaxation.

🏡

Cozy Accent

A warm touch for your space that transforms ordinary corners into inviting nooks filled with handmade charm.

About This Halloween Bunting Pattern

This pattern teaches you how to crochet a Halloween spider web bunting made from eight joined webs. Each web is worked in rows of treble and chain stitches, with picot details for a lace-like finish. The webs are worked holding black and metallic silver threads together for a subtle sparkling effect.

Halloween Bunting Pattern crochet pattern - detailed view of completed project

Full row-by-row instructions and stitch counts are provided for each web, plus clear directions on joining and finishing. Measurements are included so you can plan placement and spacing for hanging.

Why You'll Love This Halloween Bunting Pattern

I absolutely love this pattern because it turns simple thread and stitches into an elegant seasonal decoration with minimal materials. I enjoy how the metallic thread held with the black creates a subtle shimmer that catches the light without overpowering the lace design. The construction is clever—working each web in rows makes it easy to check your progress and ensures consistent shapes. I also love that the webs join on the final row, so assembly is quick and satisfying. This pattern is a lovely mix of delicate technique and high-impact decor.

Halloween Bunting Pattern step 1 - construction progress Halloween Bunting Pattern step 2 - assembly progress Halloween Bunting Pattern step 3 - details and accessories Halloween Bunting Pattern step 4 - final assembly and finishing

Switch Things Up

I love how easy it is to customize this bunting by changing thread colors; try black with gold or orange with black for a different Halloween vibe.

You can make a larger or smaller bunting by changing thread weight and hook size—use thicker metallic thread and a larger hook for a chunkier look, or finer thread for ultra-delicate webs.

I often add tiny crocheted spiders or felt embellishments sewn onto the webs for a whimsical touch and extra detail.

Try spacing the webs closer together for a denser garland or further apart for a more subtle display depending on your hanging space.

I sometimes omit the metallic thread and use textured black thread alone for a vintage lace effect that suits indoor displays.

For outdoor displays, consider adding a light spray of fabric stiffener to help the webs keep their shape in damp conditions.

If you want a portable version, make mini webs and attach them to key rings for spooky keychains or bag charms.

I like to combine this bunting with LED fairy lights woven behind the webs for a glowing, eerie effect at night.

Experiment with different picot sizes—Ch3 picots will make subtler points, while Ch5 gives the pronounced look shown in the pattern.

Finally, I recommend personalizing one web with a stitched initial or small motif to mark a party area or to gift as a unique handmade present.

Common Mistakes & How to Fix Them

✗ Not holding the black and silver threads together as instructed can reduce the sparkly effect; hold both strands together throughout to keep a consistent metallic sheen. ✗ Skipping the picot instructions or making them too loose will change the web edge detail; work picots firmly and consistently, using Ch5 then ss at the base as shown to form neat points. ✗ Failing to count chain spaces and treble repeats will cause uneven webs; count stitches and spaces after each row and refer to the bracketed stitch counts to confirm accuracy. ✗ Forgetting to fasten off and weave in ends neatly will leave sloppy joins; fasten off each web and carefully weave in ends before blocking to maintain the web shape. ✗ Neglecting to lightly block the finished bunting can leave the webs limp and uneven; pin and gently block the webs to the measurements given for best display.

Halloween Bunting Pattern

Create a spooky, sparkly spider web bunting to decorate your home for Halloween. This pattern uses black and silver threads held together to give a subtle metallic shimmer. You will make eight delicate webs that join together to form a 160cm (63in) garland—perfect for mantels, doorways, or party decor. Clear row-by-row instructions make assembly and finishing easy.

Intermediate 2-4 Hours

Materials Needed for Halloween Bunting Pattern

— Main Fabric

  • 01
    DMC Cotton Perle Thread Size 8 (100% cotton, 10g/80m) - 2 balls of Black (310)
  • 02
    DMC Diamant Metallic Thread Size 5 (72% viscose, 28% polyester metallic, 35m) - 3 reels of Silver (D415)

— Tools Required

  • 01
    A 3mm (US C/2 or D/3) hook
  • 02
    Scissors
  • 03
    Yarn/tapestry needle for weaving in ends
  • 04
    Pins for blocking
  • 05
    Measuring tape

Progress Tracker

0% Complete

— Introduction :

Info :

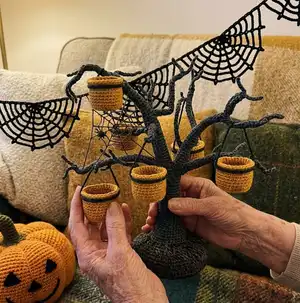
Get into the spirit of things and create the right Halloween atmosphere with this eerie yet beautiful spider web decoration. To really go to town, hang some eight-legged creatures from the webs and you'll have an authentic haunted house effect!

Infos :

NOTES: Bunting is made up of 8 Webs, which are worked in rows. The Webs are joined together on the final row. Use Black and Silver held together as a single strand throughout.

— Bunting - First Web :

Info :

Using Black and Silver held together, ch5.

Round 1 :

(Tr in fifth ch from hook, ch1) 4 times, tr in same ch, turn. [6 tr, 5 ch-1 sps]

Round 2 :

Ch6 (counts as tr and ch3), (tr in next tr, ch3) 4 times, tr in final tr (third ch of beg ch-4), turn. [6 tr, 5 ch-3 sps]

Round 3 :

Ch8 (counts as tr and ch5), (tr in next tr, ch5) 4 times, tr in final tr, turn. [6 tr, 5 ch-5 sps]

Round 4 :

Ch10 (counts as tr and ch7), (tr in next tr, ch7) 4 times, tr in final tr, turn. [6 tr, 5 ch-7 sps]

Round 5 :

Ch12 (counts as tr and ch9), tr in next tr, ch7, (tr, ch3, tr) in next tr, ch7, (tr, ch3, tr) in next tr, ch7, tr in next tr, ch9, tr final tr, turn. [8 tr, 2 ch-9 sps, 3 ch-7 sps, 2 ch-3 sps]

Round 6 :

Ch14 (counts as tr and ch11), tr in next tr, (ch9, tr in next tr, ch5, tr in next tr) twice, ch9, tr in next tr, ch11, tr in final tr, turn. [8 tr, 2 ch-11 sps, 3 ch-9 sps, 2 ch-5 sps]

Round 7 :

Ch16 (counts as tr and ch13), tr in next tr, ch11, (tr in next tr, ch7, tr in next tr, ch11) twice, tr in next tr, ch13, tr in final tr, turn. [8 tr, 2 ch-13 sps, 3 ch-11 sps, 2 ch-7 sps]

Round 8 :

Ch8, ss in fifth ch from hook (counts as tr and picot), ch15, tr in next tr, picot, (ch13, tr in next tr, picot, ch9, tr in next tr, picot) twice, ch13, tr in next tr, picot, ch15, tr in final st, picot. [8 tr, 8 picot, 2 ch-15 sps, 3 ch-13 sps, 2 ch-9 sps] Fasten off and weave in ends.

Info :

The spider web pattern is worked in eight rows of treble and chain stitches.

Info :

The sparkly effect is achieved by holding black and silver together as one strand.

— Bunting - Next Web (Make 7) :

Info :

Using Black and Silver held together, ch5.

Round 1-7 :

As Rows 1-7 of First Web.

Round 8 :

Ch8, ss in fifth ch from hook (counts as tr and picot), ch15, tr in next tr, picot, (ch13, tr in next tr, picot, ch9, tr in next tr, picot) twice, ch13, tr in next tr, picot, ch15, tr in final st, ch2, ss in first picot on prev Web, ch2, ss in top of tr on current Web. [8 tr, 8 picot, 7 ch-sps] Fasten off and weave in ends.

— To Finish :

Info :

For best results, lightly block the Bunting.

Assembly Instructions

  • Join each subsequent Web to the previous Web on Row 8 by working ch2, ss in first picot on previous Web, ch2, ss in top of tr on current Web as instructed to form the bunting.
  • Work Rows 1-7 of each of the seven additional webs as per the First Web instructions, then join on Row 8 to create the continuous garland.
  • Fasten off each Web at the end of Row 8 and weave in ends carefully so joins are tidy and secure before blocking.
  • Lightly block the entire bunting to open out the lace, pinning each web to the measurements (Web measures 10x20cm) for consistent shape.
  • Hang the finished bunting along a mantel or across a doorway, spacing the webs evenly for a total bunting length of approximately 160cm (63in).

Important Notes

  • 💡Use Black and Silver held together as a single strand throughout for the intended sparkly effect and consistent tension.
  • 💡Tension is not critical for this project, but it may affect the yarn quantities required, so adjust carefully.
  • 💡Bunting is made up of 8 Webs, which are worked in rows and joined together on the final row, so keep pieces in order for joining.
  • 💡Fasten off and weave in ends after completing each web to keep joins neat and avoid bulky spots when joining rows.

This spider web bunting is a quick, elegant way to add instant Halloween atmosphere to any space. The delicate lace webs shimmer with metallic thread held against deep black for subtle sparkle and dramatic contrast. Make a set to decorate a mantel, doorway, or table and enjoy the spooky charm all season long. 🕸️🖤

You ask,

we answer.

FAQs

What size will the finished bunting be?

The finished bunting measures approximately 160cm (63in) long composed of eight webs; each web measures approximately 10x20cm (4x8in).

Can I substitute different threads or yarns?

You can substitute similar weight threads, but using thicker yarn will change the delicate look and final measurements; choose an appropriate hook for the yarn weight.

Do I need prior crochet experience for this pattern?

This pattern is rated intermediate because it uses treble stitches, picots, and joining techniques; basic knowledge of treble and chain stitches is recommended.

How should I finish and display the bunting?

Fasten off and weave in ends, lightly block the webs to the given measurements, then hang the bunting across a mantel or doorway using pins or small hooks for best results.