๐Ÿงถ Beautiful โœจ Detailed ๐Ÿ’ Adorable

Fried Egg Amigurumi Pattern

Fried Egg Amigurumi Pattern
4.4โ˜… Rating
1-2 Hours Time Needed
3.0K Made This
โœ‚๏ธ

Beginner Friendly Level

Perfect for those just starting their crochet journey, with clear instructions and simple techniques

โฑ๏ธ

Quick Make

Complete in under 2 hoursโ€”lightning fast fun for instant gratification and quick gifts.

๐ŸŽ

Tiny Treasure

Small, sweet, and gift-worthy creations that fit perfectly in the palm of your hand with detailed charm.

About This Fried Egg Amigurumi Pattern

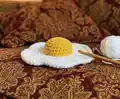
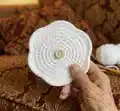
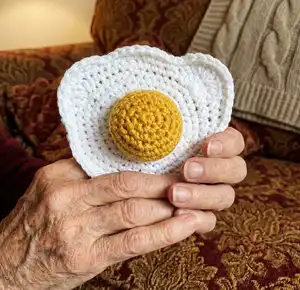
This pattern creates a small fried egg made of two separate parts: an egg white and a stuffed yolk, sewn together for a realistic look. Both pieces are started with a magic ring and crocheted in a spiral so there are no joined rounds. The finished piece measures approximately 4 inches and is quick to make, ideal for gifts or playful decor.

Fried Egg Amigurumi Pattern crochet pattern - detailed view of completed project

Written in US terms with simple stitch combinations, this pattern is friendly for newer crocheters. Complete materials and abbreviations are included so you can start right away.

Why You'll Love This Fried Egg Amigurumi Pattern

I absolutely love this pattern because it turns simple stitches into a charming, realistic little fried egg you can make in an afternoon. I enjoy how the stuffed yolk gives the piece character and dimension with minimal work. I also love that the pattern is compact and portableโ€”perfect for crafting on the go. I designed it to be forgiving for beginners yet satisfying for more experienced crocheters who want a quick, cute project.

Fried Egg Amigurumi Pattern step 1 - construction progress Fried Egg Amigurumi Pattern step 2 - assembly progress Fried Egg Amigurumi Pattern step 3 - details and accessories Fried Egg Amigurumi Pattern step 4 - final assembly and finishing

Switch Things Up

I love customizing this pattern by changing yarn colors to create playful variations; try pastel eggs or neon yolks for a quirky look.

I sometimes make the yolk larger by adding extra rounds so it becomes puffier and more pronounced.

For a keychain, I use thinner yarn and a smaller hook to create a mini version perfect for bags.

I also sew felt accents or embroider tiny faces on the yolk to give it personality and charm.

If you want a squishier yolk, use plush stuffing or add a small blob of fiberfill for extra volume.

I like to experiment with placementโ€”off-center yolks create a whimsical, hand-painted look.

Try adding a loop and a small button to turn the egg into an ornament or hanging decoration.

I sometimes join a set of different breakfast items (bacon, toast) to make a playful breakfast bundle gift set.

For a sturdier toy, I crochet tighter with a smaller hook and compact stuffing to make it durable for handling.

I often personalize gifts by embroidery initials on the underside of the egg white for a sweet, custom touch.

Common Mistakes & How to Fix Them

โœ— Skipping the magic ring and starting with chains can create a loose center; start with a proper magic ring for a tidy, closed center. โœ— Forgetting to stuff the yolk before finishing the seam will make it difficult to shape correctly; stuff the yolk firmly just before completing the final stitches. โœ— Not working in a spiral (joining rounds with slip stitches) changes the texture and appearance; follow the instruction to crochet in a spiral without joining. โœ— Ignoring stitch counts after complex rounds leads to mismatched shaping; count stitches carefully after each round, especially the long sequence rounds. โœ— Pulling your tension too tight when using DMC Natura Just Cotton can make the egg stiff; aim for consistent, moderate tension for a soft, natural shape.

Fried Egg Amigurumi Pattern

Make a cute, tiny fried egg amigurumi that's perfect as a gift or a fun kitchen decoration. This pattern uses simple stitches and is worked in continuous rounds so you can crochet smoothly without joining. You'll love how quickly the yolk and egg white come together to create a realistic, squishy little breakfast friend.

Beginner Friendly 1-2 Hours

Materials Needed for Fried Egg Amigurumi Pattern

โ€” Main Fabric

  • 01
    DMC Natura Just Cotton - White (1 Ibiza) - small amount for egg white
  • 02
    DMC Natura Just Cotton - Yellow (16 Tournesol) - small amount for yolk
  • 03
    Small leftovers of cotton yarn for sewing and details

โ€” Tools Required

  • 01
    Crochet hook size 3 mm
  • 02
    Toy stuffing / polyester filling
  • 03
    2 stitch markers
  • 04
    Scissors
  • 05
    Yarn needle for sewing and weaving in ends
  • 06
    Pins (optional) for assembly placement

Progress Tracker

0% Complete

Info :

Note: This cute fried egg is made of two parts, which are sewn together. The yolk is additionally stuffed with some toy filling, for more realistic look. Both pieces require starting with a magic ring and crocheting in a spiral (without joining the separate rounds with a slip stitch). The finished piece measures approximately 4 inches and it takes about 1.5 hours to make.The pattern is written in US terms. Gauge: 2" = 12 sts x 13 rows in sc

โ€” Egg white :

Round 1 :

6sc in MR (6)

Round 2 :

inc x 6 (12)

Round 3 :

(sc, inc) x 6 (18)

Round 4 :

(2sc, inc) x 6 (24)

Round 5 :

(3sc, inc) x 6 (30)

Round 6 :

(4sc, inc) x 6 (36)

Round 7 :

(5sc, inc) x 6 (42)

Round 8 :

(6sc, inc) x 6 (48)

Round 9 :

4sc, 2hdc, 3dc inc, hdc, 3sc, 3hdc, 4sc, hdc, dc, dc inc, dc, hdc, 1sc, hdc, dc, dc inc, dc, dc inc, hdc, 7sc (54)

Round 10 :

3sc, 3hdc, dc, 3dc inc, dc, hdc, 28sc, hdc, dc, 3dc inc, dc, 3hdc, 5sc (60)

Round 11 :

5 sl st, 11 sc, 3 sl st, 5 sc, 2 sl st, 4sc, 1sc, 3 sl st, 5 sc, 2 sl st, 4sc, inc, 3 sc, 3 sl st, 8sc, hdc, dc, 3dc inc, dc, hdc, 3sc, 5 sl st (64)

Info :

Fo and weave in the ends.

โ€” Yolk :

Round 1 :

6sc in MR (6)

Round 2 :

inc x 6 (12)

Round 3 :

(sc, inc) x 6 (18)

Round 4 :

(2sc, inc) x 6 (24)

Round 5-7 :

sc around (24)

Round 8 :

sl st around (24)

Info :

Fo and weave in the ends. Stuff the yolk lightly with toy stuffing before closing to achieve a rounded shape.

โ€” Assembly :

Info :

Choose the right spot for the yolk and sew it to the egg white. Ideally do it with your white yarn, using some hidden seam. Stuff it just before finishing the seam. Well done! You have just made your perfect fried egg :) What are you going to cook crochet next?

Assembly Instructions

  • Choose the right spot for the yolk and sew it to the egg white using a hidden seam with white yarn.
  • Stuff the yolk lightly with toy filling just before finishing the seam to ensure a nice rounded shape.
  • Start both pieces with a magic ring and crochet in a spiral (do not join rounds with a slip stitch) for a seamless finish.
  • Weave in the ends neatly after assembly and use small, even stitches to secure the yolk so it stays centered.
  • Pin the yolk in place on the egg white before sewing to check placement and symmetry.

Important Notes

  • ๐Ÿ’กPattern is written in US terms; check the abbreviations box if you are unsure about stitch names.
  • ๐Ÿ’กCrochet in a spiral without joining separate rounds with a slip stitch to maintain a smooth surface.
  • ๐Ÿ’กStuff the yolk just before finishing the seam to shape it correctly and avoid lumps.
  • ๐Ÿ’กUse stitch markers and count stitches after complex shaping rounds to keep your stitch counts accurate.

This little fried egg is a joyful, tiny project that makes a perfect handmade gift or playful home accent. It works up quickly and uses only small amounts of yarn, so it is great for using scraps. Enjoy the cozy satisfaction of a finished mini amigurumi and share your creation with friends or on social media. ๐Ÿงถ๐Ÿณ

You ask,

we answer.

FAQs

What size will the finished piece be?

The finished fried egg measures approximately 4 inches across when using DMC Natura Just Cotton and a 3 mm hook.

Can I use different yarn weights for this pattern?

Yes, but different yarn weights will change the final size; choose an appropriate hook to match your yarn to achieve the desired dimensions.

Do I need prior crochet experience for this pattern?

This pattern is beginner friendly; basic knowledge of single crochet, increases, and working in a magic ring is helpful.

How long does this project typically take to complete?

Most crocheters complete this project in about 1-2 hours, depending on experience and working speed.