🧶 Beautiful ✨ Detailed 💝 Adorable

Little Frog Amigurumi Pattern

Little Frog Amigurumi Pattern
4.8★ Rating
2-3 Hours Time Needed
2.8K Made This
✂️

Intermediate Level

Ideal for those with basic crochet experience, featuring slightly more advanced stitches and techniques to expand your skills.

⏱️

Bite-Sized Project

Finishes in 2-4 hours—perfect for an afternoon of creative relaxation.

🎁

Tiny Treasure

Small, sweet, and gift-worthy creations that fit perfectly in the palm of your hand with detailed charm.

About This Little Frog Amigurumi Pattern

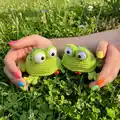
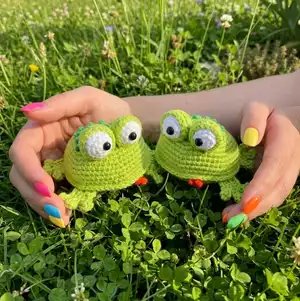
This pattern teaches you how to crochet a tiny frog amigurumi with separate pieces for belly, back, eyes, eyelids, paws and tongue. It includes step-by-step rounds worked in spiral, clear stitch counts, and photo references for assembly. The frog is made with cotton DK yarn and a 2.0 mm hook, producing a compact 7 cm finished toy. Detailed assembly and finishing notes ensure a neat, professional result.

Little Frog Amigurumi Pattern crochet pattern - detailed view of completed project

Designed for crocheters who enjoy small, detailed amigurumi projects with charming results. The pattern includes notes on stitch techniques, materials, and decorating the frog with French knots or beads.

Why You'll Love This Little Frog Amigurumi Pattern

I absolutely love this pattern because it creates such a charming little frog with simple components that come together beautifully. I enjoy working on small projects that finish quickly and still allow for cute details like eyelids, a tiny tongue, and back spots. The mix of working in spirals and the decorative French knot finishing makes the process satisfying from start to finish. I also appreciate that it uses everyday cotton DK yarn and a small hook, so the final toy has a lovely firm texture.

Little Frog Amigurumi Pattern step 1 - construction progress Little Frog Amigurumi Pattern step 2 - assembly progress Little Frog Amigurumi Pattern step 3 - details and accessories Little Frog Amigurumi Pattern step 4 - final assembly and finishing

Switch Things Up

I love how easy it is to change the personality of this little frog by swapping colors, so try pastel greens or even mint and cream combinations for a softer look.

If you want a bigger frog, use a thicker yarn and a larger hook; bulky yarn will give you a plush, chunky frog while sport weight will make a smaller, finer version.

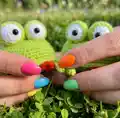
I often add tiny felt spots or embroider small hearts on the belly for a special gift-ready touch—you can sew or glue these on as you prefer.

Try using safety eyes for a durable toy, or embroider eyes for a fully washable, child-safe version; both give different expressions to the frog.

Swap the puff stitch on the paws for small crochet bobbles or little picot toes to change the texture of the feet.

For a seasonal twist, crochet the tongue in different colors or add a tiny crochet bow or scarf to dress your frog up for holidays.

I sometimes add a small loop at the top to turn the frog into a keychain or ornament—just leave a longer tail and create a small ring with a few chains.

Play with stuffing firmess: slightly less stuffing gives a flopier, squishier toy while firmer stuffing creates a more structured shape.

Add wire in the limbs if you want posable front legs; insert thin wire and wrap it well before sewing limbs closed so it stays hidden and safe.

I enjoy mixing yarn types for tactile contrast—try a cotton body with a tiny brushed yarn accent for a fuzzy tongue or spots.

Common Mistakes & How to Fix Them

✗ Crocheting with loose tension can create gaps where stuffing shows through; use a smaller hook and maintain tight stitches to avoid holes. ✗ Forgetting to leave long tails for sewing the eyes and eyelids makes assembly difficult; cut threads long enough and secure them as you go for easier placement. ✗ Not stuffing the body gradually can lead to lumps or uneven shaping; stuff a little at a time while joining the belly and back to get an even shape. ✗ Misplacing the eyes too low or too high will affect the frog s expression; use pins to position eyes between the 4th and 8th rows before sewing.

Little Frog Amigurumi Pattern

Make a tiny, adorable little frog amigurumi using simple crochet techniques and clear step-by-step photos. This pattern guides you through every piece — belly, back, eyes, eyelids, paws, and tongue — and shows how to assemble them neatly. Perfect for gifting or keeping as a cute handmade decoration, the finished frog measures about 7 cm tall. Follow the detailed instructions and enjoy crocheting your new tiny companion!

Intermediate 2-3 Hours

Materials Needed for Little Frog Amigurumi Pattern

— Main Fabric

  • 01
    100% cotton DK yarn, PaintBox Cotton DK 125 m / 50 g: Lime Green (629) - approx 50 g for body
  • 02
    100% cotton DK yarn: Paper White (601) - small ball for belly and eyes, approx 20-30 g
  • 03
    100% cotton DK yarn: Pillar Red (615) - small amount for tongue, approx 5 g
  • 04
    100% cotton DK yarn: Spearmint Green (626) - small amount for back spots or embroidery, approx 5-10 g

— Tools Required

  • 01
    Crochet hook size 2.0 mm (I used Clover)
  • 02
    Safety eyes or black beads 6 mm (2 pieces)
  • 03
    Stuffing (hollow fiber)
  • 04
    Needle with a big eye for sewing
  • 05
    Sewing pins for positioning pieces
  • 06
    Scissors
  • 07
    Yarn needle for weaving ends

Progress Tracker

0% Complete

— Belly :

Round 1 :

6 sc in magic ring (6)

Round 2 :

2 sc in each sc (12)

Round 3 :

(1 sc, sc inc)* 6 (18)

Round 4 :

(2 sc, sc inc)* 6 (24)

Round 5 :

(3 sc, sc inc)* 6 (30)

Round 6 :

(4 sc, sc inc)* 6 (36)

Round 7 :

(5 sc, sc inc)* 6 (42)

Round 8 :

(6 sc, sc inc)* 6 (48)

Round 9 :

(7 sc, sc inc)* 6 (54)

Round 10 :

(8 sc, sc inc)* 6, sl.st (60)

Info :

Tie off the thread and cut it (pic. 1).

— Back :

Round 1 :

6 sc in magic ring (6)

Round 2 :

2 sc in each sc (12)

Round 3 :

(1 sc, sc inc)* 6 (18)

Round 4 :

(2 sc, sc inc)* 6 (24)

Round 5 :

(3 sc, sc inc)* 6 (30)

Round 6 :

(4 sc, sc inc)* 6 (36)

Round 7 :

(5 sc, sc inc)* 6 (42)

Round 8 :

(6 sc, sc inc)* 6 (48)

Round 9 :

48 sc (48)

Round 10 :

(7 sc, sc inc)* 6 (54)

Round 11 :

54 sc (54)

Round 12 :

(8 sc, sc inc)* 6 (60)

Round 13-14 :

2 rows - 60 sc (60)

Info :

Don’t cut the work thread.

Info :

Join the belly and the back together: put the wrong sides of the pieces to each other, insert the crochet hook through the loops of both pieces (pic. 3) and crochet sc. Work sc around the edge (pic. 4). Stuff the body as you go round (pic. 5). Finish with sl.st. Tie off the thread and hide it inside. (pic. 6, 7)

— Eyes. 2 pcs :

Round 1 :

6 sc in magic ring (6)

Round 2 :

2 sc in each sc (12)

Round 3 :

(3 sc, sc inc)* 3 (15)

Round 4-5 :

2 rows - 15 sc (15)

Info :

Close the magic ring, but not too tight that you can insert the safety eyes easily.

Info :

Insert the safety eyes into the middle of the magic ring (pic. 8, 9).

Round 6 :

(3 sc, sc dec)* 3 (12)

Info :

Stuff the eye (pic. 10).

Round 7 :

6 sc dec (6)

Info :

Finish with sl.st. Tie off the thread and leave enough for sewing. (pic. 11)

— Eyelids. 2 pcs :

Round 1 :

6 sc in magic ring (6)

Round 2 :

2 sc in each sc (12)

Round 3 :

(1 sc, sc inc)* 6 (18)

Round 4-6 :

3 rows - 18 sc (18)

Info :

Finish with sl.st. Tie off and leave enough thread for sewing (pic. 12, 13).

— Paws. 4 pcs :

Row 1 :

2 ch, 12 dc in magic ring, sl.st. (12) (pic. 14-16)

Row 2 :

4 sl.st., (6 ch., puff stitch in the 3th loop from the hook and 1 sc in the 4th, 5th and 6th loops from the hook, 1 sl.st. in the next loop of the first row) * repeat this pattern two more times, 4 sl.st. (pic. 17- 22)

Info :

Tie off the thread and leave enough for sewing.

— Tongue :

Instruction :

Crochet 4 ch

Row 1 :

Start in the second loop from the hook (pic. 23) and crochet 2 sc, 3 sc in last ch, don’t turn the work and crochet continuously in circle direction, 1 sc, 1 sc inc (8) (pic. 24)

Info :

Finish with sl.st. Tie off the thread and leave enough for sewing.

— Assembly :

Info :

Place the eyes into the eyelids and sew them. (pic. 25-28) Tie off the white yarn in the bottom of the eye. (pic. 29, 30).

Info :

Sew the eyes onto the head/body between the 4th and 8th rows (pic. 32-38).

Info :

Sew the front paws onto the bottom of the frog symmetrically to the muzzle. (pic. 39-44).

Info :

Sew the back paws onto the bottom of the frog (pic. 47-50). The back paws should be placed as on the pictures 45, 46.

Info :

Sew the tongue onto the muzzle (pic. 51, 52).

Info :

Embroider french knots on the back of the frog using the dark green yarn (pic. 53-55). Note: Also you can use green beads for decorating.

Info :

Congratulations! Your little frog is ready! Finish weaving in ends and adjust stuffing as needed. (pic. 56)

Assembly Instructions

  • Place the eyes into the eyelids and sew them together, securing the white yarn at the bottom of each eye so each eye is stable (pics 25-30).
  • Sew the eyes onto the head/body between the 4th and 8th rows, using pins to position them evenly before sewing (pics 32-38).
  • Pin and sew the front paws to the bottom of the frog symmetrically to the muzzle, working through the edge loops to secure them (pics 39-44).
  • Position and sew the back paws to the bottom of the frog as shown in pictures 45-46, then secure them by stitching through the body edge (pics 47-50).
  • Sew the small tongue onto the muzzle and finish by embroidering French knots on the frog s back using dark green yarn for spots (pics 51-55).

Important Notes

  • 💡Use tight stitches to prevent stuffing showing through; if you see tiny holes, switch to a smaller hook for a denser fabric.
  • 💡Stuff the body gradually while joining the belly and back so the shape stays smooth and even rather than lumpy.
  • 💡Pin all parts (eyes, eyelids, paws) in place before sewing to ensure symmetry and the desired expression.

This tiny Little Frog makes a delightful handmade gift or a sweet shelf companion you can finish in an afternoon! 🐸 The pattern includes full piece instructions, assembly tips, and photo references to guide you every stitch of the way. 🧶 Have fun personalizing your frog with embroidered spots or beads for a custom finish! ✨

You ask,

we answer.

FAQs

What size will the finished piece be?

The finished amigurumi measures approximately 7 cm tall when using the recommended cotton DK yarn and a 2.0 mm hook.

Can I use different yarn weights for this pattern?

Yes, you can change yarn weight, but the final size will vary; choose an appropriate hook and adjust stitch tension for a similar density.

Do I need prior crochet experience for this pattern?

This pattern is rated intermediate — basic knowledge of single crochet, increases, decreases and working in spirals is recommended.

How long does this project typically take to complete?

Most crocheters complete this project in about 2-3 hours, though time may vary depending on experience and how much detailing you add.