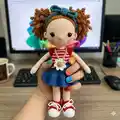
Create your very own beautifully detailed curly-haired doll with this comprehensive pattern! You'll love bringing her personality to life, from her full head of stunning synthetic curls to her completely customizable wardrobe. This extensive project guides you through creating a posable body using wire armatures, ensuring she can sit and stand with character. You'll also craft an entire outfit collection including a ruffled skirt, stylish knitted jacket, matching bag, and adorable lace-up shoes. It's the perfect fulfilling project to stretch your skills and make an heirloom-quality companion you can truly be proud of.
Progress Tracker
0% Complete
— Head :
Info :
(Use body yarn / hook size 2)
Row 1 :
6 SC in magic ring (6)
Row 3 :
[1 SC, 1 INC]*6 (18)
Row 4 :
1 SC, 1 INC, [2 SC, 1 INC]*5, 1 SC (24)
Row 5 :
[3 SC, 1 INC]*6 (30)
Row 6 :
2 SC, 1 INC, [4 SC, 1 INC]*5, 2 SC (36)
Row 7 :
[5 SC, 1 INC]*6 (42)
Row 8 :
3 SC, 1 INC, [6 SC, 1 INC]*5, 3 SC (48)
Row 9 :
[7 SC, 1 INC]*6 (54)
Row 10 :
4 SC, 1 INC, [8 SC, 1 INC]*5, 4 SC (60)
Row 11 :
[9 SC, 1 INC]*6 (66)
Rows 12-22 :
66 SC (11 rows) (66)
Row 23 :
20 SC, [1 INC, 1 SC]*5, 6 SC, [1 SC, 1 INC]*5, 20 SC (76)
Rows 24-28 :
76 SC (5 rows) (76)
Info :
Note: Pay attention to the increases we made on the sides when placing the eyes. Place the eyes between rows 21 and 22, with 10 stitches between them.
Row 29 :
[5 SC, 1 DEC]*10, 6 SC (66)
Row 30 :
2 SC, 1 DEC, [4 SC, 1 DEC]*10 (55)
Row 31 :
3 SC, 1 DEC, [6 SC, 1 DEC]*6, 2 SC (48)
Row 32 :
2 SC, 1 DEC, [4 SC, 1 DEC]*7, 2 SC (40)
Info :
Begin stuffing the head firmly.
Row 33 :
[3 SC, 1 DEC]*8 (32)
Row 34 :
1 SC, 1 DEC, [2 SC, 1 DEC]*7, 1 SC (24)
Row 35 :
[2 SC, 1 DEC]*6, slip stitch (18)
Info :
Fill the head firmly. Try to shape the cheeks to be slightly rounded.
— Ears :
Instruction :
Go back 7 stitches from below the eye. Insert your hook into the 8th stitch, and work [1 SC, 5 HDC, 1 SC] (hide yarn tails).
— Hair :
Instruction :
Mark where you will attach the hair using a pencil. Starting from 14 rows up from the eyes, mark where the hair will be gathered on both sides. Cut 6-7 cm lengths of curly synthetic hair. Thread a needle with yarn that matches the hair color. Attach 3 strands of hair to each stitch along the lines you've drawn. First complete one side of the marked area. Middle areas will remain empty. After finishing the attachment, gently pull the hair to adjust it. Then gather the hair at the top with an elastic band. Repeat the same process for the other side.
— Arms :
Row 1 :
6 SC in magic ring (6)
Row 3 :
[1 SC, 1 INC]*6 (18)
Rows 4-5 :
18 SC (2 rows) (18)
Row 6 :
8 SC, 1 popcorn stitch (work 4 HDC in same stitch, pull tight), 9 SC (18)
Row 8 :
[1 SC, 1 DEC]*6 (12)
Row 10 :
[5 SC, 1 DEC]*2 (14)
Rows 11-29 :
14 SC (19 rows) (14)
Row 30 :
[5 SC, 1 DEC]*2 (12)
Info :
Right arm ends at row 30. For left arm, work 5 more rows and fasten off.
— Legs :
Infos :
Make the leg filling every 5-6 rows for a firm result. For symmetry, I recommend working both legs at the same time. When working the legs, the increases at the knee area may look slightly bulky. This will look normal once the legs are joined to the body.
Row 1 :
8 chain, 1 chain, slip stitch, 1 INC, 5 SC, in the same stitch work 4 SC, 5 SC, 1 INC (18)
Rows 2-6 :
18 SC (5 rows) (18)
Row 7 (For heel) :
Chain 1, turn, 8 SC. Chain 1, turn, 1 SC, 7 SC. Chain 1, turn, 1 SC, 6 SC. Chain 1, turn, 1 SC, 5 SC (mark this stitch).
Row 8 :
4 SC along edge, 1 INC, 6 SC, 1 INC, 4 SC from the other edge, 2 SC, 1 INC, 1 SC (20)
Row 9 :
3 SC, 1 INC, 6 SC, 1 INC, 7 SC (18)
Row 10 :
[4 SC, 1 DEC]*3 (15)
Row 12 :
[4 SC, 1 DEC]*3 (18)
Row 14 :
1 SC, 1 INC, 14 SC, 1 INC, 1 SC (20)
Row 16 :
1 SC, 1 INC, 16 SC, 1 INC, 1 SC (22)
Row 18 :
1 SC, 1 INC, 18 SC, 1 INC, 1 SC (24)
Row 20 :
1 SC, 1 INC, 20 SC, 1 INC, 1 SC (26)
Rows 21-23 :
26 SC (3 rows) (26)
Row 24 :
3 SC, 1 INC, 12 SC, 1 INC, 7 SC (24)
Row 26 :
2 SC, 1 INC, 12 SC, 1 INC, 6 SC (22)
Row 27 :
1 SC, 1 INC, 5 SC, 4 DEC, 7 SC, 1 INC, 1 SC (24)
Row 29 :
1 INC, 18 SC, 1 INC, 2 SC (22)
Row 30 :
1 SC, 1 INC, 4 SC, 1 INC, 4 SC, 1 INC, 6 SC, 1 INC, 1 SC (22)
Row 31 :
1 SC, 1 INC, 18 SC, 1 INC, 1 SC (24)
Row 33 :
1 SC, 1 INC, 20 SC, 1 INC, 1 SC (26)
Row 35 :
1 SC, 1 INC, 22 SC, 1 INC, 1 SC (28)
Rows 36-43 :
28 SC (8 rows) (28)
Row 44 :
Work 21 more SC, fasten off, move to right leg
— Body :
Info :
Stuff the body firmly.
Row 1 :
Join legs by working 2 chain stitches at the left leg, 28 SC on left leg, 2 SC on chain, 28 SC on right leg, 2 SC on chain (60)
Row 2 :
[3 SC, 1 INC]*3, 34 SC, [1 INC, 3 SC]*3, 2 SC (66)
Rows 3-12 :
66 SC (10 rows) (66)
Row 13 :
[3 SC, 1 DEC]*3, 34 SC, [1 DEC, 3 SC]*3, 2 SC (60)
Row 15 :
[8 SC, 1 DEC]*6 (54)
Rows 16-17 :
54 SC (2 rows) (54)
Row 18 :
[7 SC, 1 DEC]*6 (48)
Rows 19-23 :
48 SC (5 rows) (48)
Row 24 :
[6 SC, 1 DEC]*6 (42)
Rows 25-30 :
42 SC (6 rows) (42)
Row 31 :
8 SC, work together with left arm: 4 SC, 17 SC, work together with right arm: 4 SC, 9 SC (42)
Row 32 :
8 SC, work over left arm: 8 SC, 17 SC, work over right arm: 8 SC, 9 SC (50)
Row 33 :
7 SC, 1 INC, 6 SC, 1 INC, 15 SC, 1 INC, 6 SC, 1 INC, 8 SC (46)
Row 34 :
[6 SC, 1 DEC]*2, 13 SC, [6 SC, 1 DEC]*2, 7 SC (42)
Info :
If you want to use wire in the arms, insert it at this stage.
Row 35 :
5 SC, 1 INC, [2 SC, 1 INC]*2, 11 SC, 1 INC, [2 SC, 1 INC]*2, 6 SC (36)
Row 36 :
2 SC, 1 INC, [4 SC, 1 INC]*5, 2 SC (30)
Row 37 :
[3 SC, 1 DEC]*6 (24)
Row 38 :
1 SC, 1 INC, [2 SC, 1 INC]*5, 1 SC (18)
Rows 39-41 :
18 SC, stitch 2 more rows, fasten off, weave in ends.
Info :
Attach the head to the body. You can use wire folded in half between the head and the body as a support to keep the head upright.
— Jacket :
Infos :
(Knitted / medium weight yarn). To avoid breaking the red yarn, use two separate yarn strands. Red Section:
Row 1 :
Cast on 26 stitches (26)
Row 3 :
4 knit, [1 INC, 1 knit, 1 INC], 4 knit, [1 INC, 1 knit, 1 INC], 6 knit, [1 INC, 1 knit, 1 INC], 4 knit, [1 INC, 1 knit, 1 INC], 4 knit (34)
Row 4 :
Purl 34 stitches (34)
Row 5 :
5 knit, [1 INC, 1 knit, 1 INC], 6 knit, [1 INC, 1 knit, 1 INC], 8 knit, [1 INC, 1 knit, 1 INC], 6 knit, [1 INC, 1 knit, 1 INC], 5 knit (42)
Row 6 :
Purl 42 stitches (42)
Row 7 :
6 knit, [1 INC, 1 knit, 1 INC], 8 knit, [1 INC, 1 knit, 1 INC], 10 knit, [1 INC, 1 knit, 1 INC], 8 knit, [1 INC, 1 knit, 1 INC], 6 knit (50)
Row 8 :
Purl 50 stitches (50)
Row 9 :
7 knit, [1 INC, 1 knit, 1 INC], 10 knit, [1 INC, 1 knit, 1 INC], 12 knit, [1 INC, 1 knit, 1 INC], 10 knit, [1 INC, 1 knit, 1 INC], 7 knit (58)
Row 10 :
Purl 58 stitches (58)
Row 11 :
8 knit, [1 INC, 1 knit, 1 INC], 12 knit, [1 INC, 1 knit, 1 INC], 14 knit, [1 INC, 1 knit, 1 INC], 12 knit, [1 INC, 1 knit, 1 INC], 8 knit (66)
Row 12 :
Purl 66 stitches (66)
Row 13 :
9 knit, 15 knit, 18 knit, 15 knit, 9 knit (36)
Row 14 :
Purl 36 stitches (36)
Row 15 :
Knit 36 stitches (36)
Row 16 :
Purl 36 stitches (36)
Row 17 :
Knit 36 stitches (36)
Row 18 :
Purl 36 stitches (36)
Row 20 :
For jacket opening: chain 1, 6 chain, 6 chain, 1 chain, work along the bottom of the front with 36 HDC, continue to the other front with 10 chain, 7 chain, 10 chain, 7 chain, 3 chain, slip stitch.
— Bag :
Info :
(Medium weight cotton, hook size 2). Back Side:
Row 1 :
3 chain, 12 DC in magic ring, slip stitch (12)
Row 2 :
3 chain, 12 DC increase (24)
Info :
Cut yarn. Front Side:
Row 1 :
3 chain, 12 DC in magic ring, slip stitch (12)
Row 2 :
3 chain, 12 DC increase in BLO stitches (24)
Instruction :
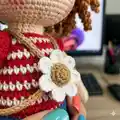
Without cutting yarn, place the two pieces together and work [1 SC, 1 INC]*9 around the edges. Leave 6 stitches open for the bag opening. For bag handle, chain 60 and attach to the opposite side with a slip stitch. For the bag flower: In BLO, work [1 SC, 3 chain, 4 DC, 3 chain, 1 SC, make 1 chain]*6, slip stitch.
— Shoes :
Info :
(Medium weight cotton, hook size 2). White Section:
Row 1 :
6 chain, 1 chain, 1 INC, 3 SC, in same stitch work 5 SC, 3 SC, 1 INC, slip stitch (16)
Row 2 :
1 chain, 2 HDC, 3 HDC, 5 HDC, 3 HDC, 3 HDC increase, slip stitch (26)
Row 3 :
1 chain, [1 HDC, 1 HDC increase]*2, 3 HDC, [1 HDC, 1 HDC increase]*5, 3 HDC, [1 HDC, 1 HDC increase]*3, slip stitch (36)
Info :
Make 2 pieces the same. Black Section:
Row 4 :
Join both pieces with slip stitch. Place a plastic piece between them for the sole.
Row 5 :
Working in joined pieces, make 36 SC around the opening, slip stitch.
Row 6 :
1 chain, 36 SC, slip stitch (mark beginning stitch) (36)
Row 7 :
1 chain, 36 SC, slip stitch (36)
Row 9 :
1 chain, 10 SC, 16 HDC, 10 SC, slip stitch (36)
Row 10 :
1 chain, 10 SC, 8 increase, 10 SC, slip stitch (28)
Row 11 :
1 chain, 10 SC, [1 increase, 1 SC]*3, 9 SC, slip stitch (25)
Rows 12-14 :
1 chain, 25 SC, slip stitch (3 rows) (25)
— Hair Bow (Knitted) :
Info :
(Knitted, size 3 hook)
Instruction :
Cast on 15 stitches.
Rows 1-13 :
Knit 15 stitches (13 rows)
Infos :
Tie in the middle and create a bow shape. Make a 110 chain for the tie, thread through the center of the bow.
— Ruffled Skirt (Knitted) :
Info :
(Knitted, size 3 hook)
Row 1 :
Cast on 50 stitches.
Rows 2-4 :
[Knit 1, purl 1] ribbing for 3 rows
Rows 5-8 :
Stockinette stitch (knit right side, purl wrong side) for 4 rows
Row 9 :
12 knit, 1 INC, 26 knit, 1 INC, 12 knit (52)
Row 10 :
Purl 52 stitches (52)
Row 11 :
13 knit, 1 INC, 26 knit, 1 INC, 13 knit (54)
Row 12 :
Purl 54 stitches (54)
Rows 13-14 :
Garter stitch for 2 rows (54)
Rows 15-22 :
Stockinette stitch for 8 rows
Rows 23-24 :
Garter stitch for 2 rows
Rows 25-30 :
Stockinette stitch for 6 rows
Rows 31-32 :
Garter stitch for 2 rows
Row 33 :
Cut yarn and leave tail for seaming.
— Skirt Ruffle :
Row 1 :
Pick up stitches at rows 13-14, using circular needle. Work 1 stitch from each purl bump. You will have 108 stitches.
Row 2 :
Purl 108 stitches (108)
Row 3 :
[6 knit, 1 INC]*18 (126)
Row 4 :
Purl 126 stitches (126)
Rows 5-8 :
Stockinette stitch for 4 rows
Rows 9-10 :
Garter stitch for 2 rows
Row 11 :
Bind off, leaving tail for seaming.
Infos :
Apply the same technique to the lower ruffle sections. For assembly: first sew the skirt, then the ruffle sections.
— Dress Top :
Infos :
(Medium weight cotton, hook size 2). Beginning chains don't count in stitch count.
Row 1 :
63 chain, join with slip stitch, 3 chain, 63 DC, slip stitch (63)
Row 2 :
3 chain, [19 DC, 1 DC decrease]*3, slip stitch (60)
Row 3 :
3 chain, BLO 60 DC, slip stitch (60)
Row 4 :
3 chain, [18 DC, 1 DC decrease]*3, slip stitch (57)
Row 5 :
1 chain, BLO 57 SC, slip stitch (57)
Rows 6-9 :
1 chain, 57 SC, slip stitch (4 rows) (57)
Row 10 :
1 chain, [17 SC, 1 decrease]*3, slip stitch (54)
Rows 11-12 :
1 chain, 54 SC, slip stitch (2 rows) (54)
Info :
If the dress is too short for your doll, you can lengthen these rows.
Row 13 :
2 chain, 54 HDC, slip stitch
Row 14 :
For elastic effect: [work in row 13 - 1 SC in front loop, 1 SC in back loop]*27, slip stitch.
— Ruffle Section :
Row 1 :
Insert hook into BLO of row 5, 3 chain, 57 HDC increase, slip stitch (114)
Row 2 :
3 chain, [2 DC, 1 DC increase]*38, slip stitch (152)
Info :
Continue without cutting yarn to row 3.
Row 3 :
3 chain, 60 HDC increase, slip stitch (120)
Row 4 :
3 chain, [2 DC, 1 DC increase]*40, slip stitch (160)
— Hair Bow (Crochet) :
Info :
(Crochet, size 3 hook)
Instruction :
Cast on 15 stitches. Work 10 rows in garter stitch. Cut yarn, gather in middle to form bow shape. Chain 110 for tie, thread through center of bow.
This breathtaking Curly-Haired Doll pattern is an absolute must-make for anyone who loves crafting intricate, heirloom-quality toys! With her full wardrobe, adorable accessories, and posable body, she provides endless hours of creative joy. Get ready to crochet your new favorite companion. 🧶💖✨