🧢 Beautiful ✨ Detailed πŸ’ Adorable

Caro-The Coral Girl Amigurumi Pattern

Caro-The Coral Girl Amigurumi Pattern
4.3β˜… Rating
5-7 Hours Time Needed
1.7K Made This
βœ‚οΈ

Intermediate Level

Ideal for those with basic crochet experience, featuring slightly more advanced stitches and techniques to expand your skills.

⏱️

Weekend Treat

Takes 5-7 hours, making it an enjoyable project to finish over a couple of days.

🧸

Cute Companion

An adorable friend to cherish, handcrafted with love to bring comfort and joy for years to come.

About This Caro-The Coral Girl Amigurumi Pattern

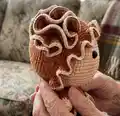
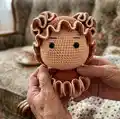
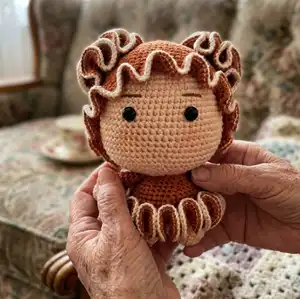
This pattern creates Caro, the Coral Girl β€” an amigurumi doll with a ruffled coral dress, curly hair buns and a sweet expression. You will crochet separate parts (legs, body, head, arms, hat and decorative buns) and assemble them for professional results. The design uses simple rounds, color changes and a few shaping techniques to achieve charming textures.

Caro-The Coral Girl Amigurumi Pattern crochet pattern - detailed view of completed project

Step-by-step round tables and helpful assembly images make construction straightforward. Suitable for crocheters who know basic increases, decreases and working in the round.

Why You'll Love This Caro-The Coral Girl Amigurumi Pattern

I absolutely love this pattern because it combines playful ruffles and tiny details into a compact, gift-ready doll. I enjoy how the coral ruffles and buns give so much personality with just simple stitches and color changes. I love that the pattern is modular β€” you make small elements separately and then assemble them, which makes it very satisfying to see progress. I poured my heart into clear round-by-round instructions so you can recreate every little flourish exactly as shown.

Caro-The Coral Girl Amigurumi Pattern step 1 - construction progress Caro-The Coral Girl Amigurumi Pattern step 2 - assembly progress Caro-The Coral Girl Amigurumi Pattern step 3 - details and accessories Caro-The Coral Girl Amigurumi Pattern step 4 - final assembly and finishing

Switch Things Up

I love how easy it is to customize this doll by changing colors β€” try soft pastels for a sweet nursery toy or bold brights for a playful gift.

If you want a chunkier, cuddle-friendly version, swap to a bulkier yarn and a larger hook; this will increase the overall size and make the ruffles more pronounced.

For a tiny keychain version, use thinner yarn and a smaller hook and reduce rounds proportionally to keep the shape balanced.

I often add embroidered eyelashes or freckles to give personality β€” a few simple stitches can change the whole expression.

Try adding a tiny bell, ribbon or felt accessories to the dress for holiday or themed variations.

If you prefer a smoother skirt, skip the extra increase round in the dress to reduce ruffle volume.

You can make the buns more or less curly by adding one extra increase round or omitting it to flatten them.

I sometimes replace safety eyes with embroidered eyes for baby-safe toys β€” this makes the doll safer for small children.

Experiment with metallic or sparkly yarn accents along the ruffle edge for a festive finish.

Want a different hairstyle? Crochet small shells or braids and sew them on instead of the buns for a unique look.

Common Mistakes & How to Fix Them

βœ— Working too loosely on the magic loop makes the starting round gappy; keep a firm but even tension and pull the loop tight before closing. βœ— Forgetting to change to the correct loop (BLO or remaining loop) can alter shaping; read each round note carefully and switch to BLO or remaining loop as instructed. βœ— Not inserting safety eyes at the recommended rounds causes misplacement of the face; place safety eyes between the specified rounds and count stitches to keep them aligned. βœ— Skipping stitch counts after increases or decreases leads to uneven shaping; count your stitches at the end of each increase/decrease round to stay accurate.

Caro-The Coral Girl Amigurumi Pattern

Make a charming Coral Girl amigurumi with ruffled dress and curly hair buns. This pattern guides you step-by-step through crocheting the head, body, arms, ruffled dress, hat and decorative coral buns so you can create a delightful handmade companion. Perfect for gifting or decorating, the finished doll has lovely texture and playful details that really stand out. Clear round-by-round instructions and assembly photos help you stitch with confidence.

Intermediate 5-7 Hours

Materials Needed for Caro-The Coral Girl Amigurumi Pattern

β€” Main Fabric

  • 01
    Color A: skin color YarnArt Jeans 73 (50g, 160m) - for head, hands and feet
  • 02
    Color B: orange YarnArt Jeans 85 (50g, 160m) - main body, dress and hat
  • 03
    Color C: white YarnArt Jeans 03 (50g, 160m) - ruffle edges and accents
  • 04
    Small amounts of yarn A/B/C for details and sewing tails

β€” Tools Required

  • 01
    Crochet hook size 2-2.5mm
  • 02
    Black safety eyes 10mm (2 pieces)
  • 03
    Tapestry needles
  • 04
    Pins for assembly
  • 05
    Stitch markers
  • 06
    Scissors
  • 07
    Polyester stuffing

Progress Tracker

0% Complete

β€” Legs (yarn A, X2) :

Round 1 :

sc 6 in a magic loop (6)

Round 2 :

[sc 1, inc] 3x (9)

Round 3 :

[sc 2, inc] 3x (12)

Round 4 :

[sc 3, inc] 3x (15)

Round 5 :

[sc 4, inc] 3x (18)

Info :

Make the 2nd leg similar to the 1st leg but do not break the yarn, connect with 1 slst. Continue crocheting sc 18 on the 1st leg and sc 18 on the 2nd leg 2 = 36. Continue to crochet through the body.

β€” Body (yarn A) :

Round 1 :

[sc 5, inc] 6x (42)

Round 2-4 :

sc 42 (3 rows), change to yarn B (42)

Round 5 :

sc 42 (42)

Round 6 :

(BLO) sc 42 (42)

Round 7-9 :

sc 42 (3 rows) (42)

Round 10 :

[sc 5, dec] 6x (36)

Round 11 :

sc 36 (36)

Round 12 :

[sc 4, dec] 6x (30)

Round 13 :

sc 30 (30)

Round 14 :

[sc 3, dec] 6x (24)

Round 15 :

sc 24 (24)

Info :

Break the yarn with a long rest, do not stuff. Turn the Body upside down, connect yarn B on the 1st stitch of the 6th rnd, we will crochet the Dress on the remaining loop of this rnd.

β€” Dress (yarn B) :

Round 1 :

inc 42 (84)

Round 2 :

inc 84 (168)

Round 3 :

inc 168, change to yarn C (336)

Round 4 :

(BLO) slst 336 (336)

Info :

Break the yarn, hide the remaining yarn.

β€” Arms (yarn A, X2) :

Round 1 :

sc 6 in a magic loop (6)

Round 2 :

[sc 1, inc] 3x (9)

Round 3 :

sc 9 change to yarn B (9)

Round 4-12 :

sc 9 (9 rows) (9)

Info :

Break the yarn, stuff lightly the lower arms, use the tapestry needle to sew 2 edges together.

β€” Head (yarn A) :

Round 1 :

sc 6 into a magic loop (6)

Round 2 :

inc 6 (12)

Round 3 :

[sc 1, inc] 6x (18)

Round 4 :

sc 1, inc, [sc 2, inc] 5x, sc 1 (24)

Round 5 :

[sc 3, inc] 6x (30)

Round 6 :

sc 2, inc, [sc 4, inc] 5x, sc 2 (36)

Round 7 :

[sc 5, inc] 6x (42)

Round 8 :

sc 3, inc, [sc 6, inc] 5x, sc 3 (48)

Round 9 :

[sc 7, inc] 6x (54)

Round 10 :

sc 4, inc, [sc 8, inc] 5x, sc 4 (60)

Round 11 :

sc 60 (60)

Round 12 :

[sc 9, inc] 6x (66)

Round 13-24 :

sc 66 (12 rows), insert 10mm safety eyes between the 17th & 18th rnd, 8 sts apart (66)

Round 25 :

[sc 9, dec] 6x (60)

Round 26 :

[sc 8, dec] 6x (54)

Round 27 :

[sc 7, dec] 6x (48)

Round 28 :

[sc 6, dec] 6x (42)

Round 29 :

[sc 5, dec] 6x (36)

Round 30 :

[sc 4, dec] 6x (30)

Round 31 :

[sc 3, dec] 6x (24)

Info :

Break the yarn with a long rest to sew later. Stuff.

β€” Hat (yarn B) :

Round 1-10 :

crochet rnd 1-10 of the Head (60)

Round 11 :

[sc 9, inc] 6x (66)

Round 12-25 :

sc 66 (14 rows) (66)

Round 26 :

(FLO) inc 66 (132)

Round 27 :

[sc 1, inc] 66x, change to yarn C (198)

Round 28 :

(BLO) slst 198 (198)

Info :

Break the yarn with a long rest to sew later.

β€” Coral\'s Buns (yarn B, X2) :

Info :

Note: leave a longer yarn before making the Magic Ring, this yarn will be the thread to attach the Buns to the Hat.

Round 1 :

sc 6 in a magic loop (6)

Round 2 :

inc 6 (12)

Round 3 :

inc 12 (24)

Round 4 :

inc 24 (42)

Round 5 :

inc 42 (84)

Round 6 :

inc 84, change to yarn C (168)

Round 7 :

(BLO) slst 168 (168)

Info :

Break the yarn, hide the remaining yarn. Tip: if you want to make a bigger and curlier Bun, just crochet 1 more rnd: inc 168 = 336 sts.

β€” Assembly :

Item Name (P1) :

Attach the Hat to the Head with the tapestry needle.

Info :

The Hat should look like this when positioned on the Head.

Item Name (P2) :

Attach 2 Buns on the Hat using the long thread left in the middle of the Magic Ring to sew them securely.

Item Name (P3) :

Attach Arms on the Body at the sides and sew securely with the tapestry needle.

Item Name (P4) :

Attach Head to the Body and hide all remaining yarn tails. The Coral Girl is done.

Assembly Instructions

  • Attach the Hat to the Head using the tapestry needle and align the front ruffle with the face edge for a neat fit.
  • Use the long thread left in the middle of each Coral Bun's magic ring to attach the buns to the Hat, positioning them symmetrically on either side.
  • Pin the arms onto the sides of the body between rounds 7-9 and sew them in place with a whipstitch for a sturdy join.
  • Sew the head to the body securely through the neck opening, making sure the face is centered and stuffing is adjusted for shape.

Important Notes

  • πŸ’‘Use stitch markers to keep track of your rounds and to mark the beginning of each round during increases or decreases.
  • πŸ’‘Stuff firmly in small increments to avoid lumps and to shape the head and body evenly as you work.
  • πŸ’‘Weave in ends and hide yarn tails as you go to avoid long finishing sessions and to keep seams tidy.

This Coral Girl amigurumi pattern is full of delightful details like ruffled skirts and curly buns that bring character to every stitch. Whether you craft her for a sweet gift or to brighten your shelf, she will add a handmade touch to your day. Share your finished doll and spread the joy of handmade playmates! 🧢😊

You ask,

we answer.

FAQs

What size will the finished piece be?

The finished amigurumi measures approximately 12-15 cm tall when using the recommended yarn and hook size and following the pattern exactly.

Can I use different yarn weights for this pattern?

Yes, you can use different yarn weights, but the final size will change; choose an appropriate hook for your yarn and be prepared to adjust stitch counts for the dress ruffles.

Do I need prior crochet experience for this pattern?

This pattern is rated intermediate, so basic knowledge of working in the round, increases, decreases and back/front loop techniques is recommended.

How long does this project typically take to complete?

Most crocheters complete this project in 5-7 hours, though time will vary depending on experience, finishing style and any customizations.