About This Heart Keychain Amigurumi Pattern
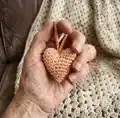
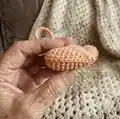
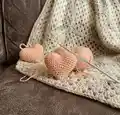
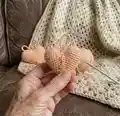
This pattern creates a small crochet heart keychain about 4 cm tall using simple single crochet rounds and basic shaping. You will make two identical halves, stuff them, and join them together without cutting the yarn between halves. The pattern is compact and designed for fast results using a 2mm hook and thin cotton yarn. Ideal for gifting, key rings, or adding as a cute accessory to bags and zippers.
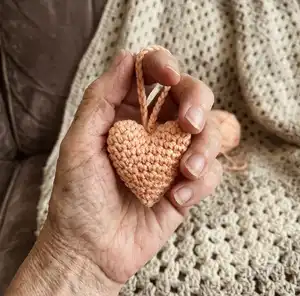
Clear, concise rounds make this design approachable for beginners while still producing a professional tiny amigurumi heart. The finished piece forms a neat loop so you can attach a key ring or hang it as a charm easily.
Why You'll Love This Heart Keychain Amigurumi Pattern
I absolutely love this pattern because it turns the simplest stitches into a charming little heart that brings joy instantly. I enjoy how quickly a finished heart comes together — perfect for last-minute gifts or making multiples for a craft fair. I also love that it uses minimal materials and small amounts of yarn, so you can use up scraps creatively. The finishing technique to create a neat loop for a key ring is one of my favorite practical details.
Switch Things Up
I love changing colors to create themed sets of hearts for holidays, gifts, or to match outfits.
I often use variegated yarn to get a marbled look without extra work—it's an instant upgrade.
You can make the heart larger by switching to a thicker yarn and a larger hook, which creates a chunky charm perfect for bags.
For an ultra-small version, try a finer thread and a 1.5mm hook to make tiny keychain charms or earrings.
I sometimes embroider initials or small motifs on one half before joining to personalize each heart for a recipient.
Attach a small bell, bead, or pompom to the loop for added texture and sound when the keychain moves.
If you want a sturdier loop, crochet a longer chain and slip stitch it into a tube or add a small metal key ring before finishing.
I recommend experimenting with different stuffing levels to change firmness—firmer for keychains, softer for plush decorations.
Try combining two different yarn textures for the two halves to give a reversible look when the heart turns.
For a polished finish, weave in ends neatly between the halves and consider using a tiny ribbon bow glued or stitched at the top for decoration.
Common Mistakes & How to Fix Them
✗ Skipping the stitch marker while working in rounds leads to losing the round start; always place a marker at the first stitch and move it every round to stay aligned.
✗ Not stuffing the halves evenly causes awkward shaping and lumps; stuff gradually and shape as you go with small amounts of fiberfill for a smooth finish.
✗ Cutting the yarn between halves will prevent you from creating the key ring loop easily; follow the instruction to not cut the yarn after finishing the second half.
✗ Miscounting stitches during increases or decreases will distort the heart shape; count your stitches at the end of each round to ensure accurate shaping.
✗ Pulling the yarn too tightly when closing the hole can flatten the heart; close the hole gently and adjust stuffing before tightening to retain the shape.