🧢 Beautiful ✨ Detailed πŸ’ Adorable

Bucket Hat Crochet Pattern

Bucket Hat Crochet Pattern
3.9β˜… Rating
2-4 Hours Time Needed
1.4K Made This
βœ‚οΈ

Intermediate Level

Ideal for those with basic crochet experience, featuring slightly more advanced stitches and techniques to expand your skills.

⏱️

Bite-Sized Project

Finishes in 2-4 hoursβ€”perfect for an afternoon of creative relaxation.

🧣

Snug Essential

Everyday comfort with practical charm, designed for both functionality and style through changing seasons.

About This Bucket Hat Crochet Pattern

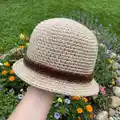
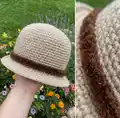
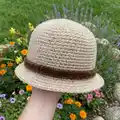
This pattern creates a classic bucket hat worked in the round using two strands of worsted weight yarn held together for texture and structure. It features a shaped crown, a subtle brim started with front post single crochets, and a removable decorative band. The pattern is sized for small, medium, and large heads and is easy to customize.

Bucket Hat Crochet Pattern crochet pattern - detailed view of completed project

Youll learn increases in spiral rounds and the front post single crochet technique to form a defined brim. The band is made separately so you can swap colors and styles to match any outfit.

Why You'll Love This Bucket Hat Crochet Pattern

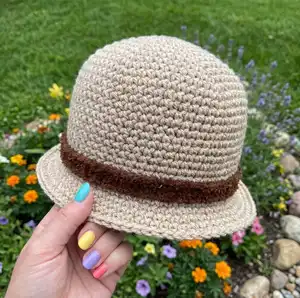
I absolutely love this pattern because it turns simple stitches into a structured, fashionable hat that really stands out. The technique of holding two strands together gives the fabric a lovely density and makes the brim keep its shape better than a single strand. I enjoy that the band is removable β€” it lets me change the look without reworking the hat. The instructions are straightforward but encourage small skills like working in a spiral and using front post stitches, which are great confidence builders. Making one always feels satisfying because it is quick and the finished result looks polished and professional.

Bucket Hat Crochet Pattern step 1 - construction progress Bucket Hat Crochet Pattern step 2 - assembly progress Bucket Hat Crochet Pattern step 3 - details and accessories Bucket Hat Crochet Pattern step 4 - final assembly and finishing

Switch Things Up

I love changing the band color to give the hat a fresh look; try bold jewel tones or soft pastels depending on your wardrobe.

You can make the hat chunkier by using a bulkier yarn and larger hook, which will give you a cozy, winter-ready version.

For a summer variation, use two strands of a cotton blend held together for breathability while keeping the same construction.

I sometimes add a small crocheted flower or bow to the band for a feminine touch that easily swaps out.

If you want a stiffer brim, try using a plant fiber yarn or lightly starch the brim after finishing and shaping it.

Try decreasing the number of increase rounds to make a child-sized hat or adding extra increase rounds for oversized, slouchy styles.

I often embroider subtle details on the band before sewing it on to personalize the hat with initials or motifs.

Experiment with texture by using a boucle yarn for the band while keeping a smooth yarn for the body for contrast.

To make a reversible band, work both sides in contrasting colors and seam them together, then slip the reversible band onto the hat.

If you like structured shapes, insert a light plastic canvas or thin interfacing between band layers before sewing to maintain a crisp profile.

Common Mistakes & How to Fix Them

βœ— Skipping the stitch marker when working in a spiral leads to lost round starts; place a marker after the first sc and move it up each round to keep track. βœ— Not holding two strands together consistently can change gauge and shape; always work with both strands held together for the hat body for consistent tension and fabric density. βœ— Working irregular increases will distort the crown shaping and brim placement; follow the increase pattern exactly and count stitches after each increase round. βœ— Joining the band too tightly can warp the hat brim; slip the band onto the hat and check fit before sewing, adjusting chain length if necessary.

Bucket Hat Crochet Pattern

Make a stylish, wearable bucket hat you can wear all season. This pattern uses two strands held together for a sturdy, textured fabric and includes a removable hat band. Youll enjoy the simple shaping and the quick satisfaction of a finished accessory you can customize. Perfect for gifting or expanding your crochet wardrobe.

Intermediate 2-4 Hours

Materials Needed for Bucket Hat Crochet Pattern

β€” Main Fabric

  • 01
    Worsted weight yarn (#4), 4 oz main color (two strands held together during hat construction)
  • 02
    Worsted weight yarn (#4), 4 oz contrast color for hat band (one strand)
  • 03
    Approximately 8 oz total yarn (4 oz each of two colors) to complete hat and band

β€” Tools Required

  • 01
    Crochet hook size J / 6.00mm
  • 02
    Stitch marker
  • 03
    Scissors
  • 04
    Yarn needle for weaving and sewing band
  • 05
    Measuring tape to check size
  • 06
    Optional: Pins for blocking

Progress Tracker

0% Complete

β€” Hat :

Info :

Materials: 4oz each of two colors of worsted weight yarn, size J or 6.00mm crochet hook.

Info :

Gauge: 3 sts + 4 rows = 1 inch with two strands held together

Info :

Sizes: small-18”, medium- 20”, large-22”

Info :

Abbreviations: ch - chain sc – single crochet fpsc – front post single crochet (single crochet around the post of the single crochets in the previous round, not the top) Rnd - round

Info :

Notes: This hat is made in the round with no joins (spiral) with both strands of yarn held together throughout. To start you can use the magic ring or if you'd like you can just chain 2 and crochet the first 6 single crochets in the second chain from hook. There is one round of front post single crochets to start the brim, this gives it a brim that instantly stands out and doesn't gradually increase. Each increase round adds 2 inches to this hat, for in between sizes (19”, 21”, 23” etc) you can add a round and only increase by 3 stitches skipping every other increase stitch.

Info :

Starting with both strands of yarn held together and magic loop: Single crochet 6 inside ring. Place a marker after this last sc and move it up with every round.

Round 1 :

2 sc in each sc around.

Round 2 :

(sc 1, 2 sc in next sc) around.

Round 3 :

(sc 2, 2 sc in next sc) around.

Round 4 :

(sc 3, 2 sc in next sc) around.

Round 5 :

(sc 4, 2 sc in next sc) around.

Round 6 :

(sc 5, 2 sc in next sc) around.

Round 7 :

(sc 6, 2 sc in next sc) around.

Round 8 :

(sc 7, 2 sc in next sc) around. For small sizes end increase here and skip down to Rnd 11.

Round 9 :

(sc 8, 2 sc in next sc) around. For medium size end increase here and skip down to Rnd 11.

Round 10 :

(sc 9, 2 sc in next sc) around.

Round 11- 24 :

sc around.

Round 12 :

(fpsc 10, 2 fpsc in next st) around.

Round 13 :

(sc 11, 2 sc in next st) around.

Round 14 :

sc 6, 2 sc in next st, (sc 12, 2 sc in next st) 5 times, sc to end.

Round 15 :

sc 3, 2 sc in next st, (sc 13, 2 sc in next st) 5 times, sc to end.

Round 16 :

(sc 14, 2 sc in next st) around.

Round 17 :

sc 7, 2 sc in next st, (sc 15, 2 sc in next st) 5 times, sc to end. Break yarn, hide end.

β€” For the hat band :

Info :

With one strand of your choice color of worsted weight yarn and size j or 6.00mm crochet hook -

Round 1 :

ch 66, join with a slip stitch to the first chain. (Try this chain out around your hat to make sure it fits before joining, if it's to long pull out some chains, if it's to short add some. The number of chains is not important here, fit is!)

Round 2 :

ch 1, sc in each ch around, join with a slip stitch to the first SINGLE CROCHET, skipping the ch 1.

Round 3 :

ch 1, sc around, join in the same way.

Round 4 :

Reverse single crochet around.

Round 5 :

You can cut the yarn and rejoin it to the bottom of the band on the chain round or you can slip stitch down the inside of the band and turn it around so that the bottom is the top and continue.

Info :

Reverse single crochet around along the bottom of the band. Cut and hide yarn. Slip this band down around the hat and you can use a strand of the same color of yarn and sew it in place or just let it be there and make a bunch of different colors of bands and change them to match whatever accessories your wearing that day. : D

Assembly Instructions

  • Slip the finished band down around the hat and check fit before securing; adjust the band chain length if it feels too tight or too loose.
  • Sew the band in place with a strand of matching yarn using a yarn needle if you want it to be permanent, otherwise leave it removable for styling options.
  • Weave in and hide all yarn ends after breaking yarn at the end of the hat and band to prevent unraveling.
  • Use pins to position the band evenly around the hat before sewing to ensure it sits straight and the color stripe is centered.
  • Block or steam the hat lightly if you want to shape the brim to sit flat or curve as desired.

Important Notes

  • πŸ’‘Work the hat in a spiral with no joins and use a stitch marker to mark the beginning of each round for accurate counting.
  • πŸ’‘Hold two strands of worsted yarn together for the hat body to achieve the correct gauge and fabric firmness for the brim to hold its shape.
  • πŸ’‘Try the band around your hat before joining the band rounds so you can alter the chain length for a perfect fit.

This Bucket Hat pattern makes a chic, wearable accessory thats fun to crochet and easy to customize. Swap band colors to match your wardrobe and make a collection of hats for every season. The solid construction and defined brim give a polished look youll love to wear. 🧢🧡✨

You ask,

we answer.

FAQs

What sizes are included in this pattern?

The pattern includes three sizes: small (18"), medium (20"), and large (22"). Instructions include where to stop increasing for each size.

What yarn and hook should I use?

Use worsted weight yarn held as two strands for the hat body and a size J / 6.00mm crochet hook. The band uses a single strand of worsted yarn with the same hook.

Do I need to sew the band on permanently?

No, the band is designed to slip on so you can change colors; sew it in place with a matching yarn strand if you prefer a permanent band.

Can I adjust the hat size?

Yes, you can add or remove increase rounds to adjust size. Each increase round adds about 2 inches; you can also change hook size or yarn weight to alter finished dimensions.