About This Voodoo Doll Amigurumi Pattern
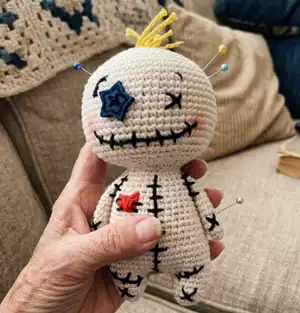
This pattern creates a small, stitched Voodoo Doll amigurumi with embroidered details and a button eye. You will crochet the head, legs, body and arms separately then assemble and embroider the finished doll. The design uses simple rounds, basic increases and decreases, and fun surface stitching for character.
Perfect for making as a small gift or shelf companion, it uses cotton yarn and a tiny hook for a firm finish. The pattern includes step-by-step rounds and clear assembly notes.
Why You'll Love This Voodoo Doll Amigurumi Pattern
I absolutely love this pattern because it turns simple stitches into a characterful little doll with personality. The design is playful and quick to make, so I get the satisfaction of a finished toy in a short time. I enjoy adding embroidered scars and a button eye because small details bring the doll to life. Sewing the pieces together and seeing the face appear is one of my favorite parts of the process.
Switch Things Up
I love how easy this pattern is to customize; change yarn colors to give the doll a different personality or outfit.
You can make a mini keychain version by using thinner yarn and a smaller hook for a tiny voodoo charm.
Swap the button eye for safety eyes or embroider both eyes for a softer look without hard parts.
Change the embroidery color from black to dark brown for a subtler stitched look or bright colors for a playful vibe.
Try adding tiny crocheted accessories like a heart patch, bow, or scarf to personalize each doll.
Make a matching set with different expressions by changing mouth placement and eye shapes for happy, sleepy, or mischievous faces.
I sometimes add a small wire inside the arms for posability; it gives the little doll more character when posed on a shelf.
Swap cotton yarn for acrylic or wool blends to alter texture — cotton gives crisp stitches while acrylic can be softer and fuzzier.
Embroider freckles, scars, or extra stitches in different places to create a backstory for your doll and make each one unique.
Try changing the size by using a 1.75 mm hook for a smaller version or a 3.00 mm hook for a chunkier, cuddlier doll — always adjust stuffing accordingly.
Common Mistakes & How to Fix Them
✗ Skipping the instruction to cut the thread after the first leg can create an awkward seam; cut the thread after completing the first leg and follow the joining instructions to continue with the second leg for a clean join.
✗ Not stuffing the body before closing can make shaping difficult and lumpy; stuff the body firmly but gradually, shaping as you go to achieve smooth curves and even tension.
✗ Forgetting to leave a long tail when fastening off prevents neat sewing; always fasten off leaving a long tail for sewing so you can attach parts securely without reworking stitches.
✗ Not marking the beginning of rounds leads to counting errors and uneven shaping; use a stitch marker at the start of each round and move it as you complete each round to maintain accuracy.