🧶 Beautiful ✨ Detailed 💝 Adorable

Twinkling Snowflakes Pattern

Twinkling Snowflakes Pattern
3.9★ Rating
2-4 Hours Time Needed
1.8K Made This
✂️

Intermediate Level

Ideal for those with basic crochet experience, featuring slightly more advanced stitches and techniques to expand your skills.

⏱️

Bite-Sized Project

Finishes in 2-4 hours—perfect for an afternoon of creative relaxation.

🏡

Cozy Accent

A warm touch for your space that transforms ordinary corners into inviting nooks filled with handmade charm.

About This Twinkling Snowflakes Pattern

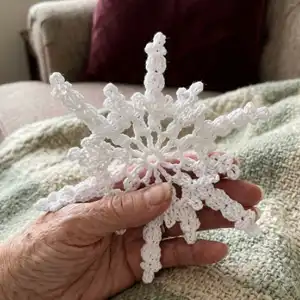
This pattern creates three sizes of twinkling crochet snowflakes using Bernat Handicrafter Holidays yarn for a subtle sparkle. Each snowflake is worked in rounds with clusters, chains and picot-like details to give a delicate, lacy look. The pattern includes full round-by-round instructions and diagrams to guide you through every step. Perfect for ornaments, garlands, or seasonal table decor.

Twinkling Snowflakes Pattern crochet pattern - detailed view of completed project

Includes Materials, Gauge, Instructions for Snowflake 1, Snowflake 2 and Snowflake 3, plus finishing and blocking notes. Comes with charted diagrams and a key to stitch symbols.

Why You'll Love This Twinkling Snowflakes Pattern

I absolutely love this pattern because the snowflakes are quick to make yet produce an elegant, professional result that sparkles on the tree. I designed the rounds so each snowflake builds from a simple ring into a detailed lacy motif that looks much more complex than it actually is. I enjoy the gentle meditative rhythm of the clusters and chains, and the finishing step of pinning and lightly starching really brings out the shape. Making a set of different sizes is so satisfying and they make lovely gifts for friends and family.

Twinkling Snowflakes Pattern step 1 - construction progress Twinkling Snowflakes Pattern step 2 - assembly progress Twinkling Snowflakes Pattern step 3 - details and accessories Twinkling Snowflakes Pattern step 4 - final assembly and finishing

Switch Things Up

I love how easy it is to customize these snowflakes with color — try soft pastels, metallic yarns, or variegated thread for different effects.

I sometimes use a finer cotton thread and a smaller hook to create delicate, doily-like snowflakes perfect for gift tags.

If you want chunkier ornaments, I switch to a bulkier yarn and a larger hook to get an oversized, cozy look.

I also like adding a small bead or sequin at the center for extra sparkle before blocking the snowflake.

For a festive garland, I make several snowflakes in mixed sizes and sew them to a length of ribbon or crocheted chain.

I sometimes stitch a loop of matching yarn into one point for easy hanging on the tree or packages.

Try lightly stiffening with diluted fabric stiffener instead of spray starch if you prefer a softer hold.

I enjoy making sets in the same colorway then varying the center embellishments to give each piece unique character.

You can embroider tiny metallic threads over petals for shimmer without changing yarn, which keeps the lacy look intact.

If you like charts, follow the included diagrams and experiment with skipping or adding cluster repeats to alter the silhouette slightly.

Common Mistakes & How to Fix Them

✗ Not counting the initial chains and joining can lead to the wrong number of petals; always count your starting chains and confirm joins before proceeding. ✗ Skipping the blocking and pinning step will leave snowflakes misshapen; pin to measurements and lightly steam or spray starch to set the shape. ✗ Working with inconsistent tension causes uneven petals and lacy details; maintain a steady, even tension throughout each round for best results. ✗ Failing to fasten off and weave in ends neatly results in sloppy finishes; fasten off as directed and weave ends into back of work for a tidy appearance.

Twinkling Snowflakes Pattern

Create delicate, sparkly snowflakes for holiday decor with this charming crochet pattern. You can make three sizes — small, medium and large — using Bernat Handicrafter Holidays yarn to get a beautiful sparkling finish. Clear step-by-step instructions and diagrams guide you through each round so you can make ornaments, garlands, or table accents. Perfect for gifting or dressing up your home for the season.

Intermediate 2-4 Hours

Materials Needed for Twinkling Snowflakes Pattern

— Main Fabric

  • 01
    Bernat Handicrafter Holidays (2.8 oz/80 g; 138 yds/126 m) White Sparkle (48005)
  • 02
    1 ball will make approx 4 snowflakes
  • 03
    Use size U.S. F/5 (3.75 mm) crochet hook or size needed to obtain gauge

— Tools Required

  • 01
    Crochet hook size U.S. F/5 (3.75 mm) or size needed to obtain gauge
  • 02
    Spray starch (optional)
  • 03
    Pins for blocking and pinning to measurements
  • 04
    Steam iron (for light steaming after starching)
  • 05
    Scissors
  • 06
    Yarn/tapestry needle for weaving in ends

Progress Tracker

0% Complete

— Materials :

Info :

Bernat Handicrafter Holidays (2.8 oz/80 g; 138 yds/126 m) White Sparkle (48005). 1 ball will make approx 4 Snowflakes. Size U.S. F/5 (3.75 mm) crochet hook or size needed to obtain gauge. Spray starch (optional).

— Measurements :

Info :

Snowflake 1: Approx 7" [18 cm] diameter. Snowflake 2: Approx 8½" [21.5 cm] diameter. Snowflake 3: Approx 10" [25.5 cm] diameter.

— Gauge :

Info :

16 sc and 17 rows = 4" [10 cm].

— Instructions - Snowflake 1 :

Round 1 :

Ch 6. Join with sl st to first ch to form a ring.

Round 1st rnd :

*Ch 4. [(Yoh) twice and draw up a loop in ring. (Yoh and draw through 2 loops on hook) twice] twice. Yoh and draw through all loops on hook - Tr cluster made. Ch 4. Sl st in ring. Rep from * 5 times more. Fasten off.

Round 2nd rnd :

Ch 3. Join yarn with sl st to first Tr cluster. (Ch 9. Sl st in same sp as previous sl st. Ch 3. Sl st in next Tr cluster) 5 times. Ch 9. Sl st in same sp as previous sl st. Join with sl st to first ch.

Round 2nd rnd (alternate/expanded) :

Sl st in next ch-3 sp. Ch 3. (Yoh and draw up a loop. Yoh and draw through 2 loops on hook) twice in same sp as last sl st. Yoh and draw through all loops on hook - beg cluster made. [Ch 5. (Yoh and draw up a loop. Yoh and draw through 2 loops on hook) 3 times in next ch-3 sp. Yoh and draw through all loops on hook - cluster made] 11 times. Ch 5. Join with sl st to top of first cluster.

Round 3rd rnd :

Ch 1. *1 sc in each of next 3 ch. [(3 sc. Ch 3) 3 times. 3 sc] in next ch-9 loop. Rep from * 5 times more. Join with sl st to first sc. Fasten off.

Round 3rd rnd (expanded) :

(Sl st. Ch 1. 1 sc. Ch 5. 1 sc) in next ch-5 sp. *(Sl st. Ch 3. Cluster) in next cluster. (Ch 3. Cluster in top of cluster just made) twice. (Ch 3. Sl st. Ch 6. Sl st. Ch 3. Sl st) all in top of last cluster. Working down towards 2nd rnd, (Ch 3. Sl st to base of cluster) 3 times. (1 sc. Ch 5. 1 sc) in next ch-5 sp. (Sl st. Ch 3. Cluster) in next cluster. (Ch 3. Sl st. Ch 6. Sl st. Ch 3. Sl st) all in top of cluster. Working down towards 2nd rnd, ch 3. Sl st to base of cluster.** (1 sc. Ch 5. 1 sc) in next ch-5 sp. Rep from * 4 times more, then from * to ** once. Join with sl st to first sc. Fasten off.

Round 4th rnd :

Join yarn with sl st to first ch-3 sp. Ch 1. 2 sc in same sp as sl st. *1 sc in each of next 3 sc. (1 sc. Ch 3. 1 dc. Ch 3. 1 sc) in next ch-9 sp. Ch 1. 2 sc in same sp as sl st. Rep from * 5 times more. Join with sl st to first sc. Fasten off.

— Instructions - Snowflake 2 :

Round 1 :

Ch 7. Join with sl st to first ch to form a ring.

Round 1st rnd :

Ch 1. (3 sc. Ch 9) 6 times in ring. Join with sl st to first sc. Fasten off.

Round 2nd rnd :

Join yarn with sl st to any ch-9 loop. Ch 3. (2 dc. Ch 3. 3 dc) in same sp as sl st. [Ch 1. (3 dc. Ch 3. 3 dc) in next ch-9 loop] 5 times. Ch 1. Join with sl st to top of ch 3.

Round 3rd rnd :

Sl st back into last ch-1 sp. Ch 1. 1 sc in same sp as sl st. *Ch 1. 6 dc in next ch-3 sp. Ch 6. Sl st to first ch. Turn. (Ch 4. 2 tr. Ch 4. Sl st) 3 times in last ch-6 sp made - top cluster made. Turn. 6 dc in same ch-3 sp as last 6 dc. Ch 1.** 1 sc in next ch-1 sp. Rep from * 4 times more, then from * to ** once. Join with sl st to first sc. Fasten off.

— Instructions - Snowflake 3 :

Round 1 :

Ch 6. Join with sl st to first ch to form a ring.

Round 1st rnd :

Ch 6 (counts as dc and ch 3). (1 dc. Ch 3) 11 times in ring. Join with sl st to 3rd ch of ch 6. 12 ch-3 sps.

Round (continued) :

Ch 3. 1 sc) all in next ch-3 sp. 1 sc in each of next 3 sc. 2 sc in next ch-3 sp. Ch 4. (1 hdc. Ch 2. Sl st) in 2nd ch from hook. Ch 2. Skip next 9 sc. 2 sc in next ch-3 sp. Rep from * 5 times more. Fasten off.

— Finishing :

Info :

Finishing: Pin Snowflake to measurements. Apply spray starch if desired and steam iron lightly.

— Key :

Info :

Key: • = slip st (sl st). + = single crochet (sc). T with one bar = half double crochet (hdc). T with two bars = double crochet (dc). Tall T = treble crochet (tr). Oval symbol = beg cluster. Other symbols indicate cluster and tr cluster as shown in diagrams.

— Abbreviations :

Infos :

Approx = Approximately. Beg = Beginning. Ch = Chain(s). Dc = Double crochet. Hdc = Half double crochet. Rep = Repeat. Rnd(s) = Round(s). RS = Right side. Sc = Single crochet. Sl st = Slip stitch. Sp(s) = Space(s). St(s) = Stitch(es). Tr = Treble crochet. WS = Wrong side. Yoh = Yarn over hook.

Assembly Instructions

  • Pin each finished snowflake to the measurements shown (Snowflake 1 = 7" [18 cm], Snowflake 2 = 8½" [21.5 cm], Snowflake 3 = 10" [25.5 cm]) using rust-proof pins to hold shape while blocking.
  • Apply spray starch lightly over the pinned snowflake if you want a crisper, stiffer finish; avoid over-saturating the yarn.
  • Steam iron lightly over the pinned and starched snowflake from a distance to set shape, taking care not to press directly on the yarn.
  • Once cooled and dry, remove pins and weave in all ends with a yarn needle; trim excess ends close to the work for a neat finish.

Important Notes

  • 💡Use rust-proof pins and a pinning surface when blocking snowflakes to prevent damage and ensure accurate shaping.
  • 💡Work with consistent tension and check your stitch counts at the end of each round to avoid mistakes that affect symmetry.
  • 💡Fasten off and weave in ends after finishing each snowflake to keep the back tidy and prevent unraveling.

These twinkling snowflakes make delightful seasonal decor and handmade gifts that sparkle just enough to catch the eye. Pin, starch lightly, and steam to set each lace motif for a crisp, professional finish. Make a set of three sizes for a beautiful holiday display or gift set. ❄️🧶✨

You ask,

we answer.

FAQs

What size will the finished pieces be?

Snowflake 1 is approximately 7" (18 cm), Snowflake 2 is approximately 8½" (21.5 cm), and Snowflake 3 is approximately 10" (25.5 cm) when made with the recommended yarn and hook.

Can I use different yarn or hook sizes?

Yes, you can change yarn weight and hook size, but this will affect final size and drape; adjust hook size to obtain the gauge or accept a different finished size.

Do I need special finishing tools?

For best results pinning and light starching are recommended; the pattern suggests spray starch and a steam iron for setting the snowflakes.

Is this pattern suitable for beginners?

This pattern is rated intermediate because it uses clusters and reading diagrams; crocheters with basic stitches and some experience with shaping will find it manageable.