About This Tic-Tac-Toe Crochet Pattern
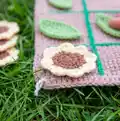
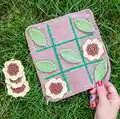
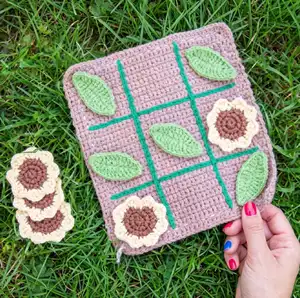
This pattern creates a charming Tic-Tac-Toe crochet board with five sunflower pieces and five leaf pieces for play. It includes the board instructions plus separate patterns for sunflowers and leaves. The pieces are removable and you can optionally attach snaps or velcro for easy storage and play. The finished game is approximately 24 cm (9.5") per side, making it a perfect gift or travel activity.
Designed with YarnArt Jeans+ yarn using a 3.5mm hook for a neat, sturdy fabric. The pattern uses American crochet terminology and is rated easy for beginners.
Why You'll Love This Tic-Tac-Toe Crochet Pattern
I absolutely love this pattern because it turns a classic game into a sweet handmade set that's both decorative and playful. I enjoyed designing simple sunflower and leaf pieces that are quick to crochet and fun to arrange. I love that the board is compact and portable, great for gifting or taking on trips. The pattern uses basic stitches and clear instructions, so I feel proud every time a new maker tells me they completed it with ease.
Switch Things Up
I love customizing this Tic-Tac-Toe pattern by changing yarn colors; try pastel petals and mint leaves for a soft, modern look.
I often make a mini version by switching to fingering yarn and a smaller hook to create a keychain-sized game set.
I like to use felt or embroidered centers on the sunflowers for extra texture and character instead of leaving them flat.
You can swap the sunflower pieces for hearts, stars, or any motif by adjusting the round counts and petal shapes.
I sometimes add small snaps to the underside of each piece so they can be attached and removed easily for travel or storage.
For a chunky, cozy style, use a bulkier yarn and a larger hook for a softer, more tactile board that feels like a cushion when played on laps.
I recommend trying contrasting colors for the grid lines so the playing area stands out clearly against the board background.
Try embroidering numeric or letter labels on the back of each piece to help young children learn coordinates while playing the game.
I also like to add a crocheted pouch or little drawstring bag to store the pieces; use the same drawstring technique from the board for a matching finish.
When gifting, I often wrap the set with a ribbon and include a small handmade scorecard or instruction tag to make the present extra special.
If you want posable pieces, you can insert a bit of thin craft wire into the leaf stems before hiding ends to give slight shaping control.
Experiment with different stitch textures on the board background like hdc or pattern rows to create subtle visual interest behind the grid.
Common Mistakes & How to Fix Them
✗ Not using stitch markers when marking the grid placement can cause uneven lines; mark the four corners and center lines before crocheting the grid to ensure symmetry.
✗ Failing to hide yarn ends as you go will make finishing fiddly and messy; weave in ends immediately after each piece to keep the work tidy.
✗ Using a different hook size without adjusting tension will change the board size too much; test a swatch and choose a hook to match the approximate finished size of 24 cm.
✗ Crocheting grid lines too tightly can pucker the board fabric; work slip stitches with relaxed tension so the grid lays flat on the board.
✗ Skipping the instruction to always turn work after each row may leave inconsistent edges; follow the note 'Always turn work after R.x.' to keep rows neat.