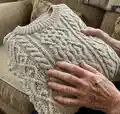
This pattern teaches you to knit a classic mens sweater worked from the neck down using the contiguous method, with beautiful braided cable panels. You'll get detailed charted instructions, shaping notes, and size options to make a perfect fit. The design uses fine cashmere yarn and neat finishing techniques for a luxurious, wearable result.
Progress Tracker
0% Complete
— Begin of work :
Info :
'Theory of braids' men's sweater is worked from the neck down completely seamless in the round, using the contiguous method.
Info :
Sizes: 32–34; 34–36 (38–40; 42–44; 46–48) (50–52; 54–56; 58–60) in the indicated order.
Info :
Needles and Materials: yarn Cariaggi– Piuma Cashmere (100% cashmere; 100 g – 320 m [3.53 ounces – 350 yards]); circular knitting needles 2.5 mm [US1.5] and 4.0 mm [US6] or other appropriate size to obtain gauge; stitch markers, tapestry needle, stitch holder, spare circular, extra cords or a piece of auxiliary yarn; cable needles.
Info :
Gauge: 26 sts and 30 rows/rounds = 10x10 cm [4x4 in], in Main Pattern (Center part chart / Body/Main Part Chart, page 12 of the pattern) on 4.0 mm [US6] needles, after blocking and stretched.
— Abbreviations and increases :
Info :
pfb – purl the same stitch through front and back (1 increased). RLI = right-leaning lifted increase: insert right needle into stitch one row below next stitch and knit this additional stitch, then work next stitch as indicated. RLI-p = right-leaning lifted purl-wise increase: insert right needle into stitch one row below next stitch and purl this additional stitch, then work next stitch as indicated.
Info :
k2tog-L: knit 2 together left-leaning – insert the right-hand needle into the first stitch knit-wise. Still keeping the first stitch on the left needle, insert the right-hand needle into the second stitch and knit it through the back loop. Pull the resulting stitch between the first and the second stitch in front of work. Now, release the first stitch from the left needle, tightening the working yarn so that the new stitch sits tightly next to the adjacent stitch. Let the second stitch slide off of the left needle.
Info :
LLI = left-leaning lifted increase: insert left needle into stitch two rows below the stitch just worked, lift stitch onto left needle and knit this additional stitch. LLI-p = left-leaning lifted purl-wise increase: insert left needle into stitch two rows below the stitch just worked, lift stitch onto left needle and purl this additional stitch.
Info :
BoR = beginning of the round. cn = cable needle. k2tog = knit 2 stitches together. k = knit. p = purl. p2tog = purl 2 stitches together. p2tog-tbl = purl 2 sts together through the back loop. RS = right side (outside) of the fabric. WS = wrong side (inside) of the fabric. st(s) = stitch(es).
— Order of work and cast on :
Info :
Begin of work: Using 2.5 mm [US1.5] needles, cast on 132; 132 (132; 132; 148) (148; 148; 148) st(s), join into the round without twisting, and place a BoR marker to indicate the beginning of the round.
— Work Round 1 :
Round 1 :
slip BoR marker to right needle, work 20 sts according to sleeve ribbing chart, place marker 1 (left sleeve) p2; 2 (2; 2; 2) (2; 2; 2), ko; 0 (0; 0; 2) (2; 2; 2), po; 0 (0; 0; 2) (2; 2; 2), work 42 sts according to Body Ribbing Chart, p2; 2 (2; 2; 2) (2; 2; 2), ko; 0 (0; 0; 2) (2; 2; 2), po; 0 (0; 0; 2) (2; 2; 2), place marker 2, (Back) work 20 sts according to sleeve ribbing chart, place marker 3 (right sleeve) p2; 2 (2; 2; 2) (2; 2; 2), ko; 0 (0; 0; 2) (2; 2; 2), po; 0 (0; 0; 2) (2; 2; 2), work 42 sts according to Body Ribbing Chart, p2; 2 (2; 2; 2) (2; 2; 2), ko; 0 (0; 0; 2) (2; 2; 2), po; 0 (0; 0; 2) (2; 2; 2), (Front).
Info :
Work neckline ribbing in the established pattern according to the respective charts. Work Rounds 1–6 once, then work Round 7 (increases) of the chart. Change to 4.0 mm [US6] needles and continue. Work Round 10 of the appropriate ribbing chart, then proceed with shoulder line shaping as follows:
— Shoulder line shaping and short-row back neck :
Row 1 :
slip BoR marker to right needle, work 24 sts according to Round 1 of the Sleeve Chart (left sleeve), slip marker 1 to right needle, LLI, work 2; 2 (2; 2; 6) (6; 6; 6) sts according to Round 1 of Shoulder Line Shaping Chart #1 for the appropriate size, place marker C1, work 48 sts according to Round 1 of Body/Main Part Chart, place marker C2, work 2; 2 (2; 2; 6) (6; 6; 6) sts according to Round 1 of Shoulder Line Shaping Chart #2 for the appropriate size, RLI, slip marker 2 to right needle, work 24 sts according to Round 1 of the Sleeve Chart (right sleeve), slip marker 3 to right needle, LLI, work 2; 2 (2; 2; 6) (6; 6; 6) sts according to Round 1 of Shoulder Line Shaping Chart #1 for the appropriate size, place marker C3, work 48 sts according to Round 1 of Body/Main Part Chart, place marker C4, work 2; 2 (2; 2; 6) (6; 6; 6) sts according to Round 1 of Shoulder Line Shaping Chart #2 for the appropriate size, RLI.
Row 2 :
slip BoR marker to right needle, work 24 sts according to the respective next round of the Left Sleeve chart, slip marker 1 to right needle, LLI, work sts according to the respective next round of Shoulder Line Shaping Chart #1 for the appropriate size to marker C1, slip marker C1 to right needle, work 48 sts according to the respective next round of the Body/Main Part Chart, slip marker C2 to right needle, work sts according to the respective next round of Shoulder Line Shaping Chart #2 for the appropriate size to marker 2, RLI, slip marker 2 to right needle, work 24 sts according to the respective next round of the Right Sleeve chart, slip marker 3 to right needle, LLI, work sts according to the respective next round of Shoulder Line Shaping Chart #1 for the appropriate size to marker C3, slip marker C3 to right needle, work 48 sts according to the respective next round of the Body/Main Part Chart, slip marker C4 to right needle, work sts according to the respective next round of Shoulder Line Shaping Chart #2 for the appropriate size to BoR marker, RLI.
Info :
Repeat Row 2 another 6 times, working the stitch patterns in the established manner, following either the charts or the respective written-out instructions. Work the stitches gained through increases in the manner shown in the respective chart for the appropriate size.
Info :
For a better fit of the garment, raise the back neck as follows (begin short-row shaping while continuing shoulder line shaping).
Next Row 3 :
slip BoR marker to right needle, work 24 sts according to the respective next round of the Left Sleeve chart, slip marker 1 to right needle, LLI, work sts according to the respective next round of Shoulder Line Shaping Chart #1 for the appropriate size to marker C1, slip marker C1 to right needle, work 48 sts according to the respective next round of Body/Main Part Chart, slip marker C2 to right needle, work sts according to the respective next round of Shoulder Line Shaping Chart #2 for the appropriate size, RLI, slip marker 2 to right needle, work 24 sts according to the respective next round of the Right Sleeve chart, slip marker 3 to right needle, LLI, work sts according to the respective next round of Shoulder Line Shaping Chart #1 for the appropriate size to marker C3, slip marker C3 to right needle, work 48 sts according to the respective next round of Body/Main Part Chart, slip marker C4 to right needle, work in the established pattern to BoR marker.
Next Row 4 :
Continue working on the wrong side of the fabric. Work in the established pattern to marker 3, RLI-p, slip marker 3 to right needle, work 24 sts according to the respective next round of the Right Sleeve chart, slip marker 2 to right needle, LLI-p, work in the established pattern to marker C2, slip marker C2 to right needle, work 48 sts according to the respective next round of the Body/Main Part Chart, slip marker C1 to right needle, work in the established pattern to marker 1, RLI-p, slip marker 1 to right needle, work 24 sts according to the respective next round of the Left Sleeve chart, slip BoR marker to right needle, LLI-p, work 4; 4 (4; 4; 5) (5; 5; 5) sts of the charted pattern, turn work to right side, slip 1 stitch knit-wise to right needle, leading the working yarn in back of the stitch, above the right needle. Tighten the working yarn so that the stitch on the right needle sits on the needle with two legs visible (Double stitch) = 4 sts increased. Then turn and continue as directed in pattern notes.
Next Row 5 :
Continue working on the right side of the fabric. Work in the established pattern to BoR marker, RLI, slip BoR marker to right needle, work 24 sts according to the respective next round of the Left Sleeve chart, slip marker 1 to right needle, LLI, work in the established pattern to marker C1, slip marker C1 to right needle, work 48 sts according to the respective next round of the Body/Main Part Chart, slip marker C2 to right needle, work in the established pattern to marker 2, RLI, slip marker 2 to right needle, work 24 sts according to the respective next round of the Right Sleeve chart, slip marker 3 to right needle, LLI, work in the established pattern to the Double stitch, knit both legs of the Double stitch together as one, work 1 st of the charted pattern, turn work to wrong side, slip 1 stitch purl-wise to right needle, leading the working yarn in back of the stitch, above the right needle. Tighten the working yarn so that the stitch on the right needle sits on the needle with two legs visible (Double stitch) = 4 sts increased.
Next Row 6 :
Continue working on the wrong side of the fabric. Work in the established pattern to marker 3, RLI-p, slip marker 3 to right needle, work 24 sts according to the respective next round of the Right Sleeve chart, slip marker 2 to right needle, LLI-p, work in the established pattern to marker C2, slip marker C2 to right needle, work 48 sts according to the respective next round of the Body/Main Part Chart, slip marker C1 to right needle, work in the established pattern to marker 1, RLI-p, slip marker 1 to right needle, work 24 sts according to the respective next round of the Left Sleeve chart, slip BoR marker to right needle, LLI-p, then work in the established pattern to the Double stitch, purl both legs of the Double stitch together as one, work 1 st of the charted pattern, turn work to right side, slip 1 stitch knit-wise to right needle, leading the working yarn in back of the stitch, above the right needle. Tighten the working yarn so that the stitch on the right needle sits on the needle with two legs visible (Double stitch) = 4 sts increased.
Info :
Continue shoulder line shaping increases (Rows 5–6), at the same time working short rows to raise the back neck, working more turned rows in steps of increases according to size instructions shown in the pattern.
Next Round 7 :
Continue working on the right side of the fabric. Knit both legs of the Double Stitch together. Work in the established pattern to BoR marker, RLI, slip BoR marker to right needle, work 24 sts according to the respective next round of the Left Sleeve chart, slip marker 1 to right needle, LLI, work in the established pattern to marker C1, slip marker C1 to right needle, work 48 sts according to the respective next round of the Body/Main Part Chart. Slip marker C2 to right needle, work in the established pattern to marker 2, RLI, slip marker 2 to right needle, work 24 sts according to the respective next round of the Right Sleeve chart, slip marker 3 to right needle, LLI, work in the established pattern to marker C3, and while doing so, after having knitted both legs of the second Double Stitch together, place marker N1. slip marker C3 to right needle, work 48 sts according to the respective next round of the Body/Main Part Chart, slip marker C4 to right needle, work in the established pattern to BoR marker, RLI = 5 sts increased.
Info :
While working the short rows, the BoR is shifted. Marker N1 indicates where to begin working the stitch pattern in the next row. The original BoR marker stays in place since all instructions regarding increases etc. are being continued, but the stitch pattern will begin at marker N1.
Next Round 8 :
slip BoR marker to right needle, work 24 sts according to the respective next round of the Left Sleeve chart, slip marker 1 to right needle, LLI, work in the established pattern to marker C1, slip marker C1 to right needle, work 48 sts according to the respective next round of the Body/Main Part Chart, slip marker C2 to right needle, work in the established pattern to marker 2, RLI, slip marker 2 to right needle, work 24 sts according to the respective next round of the Right Sleeve chart, slip marker 3 to right needle, LLI, work in the established pattern to marker C3, slip marker C3 to right needle, work 48 sts according to the respective next round of the Body/Main Part Chart, slip marker C4 to right needle, work in the established pattern to BoR marker, RLI = 4 sts increased.
Info :
Repeat Round 8 another 4; 6 (10; 12; 14) (16; 18; 22) times, working the stitch patterns in the established manner, following either the charts or the respective written-out instructions. Work the stitches gained through increases in the manner shown in the respective chart for the appropriate size.
Info :
You should now have 24 sts each per shoulder, and 128; 132 (140; 144; 158) (162; 166; 174) sts each for Front and Back. Total stitch count – 304; 312 (328; 336; 364) (372; 380; 396) st(s).
— Working the sleeves :
Info :
Work one round even in the established pattern over an unchanged stitch count, moving the BoR marker and marker 2 – 2 sts to the left, and markers 1 and 3 – 2 sts to the right. This yields 20 sts each for each shoulder, while the outmost 2 knit sts at both sides of the shoulder are allocated to the Front and Back.
Round 1 :
slip BoR marker to right needle, LLI, work 20 sts according to Round 1 of the Sleeve Cap Chart for the Left Sleeve, RLI, slip marker 1 to right needle, k2, p1, work in the established pattern to marker C1, slip marker C1 to right needle, work 48 sts according to the respective next round of the Body/Main Part Chart, slip marker C2 to right needle, work in the established pattern to 3 sts before marker 2, p1, k2, slip marker 2 to right needle, LLI, 20 sts according to Round 1 of the Sleeve Cap chart for the Right Sleeve, RLI, slip marker 3 to right needle, k2, p1, work in the established pattern to marker C3, slip marker C3 to right needle, work 48 sts according to the respective next round of the Body/Main Part Chart, slip marker C4 to right needle, work in the established pattern to 3 sts before BoR marker, p1, k2 = 4 sts increased.
Round 2 :
work in the established pattern over an unchanged stitch count.
Round 3 :
slip BoR marker to right needle, LLI, work sts according to the next round of the Sleeve Cap chart for the Left Sleeve, RLI, slip marker 1 to right needle, k2, p1, work in the established pattern to marker C1, slip marker C1 to right needle, work 48 sts according to the respective next round of the Body/Main Part Chart, slip marker C2 to right needle, work in the established pattern to 3 sts before marker 2, p1, k2, slip marker 2 to right needle, LLI, work sts according to the next round of the Sleeve Cap chart for the Right Sleeve, RLI, slip marker 3 to right needle, k2, p1, work in the established pattern to marker C3, slip marker C3 to right needle, work 48 sts according to the respective next round of the Body/Main Part Chart, slip marker C4 to right needle, work in the established pattern to 3 sts before BoR marker, p1, k2 = 4 sts increased.
Round 4 :
work in the established pattern over an unchanged stitch count.
Info :
Repeat Rounds 3–4 another 16; 20 (21; 21; 24) (25; 27; 27) times.
Info :
Continue shaping the armhole and sleeve cap of the garment according to Shoulder Line Shaping Charts #1 and 2 and Sleeve Cap Chart for the appropriate size. In this section, stitches will be increased not only in the sleeve, but also in the Body of the sweater, to both sides of the sleeve, as shown in the charts.
Round 5 :
slip BoR marker to right needle, LLI, work sts according to the next round of the Sleeve Cap chart for the Left Sleeve, RLI, slip marker 1 to right needle, work sts according to the respective next round of Shoulder Line Shaping Chart #1 for the appropriate size to marker C1, slip marker C1 to right needle, work 48 sts according to the respective next round of the Body/Main Part Chart, slip marker C2 to right needle, work sts according to the respective next round of Shoulder Line Shaping Chart #2 for the appropriate size to marker 2, slip marker 2 to right needle, LLI, work sts according to the next round of the Sleeve Cap chart for the Right Sleeve, RLI, slip marker 3 to right needle, work sts according to respective next round of Shoulder Line Shaping Chart #1 for the appropriate size to marker C3, slip marker C3 to right needle, work 48 sts according to the respective next round of the Body/Main Part Chart, slip marker C4 to right needle, work sts according to respective next round of Shoulder Line Shaping Chart #2 for the appropriate size to BoR marker = 8 sts increased.
Round 6 :
work in the established pattern over an unchanged stitch count.
Info :
Repeat Rounds 5–6 another 3; 2; (2; 3; 3) (3; 3; 5) times.
Next Round – sleeve division :
slip BoR marker to right needle, transfer 64; 70 (72; 74; 78) (82; 86; 90) sts (Left Sleeve) to a stitch holder, piece of waste yarn or spare cord for holding, cast on 9; 12 (22; 27; 29) (28; 27; 27) new underarm sts, slip marker 1 to right needle, work in the established pattern to marker 2, slip marker 2 to right needle, transfer 64; 70 (72; 74; 78) (82; 86; 90) sts (Right Sleeve) to a stitch holder, piece of waste yarn or spare cord for holding, cast on 9; 12 (22; 27; 29) (28; 27; 27) new underarm sts, slip marker 3 to right needle, work over the sts of the Front in the established pattern to BoR marker.
Info :
After having divided for the sleeves, you should have 298; 308 (344; 366; 398) (404; 410; 434) st(s).
Info :
Transfer the BoR marker and marker 2 – 2; 2 (5; 2; 0) (2; 2; 2) sts to the right, and markers 1 and 3 –2; 2 (5; 2; 0) (2; 2; 2) sts to the left. Continue working in the round in the earlier established pattern, working the sections between the BoR marker and markers 1, 2 and 3 in the Side Panel insert pattern as follows:
Info :
Size 32–34: Side panel insert Chart #1, p1, Side panel insert Chart #2 = 13 sts; Size 34–36: Side panel insert Chart #1, p4, Side panel insert Chart #2 = 16 sts; Size 38–40: Side panel insert Chart #1, p3, Side panel insert Chart #2, p2, Side panel insert Chart #1, p3, Side panel insert Chart #2 = 32 sts; Size 42–44: Side panel insert Chart #2, p2, Side panel insert Chart #1, p3, Side panel insert Chart #2, p2, Side panel insert Chart #1 = 31 sts; Size 46–48: p1, Side panel insert Chart #2, p1, Side panel insert Chart #1, p1, Side panel insert Chart #2, p1, Side panel insert Chart #1, p1 = 29 sts; Size 50–52: Side panel insert Chart #1, p3, Side panel insert Chart #2, p2, Side panel insert Chart #1, p3, Side panel insert Chart #2 = 32 sts; Size 54–56: Side panel insert Chart #2, p2, Side panel insert Chart #1, p3, Side panel insert Chart #2, p2, Side panel insert Chart #1 = 31 sts; Size 58–60: Side panel insert Chart #2, p2, Side panel insert Chart #1, p3, Side panel insert Chart #2, p2, Side panel insert Chart #1 = 31 sts.
Info :
Begin working Side Panel Insert Charts 1 and 2 from Round 4; 4 (2; 6; 4) (2; 8; 8) so that the current round of the Side Panel Insert corresponds to the current round of the Body of the garment.
Info :
Work until piece has either reached a length of 42; 45 (46; 48; 50) (52; 54; 55) cm [16.5; 17.7 ((18.1; 18.9; 19.7) (20.5; 21.25; 21.65) in] from sleeve division, or is 5 cm [2 in] shorter than desired length of the garment, remove all markers, in the following odd-numbered round, change to 2.5 mm [US1.5] needles and continue, working "k2, p2" ribbing in the following manner:
Info :
Over the stitches between marker N1 and the BoR marker, continue the stitch pattern of the previous round.
Info :
Work all sts in the established pattern, while in the first round of ribbing, working as follows: work the 6 knit sts as "k2, p2, k2"; work the 3 purl sts as "p1, p2tog"; work the 4 purl sts as "p2tog, p2tog". When the ribbing has reached a height of 5 cm [2 in], bind off all sts.
— Charts and stitch pattern excerpts :
Info :
Body ribbing chart: Rounds 1–6: (k2, p1, k2, p2, k2, p1, k2, p3) work 2 times, k2, p1, k2, p2, k2, p1, k2. Round 7: (k2, p1, k2, LLI, p2, RLI, k2, p1, k2, p3) work 2 times, k2, p1, k2, LLI, p2, RLI, k2, p1, k2. Rounds 8–10: (k2, p1, k3, p2, k3, p1, k2, p3) work 2 times, k2, p1, k3, p2, k3, p1, k2.
Info :
Sleeve ribbing chart: (visual chart provided). Rounds 1–6: (k2, p2, k2, p1) work 2 times, k2, p2, k2. Round 7: k2, p2, k2, p1, k2, LLI, p2, RLI, k2, p1, k2, p2, k2. Round 8: k2, p2, k2, p1, k3, p2, k3, p1, k2, p2, k2. Round 9: k2, pfb, p1, k2, p1, k3, p2, k3, p1, k2, pfb, p1, k2. Round 10: k2, p3, k2, p1, k3, p2, k3, p1, k2, p3, k2.
Info :
Center part chart / Body/Main Part Chart: Round 1: (k1, 2/2 RC = 4-st RC = hold 2 sts on cn BEHIND work, k2, then k2 from cable needle, k1, p2, k1, 2/2 LC = 4-st LC = hold 2 sts on cn in FRONT of work, k2, then k2 from cable needle, k1, p3) work 2 times, k1, 2/2 RC = 4-st RC = hold 2 sts on cn BEHIND work, k2, then k2 from cable needle, k1, p2, k1, 2/2 LC = 4-st LC = hold 2 sts on cn in FRONT of work, k2, then k2 from cable needle, k1.
Info :
Rounds 2, 4, 6, 8: (k6, p2, k6, p3) work 2 times, k6, p2, k6. Round 3: (2/1 LPC = hold 2 sts on cn in FRONT of work, p1, then k2 from cable needle, hold 2 sts on cn in FRONT of work, k1, then k2 from cable needle, p2, hold 1 st on cn BEHIND work, k2, k1 from cable needle, 2/1 RPC = hold 1 st on cn BEHIND work, k2, then p1 from cable needle, p3) work 2 times.
Info :
Round 7: (hold 2 sts on cn in FRONT of work, k1, then k2 from cable needle, 2/1 LPC = hold 2 sts on cn in FRONT of work, p1, then k2 from cable needle, p2, 2/1 RPC = hold 1 st on cn BEHIND work, k2, then p1 from cable needle, hold 1 st on cn BEHIND work, k2, k1 from cable needle, p3) work 2 times.
Info :
Stitch pattern for upper arm chart (charted). Round 1: k2, p3, k1, 2/2 RC = 4-st RC = hold 2 sts on cn BEHIND work, k2, then k2 from cable needle, k1, p2, k1, 2/2 LC = 4-st LC = hold 2 sts on cn in FRONT of work, k2, then k2 from cable needle, k1, p3, k2. Rounds 2, 4, 6, 8: k2, p3, k6, p2, k6, p3, k2. Round 3: k2, p3, 2/1 LPC etc. (see chart for full cable handling).
Info :
Side panel insert Chart #1 and Chart #2: follow chart symbols for crossing cables; written rounds: Round 1: k1, 2/2 LC = 4-st LC = hold 2 sts on cn in FRONT of work, k2, then k2 from cable needle, k1. Rounds 2, 4, 6, 8: k6. Round 3: hold 1 st on cn BEHIND work, k2, k1 from cable needle, 2/1 RPC = hold 1 st on cn BEHIND work, k2, then p1 from cable needle. Round 5: k2, 1/1 LC = hold 1 st on cn in FRONT of work, k1, then k1 from cable needle, k2.
— Working the Right sleeve :
Info :
Right sleeve: Take up the previously held sleeve sts with 4.0 mm [US6] needles. Right side facing, join new working yarn, place BoR marker, work 9; 12 (22; 27; 29) (28; 27; 27) sts into the corresponding sts of the side insert panel of the sweater, working knit stitches into knit stitches and purl stitches into purl stitches. Place marker 1, work the stitches of the Right Sleeve in the established pattern according to the pattern report in the chart (see pattern repeat framed in Red in Sleeve Cap Chart). Work the newly cast-on underarm sts of the Side Panel in the indicated order for the Side Panel in the appropriate size. You should now have a total of 73; 82 (94, 101, 107) (110, 113, 117) sts.
Info :
Move the BoR marker – 0; 2 (1; 2; 0) (2; 2; 2) st(s) to the right, and marker 1 – 0; 2 (1; 2; 0) (2; 2; 2) st(s) to the left.
Info :
Continue as follows: slip BoR marker to right needle, work the sts of the Side Panel Insert in the established pattern to marker 1, slip marker 1 to right needle, p2; 2 (2; 2; 1) (1; 3; 2), work the sts of the Right Sleeve in the established pattern to 2; 2 (2; 2; 1) (1; 3; 2) sts before BoR marker, p2; 2 (2; 2; 1) (1; 3; 2).
Info :
Work 20 rounds in the established pattern. Now, continue as follows: Round 1 (decreases): slip BoR marker to right needle, work the sts of the Side Panel Insert in the earlier established pattern, slip marker 1 to right needle, p2tog, then work in the established pattern to 2 sts before BoR marker, p2tog-tbl = 2 sts decreased. Work Rounds 2–12 even over an unchanged stitch count in the earlier established pattern. Repeat Rounds 1–12 another 3; 4 (4, 5, 5) (5, 6, 6) times.
Info :
As a result, you should now have a total of 65; 72 (84, 89, 95) (98, 99, 103) sts. Continue in the established pattern until sleeve has either reached a length of 40, 41 (42, 43, 44) (45, 46, 47) cm [15.75, 16.1 (16.5, 17, 17.3) (17.7, 18.15, 18.5) in] from begin of armhole, or is 5 cm [2 in] shorter than desired sleeve length.
Info :
In the following odd-numbered round, change to 2.5 mm [US1.5] needles and continue, working "k2, p2" ribbing in the following manner: Work all sts in the established pattern, while in the first round of ribbing, working as follows: work the 6 knit sts as "k2, p2, k2"; work the 3 purl sts as "p1, p2tog"; work the 4 purl sts as "p2tog, p2tog". When the ribbing has reached a height of 5 cm [2 in], bind off all sts.
Info :
Work the Left Sleeve the same way. Moisten the sweater, and block on an even horizontal surface, leaving pinned until completely dry. Happy knitting! 😊
This refined 'Theory of braids' men's sweater pattern brings timeless cable textures and expert shaping into your knitting queue. The seamless contiguous yoke and detailed charts make it a special, rewarding project that wears beautifully. Make one in luxurious cashmere for a cozy heirloom piece. 🧶👔