About This The moonlit bralette Pattern
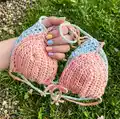
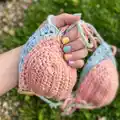
This pattern teaches you how to crochet a simple, stylish bralette featuring two shaped cups, a decorative border, and adjustable straps. You will hold two strands of Paintbox Cotton DK together to create soft, stable fabric with clear HDC shaping. The instructions are written for three sizes (S, M, L) and include details on creating both shoulder and bottom straps. The project is ideal for a quick handmade garment you can customize with color and strap length.

Includes materials list, step-by-step cup shaping, border instructions, and strap finishing. Perfect for beginners looking to make a wearable crochet bralette.
Why You'll Love This The moonlit bralette Pattern
I absolutely love this pattern because it combines simple stitches with thoughtful shaping to create a flattering handmade bralette. I enjoy how quickly each cup grows using half double crochet and how the border adds a pretty, finished edge. Holding two strands together gives the fabric a lovely drape and structure that works well for wearables. I also love that it is easy to customize the straps and fit, making each finished piece uniquely yours.
Switch Things Up
I love experimenting with colors for this pattern: try holding two different colored DK yarns together for a subtle marled look that still keeps the same fabric weight.
Want a softer, chunkier version? I sometimes use a bulkier cotton blend with a larger hook and fewer chains to make a chunkier bralette variant.
I also adjust strap length depending on fit preferences — shorten the CH80 shoulder straps for a snugger fit or lengthen them for a relaxed look.
For a sporty look, I occasionally add a row of single crochet under the cups and attach a piece of elastic to the back for extra support and stretch.
I enjoy adding decorative touches like small scallops along the border or an embroidered edge to make each piece unique and feminine.
If you want to size up, make a wider starting chain (add CH2 increments) and adjust repeats; always check fit as you go and try it on before finishing the bottom strap.
I sometimes make mini versions as swimwear-style tops by using mercerized cotton and a tighter gauge for better coverage and faster drying.
Consider adding removable padding or a thin fabric lining if you want additional coverage or structure; sew the lining into the cup after finishing borders and straps.
To create a boho look, braid three slim straps from leftover yarn rather than crocheting a single CH150-200 strap, then weave or tie them for a decorative bow.
I often embellish with tiny crochet flowers or beads sewn near the top of each cup to add personality and special detail to the finished bralette.
Common Mistakes & How to Fix Them
✗ Not holding two strands together as instructed can make the fabric too flimsy; always hold two strands together throughout to match the drape and tension used in the pattern.
✗ Skipping the instruction to place a HDC in the very last chain will cause the cup bottom to curve; be sure to place a HDC in the very last CH of the previous row to keep the cup straight at the bottom.
✗ Cutting the yarn before completing the strap or border can leave your piece unfinished; DO NOT CUT YARN until the pattern instructs you to cut and tie off at the correct moment.
✗ Weaving the bottom strap inconsistently can produce an uneven fit; weave the CH150-200 strap in and out of bottom loops evenly and try the bralette on before tying the bow to adjust placement.
✗ Using wildly different tension between the two strands may create uneven fabric; keep both strands held together with consistent tension to ensure even stitches and consistent cup shape.