About This The Bowling Llama Amigurumi Pattern
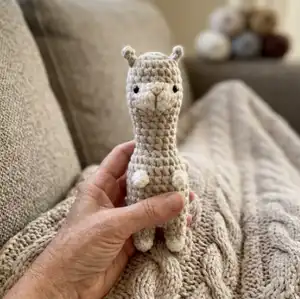
This pattern creates a delightful set: a soft no-sew llama amigurumi and a cozy bowling ball, crocheted in chunky velvet yarn. The design integrates ears, snout and legs into the head and body to avoid separate sewing parts. The pattern teaches bobble stitch, color change techniques and simple shaping for a polished toy.
Clear round-by-round instructions and helpful video links are included to guide you through tricky steps. Perfect as a handmade gift or a sweet nursery toy that stands upright with an optional pad.
Why You'll Love This The Bowling Llama Amigurumi Pattern
I absolutely love this pattern because it turns simple stitches into a charming, characterful toy that kids and adults adore. I enjoyed designing the no-sew construction so makers can focus on shaping rather than complicated assembly. The bobble stitch details add tactile interest and a playful look that really brings the llamas to life. I also love how customizable the pattern is — you can easily change colors to match your nursery or make a set of colorful bowling companions.
Switch Things Up
I love how easy it is to customize these llamas by swapping colors—try pastel shades for a nursery set or bright tones for a playful set.
If you want a pocket-sized version, use a thinner yarn and smaller hook to create mini llamas perfect for keychains.
I often change the bobble stitch color to create polka dot patterns on the body for extra whimsy.
For a sturdier, standable toy, I add a small disc of recycled plastic or bottle bottom inside the base before closing.
I sometimes embroider different mouth shapes or place the eyes slightly closer together to change facial expressions and personality.
You can make a matching set of balls in contrasting colors—use variegated or self-striping yarn for an interesting stripe effect.
I like to add tiny crocheted scarves or felt accessories to give each llama a unique outfit or character.
If you want poseable limbs (for other designs), consider adding a thin wire armature before stuffing, but avoid with baby toys for safety.
Try mixing yarn textures—pair velvet yarn for the body with smooth cotton for the snout to add texture contrast.
I recommend trying different eye sizes to vary expressions; larger safety eyes give a cuter look while smaller ones are daintier.
Common Mistakes & How to Fix Them
✗ Skipping stitch markers during rounds with increases and decreases causes lost counts; place a marker at the start of each round and move it every round to maintain correct stitch counts.
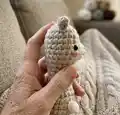
✗ Not stuffing gradually leads to uneven shapes and hard lumps; stuff the head and body gradually, adding small amounts of fiberfill while shaping to keep an even surface.
✗ Crocheting too loosely with chunky velvet yarn creates visible gaps where stuffing can escape; maintain firm, consistent tension and use recommended hook size to keep stitches close together.
✗ Forgetting to place safety eyes at the correct rounds results in misaligned facial features; insert the 6mm safety eyes between rounds 6 and 7, eight stitches apart, before final stuffing and closing the head.