About This Succulent Turtle Amigurumi Pattern
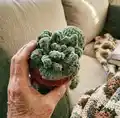
This pattern teaches you how to crochet a textured turtle with a spiral succulent top worked on the shell. You will make the head, body, four legs, tail, and a layered succulent using chenille super bulky yarn. The succulent is created in the front loops for a dimensional, rosette effect that makes this turtle truly unique.

Clear round-by-round instructions and helpful finishing notes are included so you can assemble and detail your turtle with confidence. Suitable for crocheters who are comfortable working in rounds and stitching pieces together.
Why You'll Love This Succulent Turtle Amigurumi Pattern
I absolutely love this pattern because it combines amigurumi shaping with a delightful surface technique for the succulent top. I enjoy how the front-loop spiral creates a realistic rosette that feels tactile and fun to make. The design is playful and forgiving, so small stitch count differences still produce a beautiful result. Making these turtles is always rewarding—they look great on a shelf and make sweet handmade gifts.
Switch Things Up
I love how easy it is to customize the colors for different looks; try pale pastels for a soft nursery version or rich jewel tones for a bold display.
If you want a smaller turtle, use a lighter weight yarn and a smaller hook to scale the pattern down into a keychain-sized companion.
To make a larger, squishier turtle, use a bulkier chenille yarn with a bigger hook and add more stuffing for a plush result.
I sometimes change the succulent stitch pattern to add more or fewer leaves; you can alter the repeat count to change fullness and shape.
Try embroidering tiny accents or veins on succulent leaves with contrasting thread for a realistic touch I love.
Swap the safety eyes for embroidered eyes if gifting to a baby, keeping the toy fully soft and safe.
I like to add tiny accessories like a crocheted flower or bow on the shell for seasonal variations and gifting themes.
Consider stitching the succulent slightly off-center for a whimsical, asymmetrical look that shows personality.
You can experiment with faux-suede or felt for the shell base instead of crocheting the sand color round for a mixed-media piece.
For posability, try inserting a short piece of wire into the leg seams during assembly; it allows gentle posing while still being soft to hold.
I often gift sets with different colored succulents to create a mini garden of turtles; arranging them together makes a delightful display.
Common Mistakes & How to Fix Them
✗ Skipping stitch markers when working the shell front loops causes misplaced succulent leaves; place a marker in the first front loop of each round to keep alignment consistent.
✗ Not folding and stitching the leg halves evenly causes lopsided legs and attachment issues; fold the circle carefully, count both sides, and stitch through both layers evenly.
✗ Overstuffing the head or body makes shaping difficult and bulky seams; stuff gradually and check shaping often to maintain smooth curves.
✗ Missing front/back loop placement for the succulent will distort the rosette; work one stitch per unworked front loop and use a marker to identify the first front loop for consistent placement.
✗ Failing to secure safety eyes before stuffing can shift placement later; add eyes at rounds 5-6 as instructed and check spacing before final stuffing.