About This Sterling the Star Amigurumi Pattern
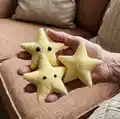
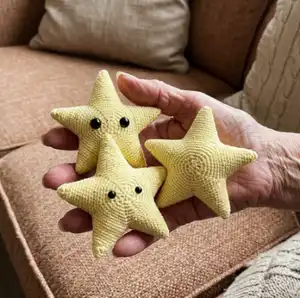
Sterling the Star is a 10" point-to-point amigurumi star made from five identical points that are joined and worked in the round. The pattern uses single crochet and simple decreases to shape each point and the body. A full felt-eye tutorial is included so you can choose safety eyes or sew on felt highlights for a soft finish.
All pieces are worked through the back loops only and the body is made in a continuous spiral. Clear round-by-round instructions make it easy to follow and assemble.
Why You'll Love This Sterling the Star Amigurumi Pattern
I absolutely love this pattern because it transforms simple rounds into a charming, sculpted star with personality. I enjoy the satisfying symmetry of making five identical points and then joining them to create a plush 3D shape. The piece is adaptable — you can use safety eyes or sew felt eyes for a softer finish, which I always appreciate for gifting. I also love that the pattern uses basic stitches, yet yields a professional-looking result with a little stuffing technique and finishing. It always feels rewarding to see the points come together into a bright, lovable star.
Switch Things Up
I love how easily this star lends itself to customization; try different yarn colors to create seasonal or themed stars.
Use a bulky yarn with a larger hook to make a chunky, cuddle-sized star, or a fingering weight yarn with a smaller hook for a tiny keychain version.
I often switch the eye style: safety eyes for durable play toys, or felt eyes with embroidered highlights for a softer, baby-safe option.
Experiment with sparkly or variegated yarn for a star with extra visual interest — it creates beautiful subtle striping across the points.
You can stitch a small smile or blush with embroidery floss to give your star a different expression and personality.
Try making a matching set in graduated sizes by changing yarn weight and hook size to create a nested star family for display.
For a nautical theme, use navy and white stripes and sew on little felt anchors or appliques for charming details.
I sometimes add a hanging loop at the top with a chain of stitches so the star can be used as an ornament or mobile piece.
To make the star more poseable, consider inserting a short piece of wire into points before stuffing, but note this makes it unsuitable for small children.
I like to finish edges with a contrasting color join or a decorative surface slip-stitch to give the star a framed look.
Mix and match highlights: white thread French knots, tiny sequins, or a small bead can become the eye highlight for added sparkle.
Don't be afraid to combine techniques — a crocheted star cap or tiny accessories can turn this pattern into a whole character set.
Common Mistakes & How to Fix Them
✗ Skipping the back loop only instruction can change the fabric texture and shaping; always work through the back loops only as stated to maintain consistent ridges and shaping.
✗ Not using a stitch marker in the continuous spiral will make it hard to track rounds; place a marker at the start of each round and move it as you work.
✗ Fastening off points too early then joining will leave ends and gaps; leave a long tail for sewing when instructed and only fasten off after assembly steps where required.
✗ Overstuffing the points causes lumps and distorts the star shape; start with small amounts in each point, then slowly add stuffing to the body for a smooth finished form.