About This Sorting Bees Amigurumi Pattern
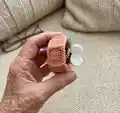
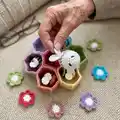
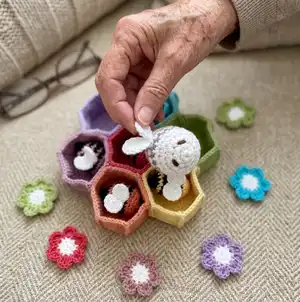
This pattern creates a magnetic sorting toy set: seven hexagon bowls, seven bees with magnet sockets, and seven flowers. It uses simple amigurumi construction and color changes to make playful, durable pieces perfect for children. The design focuses on easy assembly, magnetic play, and colorful learning.
You will make small individual pieces that assemble into a bright sorting activity set. Techniques include magic ring, special increases, back-loop rounds and sewing-in magnet pockets.
Why You'll Love This Sorting Bees Amigurumi Pattern
I absolutely love this pattern because it turns simple crochet shapes into a playful educational toy that children adore. I enjoyed designing the little bees with hidden magnet pockets so they snap right into the matching flowers and bowls. The color palette makes it bright and engaging, and the pieces are small and satisfying to make. It combines amigurumi basics with a few clever finishing touches that elevate a simple crochet project into a meaningful handmade gift.
Switch Things Up
I love how adaptable this set is—try different color schemes to create themed versions, like pastels for a baby gift or bright primaries for Montessori-inspired learning.
Want to make it larger or smaller? Change your yarn weight and hook size: bulky yarn with a larger hook gives a squishy chunky set, while fingering yarn makes tiny pocket-sized bees.
I often swap the bee stripes for embroidered patterns or add tiny crocheted hats to give each bee a different personality.
Instead of magnets, you could sew on small Velcro dots for a safer alternative in very young children, though magnet play is very satisfying for older toddlers.
Try making sets with fewer bowls and more bees to increase difficulty in matching games, or create multiple sets in different palettes for color-sorting challenges.
I sometimes add tiny bell beads inside the bees (well secured) to create an auditory element to the sorting game—just make sure they are firmly sewn in and supervised with small children.
For a display version, join bowls into a flat honeycomb by sewing them side-by-side and edging with a contrasting color to create a pretty wall hanging or play mat.
I also like to embroider little numbers or letters inside each bowl to combine color sorting with counting and literacy exercises.
Customize the flowers by using different petal stitches—switch trebles to double trebles for taller petals or try picot edging for a lacy look.
If you want a travel-friendly set, make a small zip pouch with felt lining to keep all bees, flowers and bowls together while on the go.
Common Mistakes & How to Fix Them
✗ Skipping the extra chain in the special increase because it feels unnecessary; still make the [sc + ch + sc] exactly as written so the bowl forms a neat polygon shape.
✗ Forgetting to keep magnets all oriented the same direction which causes bees not to connect; insert and test every magnet before closing the pocket to ensure consistent polarity.
✗ Working without stitch markers during long rounds can lead to missed increases; place a marker at the start of each round to track your progress and keep counts accurate.
✗ Overstuffing the bees creates distortion and stiff shapes; stuff gradually while closing and adjust with small amounts to keep a soft, rounded body.
✗ Switching colors incorrectly at the color-change row can leave a visible seam; follow the half-stitch technique at the color change to get a clean transition between main and stripe colors.