About This Small Pumpkin Amigurumi Pattern
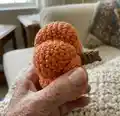
This pattern creates a small, stuffed crochet pumpkin styled for autumn decor and gift-giving. The design is compact, easy to stitch, and shaped to form pumpkin segments with simple sewing techniques. You will enjoy a fast, satisfying make that yields a cute finished piece to display or gift.
Ideal for beginners or quick craft sessions, the pumpkin uses basic amigurumi stitches and shaping. Customize color and size easily by changing yarn weight or hook.
Why You'll Love This Small Pumpkin Amigurumi Pattern
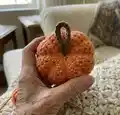
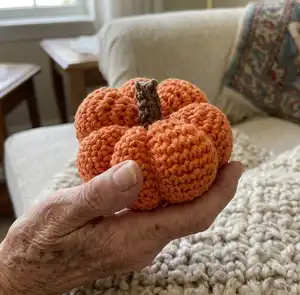
I absolutely love this pattern because it turns simple stitches into a charming seasonal accent that looks delightful on a mantel or as part of a centerpiece. I enjoy how quickly it works up, giving you instant satisfaction and a beautiful result in about an hour or two. The shaping technique creates defined pumpkin ribs that make each piece look handmade and professional. I also love that it is highly customizable—switch the yarn, adjust the hook, and you can create a whole patch of pumpkins in different sizes and colors.
Switch Things Up
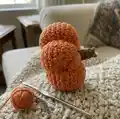
I love how easy this pattern is to customize by simply changing yarn color, so I often make a whole set in different orange and cream shades for a pretty display.
Want a tiny keychain version? I make mine smaller by using fingering yarn and a 2.5mm hook which creates a sweet mini pumpkin perfect for bags.
For a chunkier, more decorative pumpkin I switch to bulky yarn and a 6mm hook to produce a large, plush accent piece that sits nicely on a mantel.
I sometimes add a small felt leaf or an embroidered vine for extra detail, which makes the pumpkin feel more finished and unique.
Try adding a little weight in the base (a few beads or rice inside a small bag) if you want the pumpkin to sit perfectly on tabletops without toppling.
I also enjoy creating themed pumpkins—painted yarn, variegated shades, or speckled yarn create lovely rustic and modern looks depending on your home decor.
If youre gifting these, add a stitched initial or tiny tag for personalization; it turns a simple handmade pumpkin into a thoughtful present.
For seasonal wreaths, I make several small pumpkins and sew them together, experimenting with different sizes to add dimension and interest.
Try embroidering a simple face for a Halloween twist, or sew on tiny beads for a sparkling holiday ornament—little changes go a long way.
I recommend testing a swatch to decide how tight or soft you want your stitches, and adjusting hook size accordingly for your preferred finished texture.
Common Mistakes & How to Fix Them
✗ Skipping stitch markers while working in continuous rounds can lead to losing track of the beginning of rounds; place a marker at the first stitch of each round and move it up as you go.
✗ Overstuffing the pumpkin causes a too-firm, distorted shape and makes sewing segments difficult; stuff gradually and adjust stuffing while forming the ribs for a smooth finish.
✗ Using a hook that is too large for your yarn results in visible gaps and a floppy pumpkin; use the recommended hook size or go down a hook size for tighter stitches.
✗ Not counting stitches after increases or decreases can create uneven segments and mismatched shaping; count your stitches regularly and correct any errors before continuing.