About This Potion Amigurumi Pattern
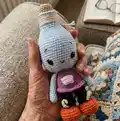
This pattern creates a sweet potion-bottle amigurumi with a cute face, tiny arms, legs with boots, and a sewn-on pocket. It is worked mostly in continuous rounds with simple increases and decreases to shape the bottle and body. The design includes instructions for color changes, working in BLO/FLO, and final needle sculpting for facial expression. Photos and step-by-step rounds make assembly and finishing straightforward for crafters comfortable with basic amigurumi techniques.
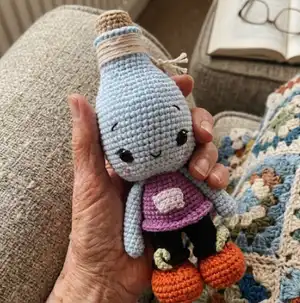
Finished toy size using the recommended materials is about 19 cm, though size will vary with yarn weight and tension. The pattern is rated intermediate and assumes familiarity with basic stitches and amigurumi construction.
Why You'll Love This Potion Amigurumi Pattern
I absolutely love this pattern because it turns a simple bottle shape into a playful character with so much personality. I enjoy the combination of shaping techniques and small details like the pocket and boots that make it feel special. The design is versatile so I often experiment with colors and tiny accessories to make each potion unique. Working the face needle sculpting is always satisfying — it brings the toy to life in a few stitches.
Switch Things Up
I love experimenting with colors on this pattern: try pastels for a soft, whimsical potion or deep jewel tones for a magical vibe.
I often change yarn weight and hook size to make a mini or jumbo version — just remember the stitch counts will produce different sizes.
I like swapping safety eyes for embroidered eyes for a softer, child-safe version that is ideal for babies.
I sometimes embroider extra details on the pocket or add tiny crocheted labels to make each potion feel unique and characterful.
I recommend trying felt or tiny beads as bottle decorations, or add a little tag with a handwritten potion name for gifting.
I add wire inside the arms for posability when making display pieces, but omit wire for toys for small children for safety.
I change the boot style — a round toe or a pointy witchy boot — by adjusting the last rounds of the foot to match the look I want.
I embellish the face with blush using a little yarn or rubbing chalk/pastel for a gentle cheek effect if desired.
I sometimes make a whole set in coordinating colors — a potion, cupcake, and tiny critter — to give as a themed gift set.
I recommend trying different stitches for texture on the body, like alternating BLO and regular SC rows to suggest a label or ribbing on the bottle.
Common Mistakes & How to Fix Them
✗ Skipping the note to work BLO or FLO when instructed can change the texture; follow the instruction to work into back loops only or front loops when specified.
✗ Placing safety eyes at the wrong height will alter the expression; install the eyes between rounds 30-31 as instructed and space them 13 SC apart for the intended look.
✗ Not joining the legs correctly when working across both pieces makes the body uneven; work the specified stitches across leg #1 and leg #2 in sequence so the legs join smoothly.
✗ Overstuffing the head or body creates bulges and distorts shaping; stuff gradually and use a chopstick to push stuffing into narrow areas for even shaping.