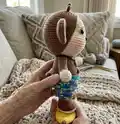
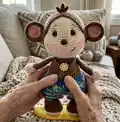
Create Oakley, a charming handmade monkey amigurumi designed with clear step-by-step instructions and helpful photos. This pattern guides you through crocheting each part — legs, body, head, ears, arms, tail and playful accessories. Perfect for crafters who enjoy detailed, assembly-focused projects with bright accents and customizable finishes.
Progress Tracker
0% Complete
— Legs and Body :
Round 1 :
Make 6 sc into a magic ring= 6
Round 2 :
Increase in each st around= 12
Round 3 :
(sc, inc) x 6= 18
Round 4 :
(2 sc, inc) x 6= 24
Round 5 :
(3 sc, inc) x 6= 30
Round 6 :
sc in each st around
Round 7-8 :
sc in each st around
Round 9 :
dec x 6, 18 sc= 24
Round 10 :
2 sc, dec, 9 sc, dec x 2, 7 sc= 21
Info :
Start stuffing the feet
Round 11-13 :
sc in each st around
Round 14 :
(6 sc, inc) x 3= 24 (Mark the 3rd st on the 1st leg with a stitch marker)
Info :
Do not F/O the 2nd leg! Work 6 more sc around the top of the 2nd leg, (You are moving the starting position). Ch 4, work a sc into the marked stitch on leg 1, work 23 more sc around the 1st leg, work 4 sc on the back of the ch 4, work 24 more sc around the 2nd leg, work 4 sc on the front of the ch 4= 56
— Legs and Body Continued :
Round 1 :
sc in each st around
Round 2 :
(13 sc, inc) x 4= 60
Round 3-6 :
sc in each st around
Round 7 :
(8 sc, dec) x 6= 54
Info :
Stuff the body as you work
Round 8 :
sc in each st around
Round 9 :
(7 sc, dec) x 6= 48
Round 10 :
(On stitch 30 change to Color E) sc in each st around
Round 11 :
(6 sc, dec) x 6= 42
Round 12 :
(On stitch 25 change to Color A) sc in each st around
Round 13 :
sc in each st around
Round 14 :
(5 sc, dec) x 6= 36
Round 15 :
2 sc, bobble stitch, 33 sc= 36
Round 16-17 :
sc in each st around
Round 18 :
(10 sc, dec) x 3= 33
Round 19 :
sc in each st around
Round 20 :
(9 sc, dec) x 3= 30
Round 21 :
sc in each st around
Round 22 :
(8 sc, dec) x 3= 27
Round 23 :
sc in each st around
Round 24 :
(7 sc, dec) x 3= 24
Info :
F/O and leave a long tail for sewing
— Head :
Info :
Crocheted from top to bottom
Round 1 :
Make 6 sc into a magic ring= 6
Round 2 :
Increase in each st around= 12
Round 3 :
(sc, inc) x 6= 18
Round 4 :
sc, inc, (2 sc, inc) x 5, sc= 24
Round 5 :
(3 sc, inc) x 6= 30
Round 6 :
2 sc, inc, (4 sc, inc) x 5, 2 sc= 36
Round 7 :
(5 sc, inc) x 6= 42
Round 8 :
3 sc, inc, (6 sc, inc) x 5, 3 sc= 48
Round 9-13 :
sc in each st around
Info :
(Mark the 1st and last increase of round 14 with a stitch marker)
Round 14 :
10 sc, inc x 6, 10 sc, inc x 6, 16 sc= 60
Round 15-18 :
sc in each st around
Info :
Place eyes between rounds 11 and 12, leaving 10 holes between them. Place the 1st eye before the 1st increase. Count 10 holes after the first eye and place the 2nd eye. If you want the sunken eye look, do not place the backs of the eyes on until round 23
Info :
Place nose in between rounds 14 and 15, in between the eyes.
Round 19 :
10 sc, (sc, dec) x 3, 12 sc, (sc, dec) x 3, 20 sc= 54
Round 20 :
(7 sc, dec) x 6= 48
Round 21 :
sc in each st around
Round 22 :
(6 sc, dec) x 6= 42
Round 23 :
(5 sc, dec) x 6= 36
Info :
Now for the eyes. Stuff the head well. Cut a long piece of yarn and remove the eyes. Place the needle in the hole where the first eye was and thread the needle into a hole next to the eye hole. Go back and forth between each eye hole repeating the process from the first eye. Pull slightly on the yarn after going through each hole. Do this about 3 times on each side until you reach the look you want. Follow the pictures on pg. 5-6 for help. There is also a youtube video I have for extra help on this process. https://www.youtube.com/watch?v=9XoBnTY6k70&t=55s
Info :
To place the backs of the eyes you will need to remove most of the stuffing to place the washers on the eyes then re stuff it.
Round 24 :
sc in each st around
Round 25 :
(4 sc, dec) x 6= 30
Round 26 :
(3 sc, dec) x 6= 24
Info :
F/O and leave a short tail
— Cap :
Round 1 :
Make 6 sc into a magic ring= 6
Round 2 :
Increase in each st around= 12
Round 3 :
(sc, inc) x 6= 18
Round 4 :
(2 sc, inc) x 6= 24
Round 5 :
(3 sc, inc) x 6= 30
Round 6 :
(4 sc, inc) x 6= 36
Round 7 :
(5 sc, inc) x 6= 42
Round 8 :
(6 sc, inc) x 6= 48
Round 9 :
(7 sc, inc) x 6= 54
Round 10 :
(8 sc, inc) x 6= 60
Round 11-18 :
sc in each st around
Round 19 :
18 sc, 2 sl, 3 hdc, 4 dc, 3 hdc, 2 sl, 3 hdc, 4 dc, 3 hdc, 2 sl, 10 sc
Info :
F/O and leave a tail
— Ears :
Info :
Make 2 in Color A, 2 in Color B
Round 1 :
Make 6 sc into a magic ring= 6
Round 2 :
Increase in each st around= 12
Round 3 :
(sc, inc) x 6= 18
Round 4 :
(2 sc, inc) x 6= 24
Info :
Do not F/O the Color A ears! Place the back sides of Color A and Color B ears together. You will be working around the ears to connect them together:
Round 5 :
(3 sc, inc) x 6= 30
Info :
F/O and leave a long tail for sewing
— Arms :
Round 1 :
Make 6 sc into a magic ring= 6
Round 2 :
Increase in each st around= 12
Round 3 :
(3 sc, inc) x 3= 15
Round 4 :
sc in each st around
Round 5 :
3 dc cluster, ch 1, 14 sc= 15
Round 6 :
(Do not work on the ch 1 from the previous round) (3 sc, dec) x 3= 12
Round 7 :
(2 sc, dec) x 3= 9
Info :
Start stuffing the arms
Info :
Change to Color A: No longer stuff the arms
Round 8-19 :
sc in each st around
Info :
Fold the arms in half and sc the opening closed. F/O and leave a long tail for sewing
— Tail :
Round 1 :
Make 4 sc into a magic ring= 4
Round 2 :
Increase in each st around= 8
Round 3-5 :
sc in each st around
Info :
Change to Color A: I did not stuff my tail, I used a pipe cleaner to stuff it instead
Round 6-29 :
sc in each st around
Info :
If you are using a pipe cleaner, fold the pipe cleaner in half and twist it together. Insert it into the tail. Fold the tail in half and sc the opening closed. F/O and leave a long tail for sewing
— Surfboard :
Round 1 :
Make 4 sc into a magic ring= 4
Round 2-4 :
sc in each st around
Round 5 :
Increase in each st around= 8
Round 6 :
(sc, inc) x 4= 12
Round 7 :
(2 sc, inc) x 4= 16
Round 8 :
sc in each st around
Round 9 :
(3 sc, inc) x 4= 20
Info :
Do not stuff the surfboard
Round 10-44 :
sc in each st around
Round 45 :
(3 sc, dec) x 4= 16
Round 46 :
sc in each st around
Round 47 :
(2 sc, dec) x 4= 12
Info :
F/O and sew the hole closed
— Assembly :
Item Name (P1) :
Put the cap around the head. Your cap will cover half of the open hole on the bottom of the head.
Item Name (P2) :
Sew the head and body together. You may need to add more stuffing while you sew.
Item Name (P3) :
Pin the arms onto the side of the body approximately between rounds 22 and 23, then sew the arms onto the body.
Item Name (P4) :
Pin the ears onto the side of the cap approximately between rounds 13 and 14 and sew them onto the head.
Item Name (P5) :
Pin the tail right above your waistband on the body and sew the tail onto the back of the body.
Item Name (P6) :
If you want, thread a strand of thread through a button and tie it around the neck as a necklace.
Item Name (P7) :
Attach brown yarn to the top of the head with a sl st. Ch 6, sl st in the 2nd ch from hook and across. Sl st into the head. Repeat on top of the head 3 more times. Weave in the tail ends.
Item Name (P8) :
Embroider a smile on the side of the face. Add some blush to the cheeks and inside the ears if you want.
This Oakley the Monkey pattern brings a handmade friend to life with charming details and playful accessories. Whether you make one for yourself or as a thoughtful gift, Oakley is full of personality and easy to customize. Happy crocheting and enjoy every stitch! 🧶🐒