About This Miniature Pippi Amigurumi Pattern
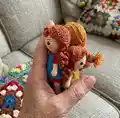
This pattern creates a miniature Pippi doll approximately 7 cm tall using lace yarn and small crochet hooks. You will crochet separate pieces (arms, legs, body, head, shoes, hair, apron) and assemble them for a polished result. The pattern includes detailed round-by-round instructions, color change notes, and hair construction tips for a realistic finish.
Perfect for crafters who enjoy fine, detailed work and tiny amigurumi. The guide includes photos and specific placement notes to help with assembly and finishing.
Why You'll Love This Miniature Pippi Amigurumi Pattern
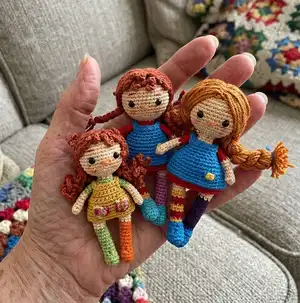
I absolutely love this pattern because it captures so much personality in such a small package. I enjoy working with delicate lace yarn and watching the tiny stripes and braids come to life. The design balances straightforward amigurumi techniques with playful details like mismatched socks and braided hair. I find it very satisfying to assemble and finish, and I hope you will find the same joy in making your miniature Pippi.
Switch Things Up
I love customizing this pattern by swapping colors and making playful mismatched socks for each doll.
I often change the dress color and add tiny embroidered pockets or buttons for extra character.
If you want a larger doll, I change to a thicker yarn and a correspondingly larger hook to create a chunkier version.
I sometimes omit the safety eyes and embroider faces for a softer, child-safe toy option.
For hair variations, I use mohair rope for volume or thin yarn for tighter, neater braids depending on the look I want.
I like to experiment with different skirt lengths by adding or removing HDC rounds to create mini or longer dresses.
Try adding wire inside the arms if you want posable limbs — just secure well and pad with stuffing before finishing.
Personalize each doll with tiny accessories like crocheted bows, hats, or tiny aprons using leftover yarn scraps.
Embroider freckles or a small mouth to change facial expressions and make each Pippi uniquely expressive.
I sometimes create a set of themed dolls by varying hair color, dress style, and sock patterns to tell a small story on my shelf.
Common Mistakes & How to Fix Them
✗ Not centering the beginning loop when joining the legs can make the doll sit uneven; take the beginning of the loop back and center it before continuing so the legs align properly.
✗ Skipping stuffing until after shaping the torso causes lumps and misproportioned curves; start filling fiber gradually when instructed and adjust shape as you go.
✗ Forgetting to keep a distance of 6 stitches between safety eyes will make the face look crowded; follow the eye placement note and leave a 6sc gap for balanced features.
✗ Pulling yarn too tightly when changing colors can distort the dress and body lines; maintain even tension at color changes and weave ends neatly to avoid bunching.
✗ Missing the BLO instruction for the dress area results in incorrect texture; be sure to work the specified round in BLO if you choose the red suit so the dress rows sit correctly.