🧢 Beautiful ✨ Detailed πŸ’ Adorable

Mike Wazowski Amigurumi Pattern

Mike Wazowski Amigurumi Pattern
4.0β˜… Rating
5-7 Hours Time Needed
1.5K Made This
βœ‚οΈ

Intermediate Level

Ideal for those with basic crochet experience, featuring slightly more advanced stitches and techniques to expand your skills.

⏱️

Weekend Treat

Takes 5-7 hours, making it an enjoyable project to finish over a couple of days.

🧸

Cute Companion

An adorable friend to cherish, handcrafted with love to bring comfort and joy for years to come.

About This Mike Wazowski Amigurumi Pattern

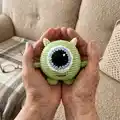
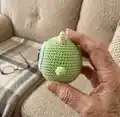
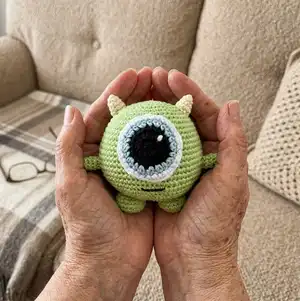
This pattern makes a small Mike Wazowski amigurumi measuring approximately 11 cm tall using 2 mm mercerized cotton. You will crochet the body as one piece, plus separate feet, hands, horns and a layered eye to sew on. It uses continuous rounds, simple increases and decreases, and a few color changes for the eye details.

Mike Wazowski Amigurumi Pattern crochet pattern - detailed view of completed project

Clear step-by-step rounds and assembly photos guide you through joining and finishing touches. Embroidery instructions add the final facial details for a charming finished toy.

Why You'll Love This Mike Wazowski Amigurumi Pattern

I absolutely love this pattern because it captures a lot of character with simple stitches and a tiny amount of yarn. I enjoyed designing the layered eye β€” it gives Mike his personality without complicated techniques. I love how quickly the project comes together, making it ideal for a weekend make or a thoughtful handmade gift. I hope you feel proud stitching up a tiny, expressive friend that brings smiles.

Mike Wazowski Amigurumi Pattern step 1 - construction progress Mike Wazowski Amigurumi Pattern step 2 - assembly progress Mike Wazowski Amigurumi Pattern step 3 - details and accessories Mike Wazowski Amigurumi Pattern step 4 - final assembly and finishing

Switch Things Up

I love changing yarn colors to make unique characters; try pastel greens or mint for a softer Mike look instead of bright green.

I sometimes use a slightly thicker yarn and a larger hook to make a chunkier, cuddlier versionβ€”experiment with weight to change size.

I also add tiny accessories like a crochet hat, bow tie, or felt props to personalize each amigurumi and tell a little story.

I often embroider different mouth expressions to change personalityβ€”try a smile, a surprised O, or a cute smirk for variety.

If you want a keychain, make a mini version using thinner yarn and smaller hook, then add a keyring loop before closing the head.

I like adding safety eyes for sturdiness in toy versions for older children, but the sewn layered eye here is great for durability and cuteness.

Try using variegated yarn for the eye ring to get subtle color shifts without changing yarns mid-round.

Consider adding wire armatures inside the hands if you want posable armsβ€”just be sure to secure wire ends safely inside stuffing.

For a unique finish, block the completed piece lightly (if your yarn allows) to even out stitches and smooth the surface.

I recommend experimenting with placement of the eye and mouth before sewing; pin pieces in place and take photos to compare looks.

Common Mistakes & How to Fix Them

βœ— Not using a stitch marker leads to lost round starts and misplaced increases; place a marker at the beginning of every round and move it up each round to stay aligned. βœ— Forgetting to stuff as you go causes lumps and misshapen sections when closing; stuff gradually during shaping and check firmness frequently for even filling. βœ— Changing colors without securing yarn ends can cause unraveling later; carry yarn neatly or weave and secure color changes before continuing the next rounds. βœ— Skipping stitch counts during increases or decreases results in mismatched shaping; count your stitches after each increase or decrease round to ensure accurate totals. βœ— Over-tightening your tension makes the amigurumi stiff and hard to join; keep a relaxed, consistent tension to allow smooth joining and sewing of parts.

Mike Wazowski Amigurumi Pattern

Make your own adorable Mike Wazowski amigurumi with this complete, photo-supported pattern. You will work in continuous rounds using 2.0 mm hook and mercerized cotton to create a compact, 11 cm tall toy. The pattern includes full round-by-round instructions for body, feet, hands, horns and the layered eye, plus clear assembly steps and embroidery details to finish the face. Perfect for gifting or adding to your handmade toy collection.

Intermediate 5-7 Hours

Materials Needed for Mike Wazowski Amigurumi Pattern

β€” Main Fabric

  • 01
    2 mm Yarn, 100% Mercerized Cotton - Green (main color), sufficient amount for body
  • 02
    2 mm Yarn, 100% Mercerized Cotton - Yellow (for horns), small amount
  • 03
    2 mm Yarn, 100% Mercerized Cotton - Black (for eye center and mouth), small amount
  • 04
    2 mm Yarn, 100% Mercerized Cotton - Blue (for eye ring), small amount
  • 05
    2 mm Yarn, 100% Mercerized Cotton - White (for eye highlight/ring), small amount

β€” Tools Required

  • 01
    Crochet hook 2.0 mm
  • 02
    Stitch marker
  • 03
    Pins
  • 04
    Wool needle
  • 05
    Stuffing (polyester fiberfill)
  • 06
    Scissors

Progress Tracker

0% Complete

β€” Body :

Round 1 :

Magic ring 8 sc (8 sc)

Round 2 :

8 inc (16 sc)

Round 3 :

(1 sc, 1 inc) x 8 (24 sc)

Round 4 :

(2 sc, 1 inc) x 8 (32 sc)

Round 5 :

(3 sc, 1 inc) x 8 (40 sc)

Round 6 :

1 sc in each of the 40 sc (40 sc)

Round 7 :

(4 sc, 1 inc) x 8 (48 sc)

Round 8 :

(5 sc, 1 inc) x 8 (56 sc)

Round 9 :

(6 sc, 1 inc) x 8 (64 sc)

Round 10-13 :

1 sc in each of the 64 sc (64 sc)

Round 14 :

(15 sc, 1 inc) x 4 (68 sc)

Round 15-16 :

1 sc in each of the 68 sc (68 sc)

Round 17 :

(16 sc, 1 inc) x 4 (72 sc)

Round 18-19 :

1 sc in each of the 72 sc (72 sc)

Round 20 :

(17 sc, 1 inc) x 4 (76 sc)

Round 21-24 :

1 sc in each of the 76 sc (76 sc)

Round 25 :

(2 sc, 1 dec) x 19 (57 sc)

Round 26 :

(1 sc, 1 dec) x 19 (38 sc)

Round 27 :

(2 sc, 1 dec) x 9, 1 dec (28 sc)

Round 28 :

(2 sc, 1 dec) x 7 (21 sc)

Info :

STUFF.

Round 29 :

(1 sc, 1 dec) x 7 (14 sc)

Round 30 :

7 dec (7 sc)

β€” Note :

Info :

Using a wool needle: Close the hole.

β€” Feet :

Info :

(Crochet two pieces using the green-colored yarn) Using a Crochet Hook 2.0 mm

Round 1 :

Magic ring 8 sc (8 sc)

Round 2 :

8 inc (16 sc)

Round 3 :

(1 sc, 1 inc) x 8 (24 sc)

Round 4-5 :

1 sc in each of the 24 sc (24 sc)

Round 6 :

12 dec (12 sc)

Info :

STUFF.

β€” Hands :

Info :

(Crochet two pieces using the green-colored yarn) Using a Crochet Hook 2.0 mm

Round 1 :

Magic ring 6 sc (6 sc)

Round 2-4 :

1 sc in each of the 6 sc (6 sc)

Info :

DON'T STUFF.

β€” Horns :

Info :

(Crochet two pieces using the yellow-colored yarn) Using a Crochet Hook 2.0 mm

Round 1 :

Magic ring 6 sc (6 sc)

Round 2 :

1 sc in each of the 6 sc (6 sc)

Round 3 :

(1 sc, 1 inc) x 3 (9 sc)

Round 4 :

1 sc in each of the 9 sc (9 sc)

Info :

STUFF.

β€” Eye :

Info :

(Crochet one piece starting to use the black-colored yarn) Using a Crochet Hook 2.0 mm

Round 1 :

Magic ring 8 sc (8 sc)

Round 2 :

8 inc hdc (16 hdc)

Round 3 :

(3 sc, 1 inc) x 4 (20 sc)

Info :

Change the black-colored yarn to the blue one

Round 4 :

(1 hdc, 1 inc) x 10 (30 hdc)

Info :

Change the blue-colored yarn to the white one

Round 5 :

(2 sc, 1 inc) x 10 (40 sc)

β€” Assembly :

Info :

NOTE: Begin to join. Using a wool needle:

Step 1 :

Join the eye to the body, starting on round number 8.

Step 2 :

Join the feet to the body.

Step 3 :

Join the hands to the body.

Step 4 :

Join the horns to the body.

Step 5 :

Embroider the detail in the eye using the white-colored yarn.

Step 6 :

Embroider the mouth using the black-colored yarn.

Assembly Instructions

  • Join the eye to the body using a wool needle, starting at round 8 and sewing evenly around the eye circle so it sits centered on the face.
  • Position and sew the two feet to the bottom of the body, spacing them evenly to allow the amigurumi to stand, and sew securely with matching green yarn.
  • Attach the hands on either side of the body at the level shown in photos, sewing through the body rounds and securing ends inside before weaving in.
  • Sew the two horns to the top of the head, spacing them symmetrically and stuffing lightly before closing the base of each horn.
  • Embroider the white highlight and eye details on the eye surface using the white yarn, securing the ends on the inside of the eye piece.
  • Embroider the mouth using black-colored yarn centered under the eye, keeping the stitches short and even to match the reference photo.

Important Notes

  • πŸ’‘Use a wool needle to close the final hole for a neat finish and secure end; this helps hide the tail and shape the piece.
  • πŸ’‘Begin joining the eye to the body at round 8 so the eye sits in the correct position and lines up with the body shaping.
  • πŸ’‘Do not stuff the hands; only stuff the feet, horns and body sections where indicated to maintain correct proportions.
  • πŸ’‘Use stitch markers to mark the start of rounds and any placement points for eyes, feet, and hands to ensure symmetry.
  • πŸ’‘Stuff gradually and evenly to avoid lumps and to maintain the round shape of the body and smooth joins.

Thank you for choosing this Mike Wazowski amigurumi pattern β€” I hope it brings you joy and a smile every time you make it. This little toy is compact, squishy, and full of character, perfect for gifting or decorating your shelf. Share your finished photos and enjoy every round of stitching! 🧢😊

You ask,

we answer.

FAQs

What size will the finished piece be?

The finished amigurumi measures approximately 11 cm tall when using the recommended 2 mm mercerized cotton yarn and 2.0 mm hook.

Can I use different yarn weights for this pattern?

Yes, you can use different yarn weights, but this will affect the final size; choose an appropriate hook for your yarn and expect size changes.

Do I need prior crochet experience for this pattern?

This pattern is rated intermediate, so basic knowledge of single crochet, half double crochet, increases and decreases is recommended.

How long does this project typically take to complete?

Most crocheters complete this project in 5-7 hours, though time may vary based on experience level and working pace.