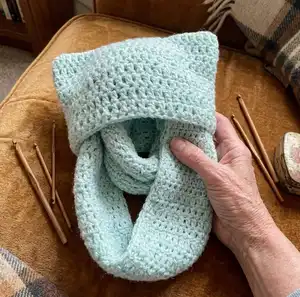
Make a cozy kitty scarf with an off-center cat-ear hat built into one side. This simple crochet project uses basic double crochet rows and seaming to create a wearable set that is warm and playful. You can customize width, yarn, and length to suit your style. Perfect as a quick handmade gift or a fun accessory for yourself.
Progress Tracker
0% Complete
— Scarf :
Info :
Chain your desired scarf width. I did approx. 22cm / 20 stitches.
Round 1 :
Do two more chains (these are your turning chains). Do one dc into the third stitch from hook (black arrow). Do one dc into each chain.
Info :
At the start of each row do two chains and turn your work. It does not matter, whether you count the turning chain as a stitch, this is up to your personal preference. I do not count my turning chains as stitches.
Round 2 :
At the start of each row do two chains and turn your work. Do one dc into each stitch across (20).
Round 3 :
At the start of each row do two chains and turn your work. Do one dc into each stitch across (20).
Round 4 :
At the start of each row do two chains and turn your work. Do one dc into each stitch across (20).
Round 5 :
At the start of each row do two chains and turn your work. Do one dc into each stitch across (20).
Round 6 :
At the start of each row do two chains and turn your work. Do one dc into each stitch across (20).
Round 7 :
At the start of each row do two chains and turn your work. Do one dc into each stitch across (20).
Round 8 :
At the start of each row do two chains and turn your work. Do one dc into each stitch across (20).
Round 9 :
At the start of each row do two chains and turn your work. Do one dc into each stitch across (20).
Round 10 :
At the start of each row do two chains and turn your work. Do one dc into each stitch across (20).
Round 11 :
At the start of each row do two chains and turn your work. Do one dc into each stitch across (20).
Round 12 :
At the start of each row do two chains and turn your work. Do one dc into each stitch across (20).
Round 13 :
At the start of each row do two chains and turn your work. Do one dc into each stitch across (20).
Round 14 :
At the start of each row do two chains and turn your work. Do one dc into each stitch across (20).
Round 15 :
At the start of each row do two chains and turn your work. Do one dc into each stitch across (20).
Round 16 :
At the start of each row do two chains and turn your work. Do one dc into each stitch across (20).
Round 17 :
At the start of each row do two chains and turn your work. Do one dc into each stitch across (20).
Round 18 :
At the start of each row do two chains and turn your work. Do one dc into each stitch across (20).
Round 19 :
At the start of each row do two chains and turn your work. Do one dc into each stitch across (20).
Round 20 :
At the start of each row do two chains and turn your work. Do one dc into each stitch across (20).
Round 21 :
At the start of each row do two chains and turn your work. Do one dc into each stitch across (20).
Round 22 :
At the start of each row do two chains and turn your work. Do one dc into each stitch across (20).
Round 23 :
At the start of each row do two chains and turn your work. Do one dc into each stitch across (20).
Round 24 :
At the start of each row do two chains and turn your work. Do one dc into each stitch across (20).
Round 25 :
At the start of each row do two chains and turn your work. Do one dc into each stitch across (20).
Round 26 :
At the start of each row do two chains and turn your work. Do one dc into each stitch across (20).
Round 27 :
At the start of each row do two chains and turn your work. Do one dc into each stitch across (20).
Round 28 :
At the start of each row do two chains and turn your work. Do one dc into each stitch across (20).
Round 29 :
At the start of each row do two chains and turn your work. Do one dc into each stitch across (20).
Round 30 :
At the start of each row do two chains and turn your work. Do one dc into each stitch across (20).
Round 31 :
At the start of each row do two chains and turn your work. Do one dc into each stitch across (20).
Round 32 :
At the start of each row do two chains and turn your work. Do one dc into each stitch across (20).
Round 33 :
At the start of each row do two chains and turn your work. Do one dc into each stitch across (20).
Round 34 :
At the start of each row do two chains and turn your work. Do one dc into each stitch across (20).
Round 35 :
At the start of each row do two chains and turn your work. Do one dc into each stitch across (20).
Round 36 :
At the start of each row do two chains and turn your work. Do one dc into each stitch across (20).
Round 37 :
At the start of each row do two chains and turn your work. Do one dc into each stitch across (20).
Round 38 :
At the start of each row do two chains and turn your work. Do one dc into each stitch across (20).
Round 39 :
At the start of each row do two chains and turn your work. Do one dc into each stitch across (20).
Round 40 :
At the start of each row do two chains and turn your work. Do one dc into each stitch across (20).
Round 41 :
At the start of each row do two chains and turn your work. Do one dc into each stitch across (20).
Round 42 :
At the start of each row do two chains and turn your work. Do one dc into each stitch across (20).
Round 43 :
At the start of each row do two chains and turn your work. Do one dc into each stitch across (20).
Round 44 :
At the start of each row do two chains and turn your work. Do one dc into each stitch across (20).
Round 45 :
At the start of each row do two chains and turn your work. Do one dc into each stitch across (20).
Round 46 :
At the start of each row do two chains and turn your work. Do one dc into each stitch across (20).
Round 47 :
At the start of each row do two chains and turn your work. Do one dc into each stitch across (20).
Round 48 :
At the start of each row do two chains and turn your work. Do one dc into each stitch across (20).
Round 49 :
At the start of each row do two chains and turn your work. Do one dc into each stitch across (20).
Round 50 :
At the start of each row do two chains and turn your work. Do one dc into each stitch across (20).
Round 51 :
At the start of each row do two chains and turn your work. Do one dc into each stitch across (20).
Round 52 :
At the start of each row do two chains and turn your work. Do one dc into each stitch across (20).
Round 53 :
At the start of each row do two chains and turn your work. Do one dc into each stitch across (20).
Round 54 :
At the start of each row do two chains and turn your work. Do one dc into each stitch across (20).
Round 55 :
At the start of each row do two chains and turn your work. Do one dc into each stitch across (20).
Round 56 :
At the start of each row do two chains and turn your work. Do one dc into each stitch across (20).
Round 57 :
At the start of each row do two chains and turn your work. Do one dc into each stitch across (20).
Round 58 :
At the start of each row do two chains and turn your work. Do one dc into each stitch across (20).
Round 59 :
At the start of each row do two chains and turn your work. Do one dc into each stitch across (20).
Round 60 :
At the start of each row do two chains and turn your work. Do one dc into each stitch across (20).
Round 61 :
At the start of each row do two chains and turn your work. Do one dc into each stitch across (20).
Round 62 :
At the start of each row do two chains and turn your work. Do one dc into each stitch across (20).
Round 63 :
At the start of each row do two chains and turn your work. Do one dc into each stitch across (20).
Round 64 :
At the start of each row do two chains and turn your work. Do one dc into each stitch across (20).
Round 65 :
Do rows with dc until you reach your desired scarf length. Fasten off. I did 130cm / 65 rows.
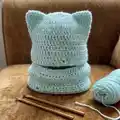
— Cat Hat :
Info :
The cat hat is worked off center. That way, the scarf will be (approximately) the same length on both sides when wearing it.
Info :
Mark the middle of the scarf with a stitch marker.
Info :
Attach a second stitch marker approx. 11cm away. It does not matter, whether to the left or right.
Info :
Attach yarn at the second stitch marker. Start working dc into the side of the scarf, away from the first stitch marker. I do 2 stitches per row.
Info :
Do dc until you reach approx. 28cm. I did 28 stitches.
Round 1 :
Work 2 chains at the start of the row, turn, then dc across the hat width (28).
Round 2 :
Work 2 chains at the start of the row, turn, then dc across the hat width (28).
Round 3 :
Work 2 chains at the start of the row, turn, then dc across the hat width (28).
Round 4 :
Work 2 chains at the start of the row, turn, then dc across the hat width (28).
Round 5 :
Work 2 chains at the start of the row, turn, then dc across the hat width (28).
Round 6 :
Work 2 chains at the start of the row, turn, then dc across the hat width (28).
Round 7 :
Work 2 chains at the start of the row, turn, then dc across the hat width (28).
Round 8 :
Work 2 chains at the start of the row, turn, then dc across the hat width (28).
Round 9 :
Work 2 chains at the start of the row, turn, then dc across the hat width (28).
Round 10 :
Work 2 chains at the start of the row, turn, then dc across the hat width (28).
Round 11 :
Work 2 chains at the start of the row, turn, then dc across the hat width (28).
Round 12 :
Work 2 chains at the start of the row, turn, then dc across the hat width (28).
Round 13 :
Work 2 chains at the start of the row, turn, then dc across the hat width (28).
Round 14 :
Work 2 chains at the start of the row, turn, then dc across the hat width (28).
Round 15 :
Work 2 chains at the start of the row, turn, then dc across the hat width (28).
Round 16 :
Work 2 chains at the start of the row, turn, then dc across the hat width (28).
Round 17 :
Work 2 chains at the start of the row, turn, then dc across the hat width (28).
Round 18 :
Do rows with dc until your hat part is approx. 36cm long. I did 18 rows.
Info :
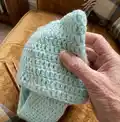
Fold the hat part in half. Sl st together along sides (dotted lines). Fasten off. Turn hat inside out.
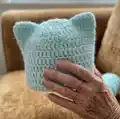
This cozy Kitty Scarf + Cat Hat set is a quick and playful project you will love to wear and gift. 🧣
Make it in bold or soft colors to match your style and enjoy the plush texture from holding two strands together. 🐾
Happy crocheting and stay toasty in your new feline-inspired set! ✨