About This Bumble Blossom Amigurumi Pattern
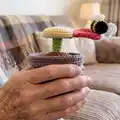
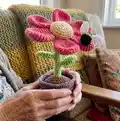
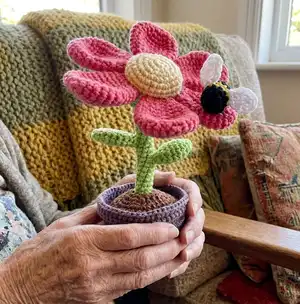
This pattern creates a potted crochet flower with six sculpted petals, a textured center, leaves, a stem you can reinforce, and a tiny bumblebee. Each element is worked in the round using sport-weight yarn for fine detail and a neat finish. Clear rounds and helpful photos guide your assembly so the finished piece stands beautifully.
You will learn shaping for petals and stems plus sewing and finishing techniques for a stable pot and realistic look. Includes step-by-step assembly directions and suggestions for reinforcing the stem with wire.
Why You'll Love This Bumble Blossom Amigurumi Pattern
I absolutely love this pattern because it combines playful design with small, satisfying crocheting sessions that produce a polished display piece. I enjoy shaping the petals so they sit naturally around the center, and the tiny bumblebee is such a charming finishing touch. The project is versatile — you can experiment with colors and yarns to create different moods. It also teaches useful assembly techniques for attaching components securely so your flower stands well.
Switch Things Up
I love experimenting with different color palettes for this pattern; try pastel tones for a soft nursery piece or bold brights for a playful gift.
I often change the yarn weight and hook size to make a family of flowers in various sizes — larger yarn and a bigger hook make a chunky, cozy version.
I sometimes add wire inside the stem so I can bend the flower slightly for a more dynamic display; it helps the stem hold poses.
I enjoy embroidering small veins onto the leaves or adding tiny French knot beads to the center for extra texture and detail.
For a modern twist, change the pot color or use variegated yarns for the petals to get a marbled effect that catches the eye.
I make the bumblebee removable by sewing on a snap or small Velcro patch so it can be repositioned or replaced.
I occasionally stitch extra petals or reduce the petal count to alter the flower silhouette and experiment with different spacing and fullness.
If I'd like a more rustic look, I choose natural-toned yarn and a burlap-wrapped cardboard base for the pot to add earthy texture.
I also sometimes add tiny accessories like a crocheted watering can or a keyring attachment to turn the flower into a functional keychain or bag charm.
When gifting, I customize with initials or tiny heart appliques on the pot to make each piece personal and memorable.
Common Mistakes & How to Fix Them
✗ Working stitches loosely will make the stem and petals floppy; maintain tight amigurumi tension and add optional wire for reinforcement.
✗ Forgetting to stuff the stem firmly causes the flower not to stand upright; stuff gradually and tightly and consider adding wire for extra support.
✗ Not counting rounds precisely leads to mismatched petals or an off-center pot rim; count after each round and mark key rounds with a stitch marker.
✗ Re-attaching yarn to crochet the dirt top incorrectly can flip the wrong side out; insert your hook from the inside to the outside as instructed to get the correct orientation.
✗ Sewing petals too far apart will leave gaps around the center; pin the petals in place and sew along the designated rounds so they fit closely together.