About This Harry Potter Amigurumi Pattern
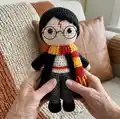
This pattern makes a Harry Potter inspired amigurumi approximately 20-30 cm tall depending on yarn and hook choice. It includes full instructions for arms, legs, body, head, hair, scarf and cloak. The pattern uses simple amigurumi shaping techniques plus small surface embroidery for the lightning scar.
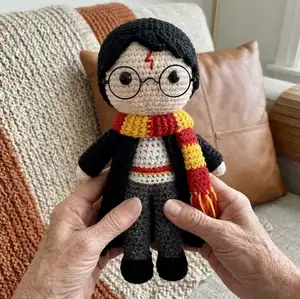
Perfect for gifting or display, the pattern includes color change instructions and finishing steps for accessories such as glasses and a striped scarf. You will also find clear placement notes for safety eyes and assembly tips.
Why You'll Love This Harry Potter Amigurumi Pattern
I absolutely love this pattern because it brings a beloved character to life in a small, handmade form. I enjoy the mix of amigurumi basics with little costume details like the striped scarf and cloak that give the doll real personality. Working the hair and embroidering the lightning scar is so satisfying — it adds character with just a few simple stitches. The construction is versatile so I can adjust yarn and hook size to make mini or larger versions depending on my mood.
Switch Things Up
I love customizing this amigurumi by changing yarn colors to create different outfits or Hogwarts houses — swapping the scarf colors instantly changes the theme.
I sometimes use bulky yarn and a larger hook to make a chunkier, cuddlier version, or thin sport yarn and a smaller hook for a miniature keychain sized doll.
I like to embroider different facial expressions or add blush with a tiny bit of yarn or fabric paint to give each doll its own personality.
Try making the cloak removable by adding small snaps or button loops so you can swap outfits and display different looks.
I often replace safety eyes with embroidered eyes for a completely soft, child-safe toy option and an extra cozy style.
For a vintage look, choose muted autumnal yarn shades and distress the edges of the scarf slightly for character.
I like to add tiny accessories like a felt wand, a crocheted book, or wired glasses made from craft wire for extra detail and play value.
To make a more posable doll, carefully insert flexible wire into the limbs before stuffing and secure the ends so the doll can hold small props.
Experiment with hair by using loop-stitch fringe, faux fur yarn, or attaching crocheted bangs for different hairstyles and ages of the character.
If you want to mass-produce for gifts, consider simplifying the scarf to fewer stripes or using pre-made doll glasses to save finishing time while keeping the core charm intact.
Common Mistakes & How to Fix Them
✗ Skipping the safety eye placement instructions can leave the face off-centre; place and check eyes between the specified rounds and ensure they are 8 stitches apart before securing.
✗ Changing yarn colors without finishing the stitch can leave loose ends; carry the yarn neatly or weave in ends after the round to keep the surface smooth.
✗ Forgetting to stuff as you go leads to lumps and misshapen limbs; stuff gradually and evenly while shaping each piece to maintain smooth contours.
✗ Not counting stitches after increases and decreases may create uneven shaping; count your stitches at the end of each round, especially after increases and decreases to stay on track.