About This Duck No Sew Amigurumi Pattern
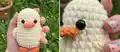
This pattern creates a small, no-sew duck amigurumi using super bulky (category 6) yarn for a plush, squishy finish. The body is crocheted from the body up to the head in continuous rounds so sewing is minimal. Includes instructions for yellow duck, mallard color variation, legs, speculum (beak), and tips for finishing.
Designed with clear round-by-round instructions and helpful photo references to guide you. Ideal for making quick handmade gifts or a charming collection of birds.
Why You'll Love This Duck No Sew Amigurumi Pattern
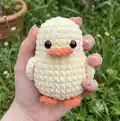
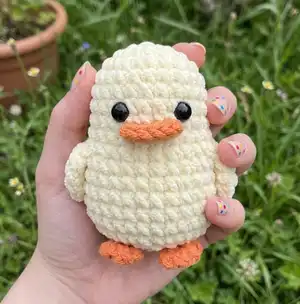
I absolutely love this pattern because it creates a cheerful little duck with very little sewing required, which saves time and keeps the finish neat. I enjoy how the super bulky yarn gives the toy a soft, plush feel that is satisfying to hold and quick to crochet. The no-sew approach makes assembly approachable while still allowing for small details like the feet and beak to shine. I also love that you can easily customize colors to make a yellow duck, a mallard, or other friendly variations.
Switch Things Up
I love how easily you can change colors to create different characters — swap the yellow for pastel shades to make a nursery-friendly duck or use green and brown for a mallard version.
I often change the yarn weight and hook size to make a tiny keychain version or a larger cuddly toy; try thin yarn with smaller hooks for minis and bulky yarn for a chunky friend.
I sometimes embroider eyelashes or eyebrows to give each duck a unique expression, which drastically changes the personality of the piece.
Try different eye sizes and positions to experiment with cuteness: larger eyes placed slightly lower create a very playful look.
I enjoy adding tiny crocheted props like a hat, scarf, or tiny flower to make gift-ready characters that feel special and personalized.
For a sturdier toy I add a small amount of felt inside the base before stuffing or place safety eyes with washers for extra durability when the toy is handled by children.
Consider using variegated or speckled yarns for textured, rustic finishes that look adorable on the mallard or rooster designs.
I sometimes make a set of different birds in matching colors to create a charming display or mobile; matching beaks and feet colors ties the collection together.
If you want posable features, I suggest threading thin wire into the wings or legs before stuffing to give gentle poseability while keeping the outside looking seamless.
I recommend experimenting with different yarns for seasonal editions — think pastel spring colors or warm autumn tones to make delightful themed gifts.
Common Mistakes & How to Fix Them
✗ Skipping stitch markers during rounds can make it hard to know where each round ends; place a marker at the start of every round to maintain correct stitch counts.
✗ Waiting until the end to stuff the body leads to uneven shaping; stuff gradually as you decrease to keep the shape smooth and consistent.
✗ Cutting yarn too early when making legs or feet results in short tails for attachment; keep the yarn attached for legs and slip stitch them into the body for secure placement.
✗ Not counting increases and decreases precisely will change your stitch count and shape; recount after each increase or decrease round to ensure accuracy.