About This Duck and Goose Trinket Tray Amigurumi Pattern
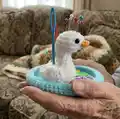
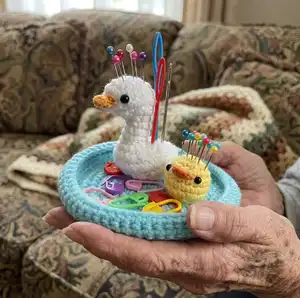
This pattern creates a small crocheted trinket tray that holds a tiny goose and a mini duck, serving as a pin cushion and decorative dish. The design uses Type 4 yarn and a 3.0mm hook to produce compact, well-shaped amigurumi pieces. Clear, round-by-round instructions guide you through each piece: the tray base, goose body and beak, and the mini duck body. Ideal for using scrap yarn and experimenting with tiny embellishments.
You will learn continuous round techniques and shaping for rounded amigurumi bodies, plus how to attach small features securely. The finished tray is functional and decorative, perfect for craft rooms or gifts.
Why You'll Love This Duck and Goose Trinket Tray Amigurumi Pattern
I absolutely love this pattern because it combines a practical trinket tray with two sweet amigurumi companions that feel alive with very little work. I enjoy how quickly the tray comes together using continuous rounds, and how the small shaping rounds create expressive little bodies for the duck and goose. I also love that you can personalize colors and finishes to match your space or use up leftover yarn. Making this gives me a satisfying, fast project with a lovely usable result to display or gift.
Switch Things Up
I love how easily you can switch colors to create a whole family of ducks and geese; try pastel shades for a soft nursery look or bright colors for a playful set.
I sometimes change yarn weight and hook size to make a larger tray and larger birds; use a bulky yarn with a larger hook for a chunkier, more loved-feel result.
I often replace safety eyes with embroidered eyes or tiny felt circles for a more child-safe version when gifting to families with small children.
For a vintage look I add surface embroidery to the tray rim or tiny embroidered cheeks to the birds to add personality and charm.
I like to add a small loop to the back of the tray using a chain so it can be hung on a pegboard or wall as a novelty display, making the piece both decorative and functional.
Try making the birds in different species by changing beak shape or ear/crest details—simple stitch changes can make a swan, chick, or playful fantasy bird.
I sometimes experiment with felt or leather beaks glued on for a different texture and sturdiness, especially if the piece will be handled often.
Consider adding a removable felt pad inside the tray to protect pins and give a softer surface; this also allows for cleaning or replacement later.
If you want more stability, add a small cardboard disc or thin plastic piece inside the base before finishing to help the tray keep its shape under frequent pin use.
I recommend trying metallic or variegated yarn for the tray rim to give a subtle sparkle or texture contrast that makes the little scene pop.
Common Mistakes & How to Fix Them
✗ Skipping stitch markers during continuous rounds can lead to losing the start of the round; place a marker at the first stitch and move it each round to maintain correct stitch placement.
✗ Not stuffing evenly causes lumps and uneven shaping in the goose and duck bodies; stuff gradually in small amounts and shape as you go for a smooth finish.
✗ Pulling stitches too tightly during increases and decreases makes the fabric stiff and the shape distorted; keep a consistent, moderate tension to preserve flexibility and shape.
✗ Placing safety eyes without measuring can make facial features look uneven; position eyes between the specified rounds and count stitches to space them symmetrically.
✗ Forgetting to fasten off and leave a long tail will make sewing pieces to the tray difficult; leave a long tail when fastening off for neat, secure sewing.
✗ Ignoring the 'neater' side orientation of the tray rim can produce the wrong curve direction; ensure the neater side is facing the inside so rims naturally curve inwards.