🧢 Beautiful ✨ Detailed πŸ’ Adorable

Desert Crochet Cactus Amigurumi Pattern

Desert Crochet Cactus Amigurumi Pattern
3.9β˜… Rating
2-4 Hours Time Needed
1.4K Made This
βœ‚οΈ

Intermediate Level

Ideal for those with basic crochet experience, featuring slightly more advanced stitches and techniques to expand your skills.

⏱️

Bite-Sized Project

Finishes in 2-4 hoursβ€”perfect for an afternoon of creative relaxation.

🎁

Tiny Treasure

Small, sweet, and gift-worthy creations that fit perfectly in the palm of your hand with detailed charm.

About This Desert Crochet Cactus Amigurumi Pattern

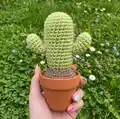
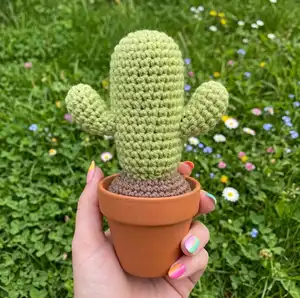
This pattern creates a small, stuffed crochet cactus complete with a crocheted soil insert and optional flowers or arms. You will use DK weight yarn and a 3.5mm hook to make a compact piece that fits in a 6cm terracotta pot. The instructions include rounds for shaping, an invisible decrease technique, and simple sewing steps to finish.

Desert Crochet Cactus Amigurumi Pattern crochet pattern - detailed view of completed project

Clear, step-by-step rounds guide you from the magic ring through finishing and assembly. Optional variations show how to make a tall cactus and small decorative flowers.

Why You'll Love This Desert Crochet Cactus Amigurumi Pattern

I absolutely love this pattern because it turns simple stitches into a very charming little cactus that fits in your hand. I enjoy how quickly the soil and plant come together, making it rewarding to finish in one sitting. The design is versatile so I can make several different shapes and add tiny flowers for variety. I also love that it uses basic techniques with a few clever shaping tricks, so it stays interesting without being overwhelming.

Desert Crochet Cactus Amigurumi Pattern step 1 - construction progress Desert Crochet Cactus Amigurumi Pattern step 2 - assembly progress Desert Crochet Cactus Amigurumi Pattern step 3 - details and accessories Desert Crochet Cactus Amigurumi Pattern step 4 - final assembly and finishing

Switch Things Up

I love how easy it is to customize this cactusβ€”try different greens to create a collection with subtle color variations.

I often swap DK yarn for a heavier weight to make a chunkier version that looks extra cuddly on a shelf.

For a summery look I use pastel yarns and tiny white flowers instead of pink, which changes the whole vibe quickly.

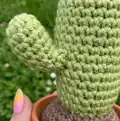
I sometimes insert a short pipe cleaner into the arms so I can pose them into playful shapes after sewing them in.

If I want a taller cactus I follow the flat panel method and make the panel longer before drawing it closed.

I also add embroidered lines or french knot 'spines' for textureβ€”just use a darker green or brown embroidery thread.

To make a keychain-sized version I use thinner yarn and a smaller hook, and add a keyring before stuffing the final piece.

Want a potted trio? I make three different sizes using the same soil pattern and vary the increases to get small, medium and large cacti.

I sometimes glue a small glass pebble into the pot before placing the crochet soil to keep it stable in display.

For gifting I attach a tiny tag and wrap the pot in clear cellophane with ribbonβ€”the mini cactus makes an instant delightful present.

Common Mistakes & How to Fix Them

βœ— Working without a stitch marker can cause you to lose track of the start of the round; place a marker at the first stitch and move it each round. βœ— Forgetting to stuff as you go can make closing the top difficult and lumpy; begin stuffing early and add stuffing gradually to maintain shape. βœ— Skipping the invisible decrease instruction will change the look of your cactus; perform decreases in the front loops only for a neat invisible finish. βœ— Not checking the soil circumference against your pot can make the soil too large or small; measure inside the pot and continue increasing until it fits just inside. βœ— Ending rounds inconsistently (slip stitch vs continuous rounds) can cause uneven edges; follow the pattern's round endings and keep consistent tension throughout.

Desert Crochet Cactus Amigurumi Pattern

Create a charming mini desert cactus you can display in a tiny terracotta pot. This pattern walks you through making the soil, a cuddly cactus body, optional arms and flowers, and simple assembly steps. You will enjoy quick shaping techniques and a compact, gift-ready finished piece. Perfect for sprucing up a desk, shelf, or gifting to a friend.

Intermediate 2-4 Hours

Materials Needed for Desert Crochet Cactus Amigurumi Pattern

β€” Main Fabric

  • 01
    Yarn A: Brown DK weight yarn - approximately 20g for the soil
  • 02
    Yarn B: Green DK weight yarn - approximately 20g for the cactus body
  • 03
    Yarn C: Small quantity of pink or white DK weight yarn - for flowers (optional)
  • 04
    Yarn D: (used as flower color in Round 2 of flowers) - small quantity of contrasting DK
  • 05
    Small Terracotta Plant Pot – 6cm x 6.8cm x 4cm (used as display and sizing reference)

β€” Tools Required

  • 01
    US 4 (3.5mm) Crochet Hook
  • 02
    Stitch marker
  • 03
    Sewing Needle
  • 04
    Acrylic toy stuffing
  • 05
    Scissors
  • 06
    Small Terracotta Plant Pot – 6cm x 6.8cm x 4cm
  • 07
    Pipe cleaner (optional for bendable arms)

Progress Tracker

0% Complete

β€” Soil :

Round 1 :

MR 6

Round 2 :

*Inc (12)

Round 3 :

*1 SC, Inc (18)

Round 4 :

1 SC, *Inc, 2 SC until last stitch, 1 SC (24)

Round 5 :

*3 SC, Inc (30)

Round 6 :

2 SC, *Inc, 4 SC until last 2 stitches, 2 SC (36)

Info :

Note: If your pot is larger continue increasing in this way until the circumference of the soil fits just inside the pot as pictured below.

Round 7-15 :

SC around (36)

Info :

Note: If your pot is larger continue until soil fits just inside the pot as pictured below. Begin stuffing your cactus, continue stuffing as you go.

Round 16 :

2 SC, *Dec, 4 SC until last 2 stitches, 2 SC (30)

Round 17 :

*3 SC, Dec (24)

Round 18 :

1 SC *Dec, 2 SC until last stitch, 1 SC (18)

Round 19 :

*1 SC, Dec (12)

Round 20 :

*Dec (6)

Info :

FO.

β€” Cactus Body :

Round 1 :

MR 6 (6)

Round 2 :

*Inc (12)

Round 3 :

*1 SC, Inc (18)

Round 4 :

1 SC, *Inc, 2 SC until last stitch, 1 SC (24)

Round 5-19 :

SC around (24)

Round 20 :

1 SC *Dec, 2 SC until last stitch, 1 SC (18)

Info :

FO – leave tail for sewing.

Info :

Stuff firmly.

β€” Cactus Arms (Make 2) :

Round 1 :

MR 6 (6)

Round 2 :

*Inc (12)

Rounds 3-8 :

SC around (12)

Round 9 :

(for this last row stop working in rounds) turn and do not CH, SC 8.

Info :

FO – leave tail for sewing

Info :

Lightly stuff.

Info :

If you want the arms to have more of a bend, fold a short piece of pipe cleaner so it is the length of the arm. Place inside with the stuffing.

β€” Assembly :

Info :

Sew the body of the cactus to the soil at approximately round three of the soil pattern.

Info :

To sew the arms to the cactus. Place the arms with pins to the body approximately 6 rounds up from the bottom of the body of the cactus and on opposite sides.

Info :

Place the arms facing upwards, so row 9 is facing downwards.

Info :

Sew the arm of the cactus to the body of the cactus. If you have used pipe cleaner, once sewn in place bend the pipe cleaner to create an upwards curve.

Info :

Sew to the soil.

β€” Tall Cactus (Flat Panel Method) :

Info :

Using yarn B:

Instruction :

CH 24

Row 1 :

In 2nd Loop from the hoop, SC, repeat for remaining 22 stitches, CH1 turn

Row 2 :

In 2nd loop from the hook, SC in the back looks only for all 23 stitches, CH 1 turn

Instruction :

Repeat row 2 until piece measures 11cm.

Info :

Weave through one side of the cactus, drawstring close as pictured

Info :

Sew up the side of the cactus by crocheting through the stem of the first row and the back loop of the last row.

Info :

Stuff firmly.

Info :

Weave the other side of the cactus as above and drawstring to close.

Info :

Sew to the soil.

β€” Flowers (Optional) :

Info :

Using Yarn C:

Round 1 :

MR 6

Info :

Change to Yarn D:

Round 2 :

SS to the first stitch, in the same stitch: 2 CH, 2 TR, 1 DC. For the remaining 5 stitches: SS to the next stitch, 2 CH 2 TR, 1 DC. SS to the first stitch.

Info :

FO.

Assembly Instructions

  • Sew the body of the cactus to the soil at approximately round three of the soil pattern.
  • Position the arms on either side of the body approximately 6 rounds up from the bottom and pin in place before sewing for accurate placement.
  • Place the arms facing upwards so the final arm row (row 9) is facing downwards, then sew securely to the body.
  • If you used pipe cleaner in the arms, sew the arms into place first then bend the pipe cleaner to create a natural upward curve.
  • Weave in all ends and tuck tails into the soil before placing the completed cactus inside the terracotta pot.

Important Notes

  • πŸ’‘This pattern uses American crochet terminology and the invisible decrease is worked in the front loops only.
  • πŸ’‘If you are not familiar with the Magic Ring technique you can replace MR with 2 Chains and work into the 2nd chain.
  • πŸ’‘Use stitch markers to mark the beginning of each round and keep track of increases and decreases for even shaping.
  • πŸ’‘Stuff gradually while shaping to avoid lumps and to maintain a smooth silhouette for the cactus.

This adorable Desert Crochet Cactus makes a perfect small handmade gift to brighten any desk or shelf. 🌡 The compact design is quick to make and easy to customize with tiny flowers or bendable arms. 🎁 Enjoy the processβ€”one little cactus can bring a lot of handmade charm to your space. 🧢

You ask,

we answer.

FAQs

What size will the finished piece be?

The finished cactus measures approximately 10-12 cm tall (depending on variation) when using DK yarn and a 3.5mm hook, and fits a small 6cm terracotta pot.

Can I use different yarn weights for this pattern?

Yes, you can change yarn weight to alter the final size; use an appropriate hook for your yarn and expect the finished cactus to be larger with bulkier yarn or smaller with lighter yarn.

Do I need prior crochet experience for this pattern?

This pattern is rated intermediate, so basic knowledge of single crochet, increases, decreases and working in rounds is recommended for best results.

How long does this project typically take to complete?

Most crocheters complete the cactus in 2-4 hours, depending on experience and whether you make additional arms, flowers, or variations.