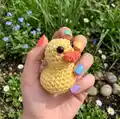
About This Daisy The Duck Amigurumi Pattern
This pattern creates a small, hand-sized duck amigurumi named Daisy with a rounded body and a tiny stitched beak. It uses simple single crochet, increases and decreases to shape the body and a small rectangular beak to sew on. The finished duck is compact and travel-friendly, perfect to make as gifts or keychain charms. Clear instructions and helpful shaping notes are included to guide you.
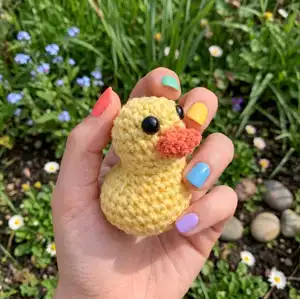
Worked in 4ply yarn with a 3.5mm hook, the duck finishes at approximately 4cm x 3cm x 4cm. The pattern includes materials, stitch explanations, full round-by-round instructions, and placement notes for eyes and beak.
Why You'll Love This Daisy The Duck Amigurumi Pattern
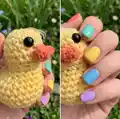
I absolutely love this pattern because it takes a few basic techniques and turns them into a delightful little character you can finish in an afternoon. I enjoy how compact and portable Daisy is — she is perfect for gifting or for using as a cheerful desk companion. The shaping is simple but effective, and I love seeing how a few increases and decreases create such a recognizable duck silhouette. Stitching the tiny beak on is a satisfying detail that brings the whole piece to life.
Switch Things Up
I love customizing this pattern by changing the yarn color to create different duck personalities; a pastel yellow creates a soft look while bright yellow makes a cheery toy.
You can make Daisy larger or smaller by switching yarn weight and adjusting hook size — bulky yarn gives a chunky version while fingering weight makes a tiny charm.
I often substitute safety eyes with French knots or embroidered eyes for a more baby-safe toy.
Try different eye sizes or spacing to change the duck's expression; moving eyes slightly forward or back alters the face a lot.
For a keychain, stitch a small loop into the top before finishing and use embroidery floss for durability.
Add tiny accessories like a crocheted scarf, a felt bow, or a small hat to give each duck unique character.
Experiment with textured stitches on the body for a fluffy look, such as using a boucle yarn or a loop stitch for novelty effect.
I sometimes use a contrasting color for the tail or a different shade of yellow for a vintage look.
To make the beak neater, embroider a little mouth line after sewing the beak on to emphasize the smile.
If you want a weighted base for better stability, insert a small amount of plastic pellets into a pouch at the back before stuffing, ensuring it is securely enclosed.
Common Mistakes & How to Fix Them
✗ Forgetting to place the safety eyes between rows 4 and 5; insert the eyes before stuffing to ensure correct placement and symmetry.
✗ Under-stuffing the back end which causes the duck to overbalance; add extra stuffing to the back end to keep Daisy sitting upright.
✗ Skipping stitch counts during rounds which leads to incorrect shaping; count stitches at the end of each round to confirm accuracy.
✗ Pulling stitches too tight when sewing the beak on which distorts the head shape; use gentle tension and stitch slowly to maintain shape and alignment.