About This Cute Hulk Amigurumi Pattern
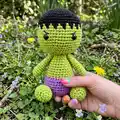
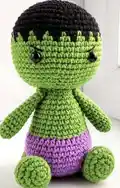
This pattern creates a small, 13 cm tall Hulk-inspired amigurumi using YarnArt Jeans yarn in green, purple and black. You will work in continuous spirals and follow clear round-by-round instructions for the body, head, arms, and legs. The pattern includes tips for color changes, stuffing, and finishing touches to bring your little hero to life.
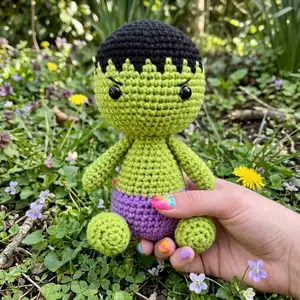
Ideal for beginners with basic crochet skills, it focuses on single crochet shaping and simple decreases. The finished toy is sturdy, cute, and perfect for gifting or display.
Why You'll Love This Cute Hulk Amigurumi Pattern
I absolutely love this pattern because it turns simple stitches into a charming character with a lot of personality. I enjoy how the color change detail at the hairline gives the toy instant character with very little extra work. The pattern is compact and relaxing to make, which means you get a finished, gift-ready piece quickly. I also love that it uses basic techniques so I can introduce friends to amigurumi without overwhelming them.
Switch Things Up
I love changing the yarn color scheme to create different characters from the same shape — try pastel greens and lilacs for a softer look.
I often use a thicker yarn and a larger hook to make a chunky, cuddle-friendly version; experiment to find a size you love.
I add felt or embroidered details for the face instead of safety eyes when making toys for very young children.
Try using different eye sizes to change the expression — larger eyes make the doll look cuter, smaller eyes look more realistic.
For a keychain version, use thinner yarn and a smaller hook and add a keyring before closing the head.
I sometimes add tiny crocheted props like a cape or a tiny hat to personalize the toy for gifts.
To make the limbs posable, I add thin wire into the arms and legs before stuffing, being careful to cover wire ends safely.
Try embroidering different eyebrow shapes with black thread to create a variety of moods and personalities.
You can make a whole set of characters by changing hair color, shorts color, and eye placement — mix and match for a collection.
When I sew pieces together, I pin them first to test placement and make small adjustments before final stitching for the best symmetry.
Common Mistakes & How to Fix Them
✗ Skipping the stitch marker can make you lose track of the starting stitch and ruin the round count; place a marker at the start of every round and move it up as you crochet.
✗ Changing colors incorrectly can leave loose loops or gaps at the color join; loop the new colour over the hook and pull through both loops to secure the change neatly.
✗ Understuffing or overstuffing the body creates a misshapen toy; stuff gradually and firmly, checking the shape frequently to maintain a smooth silhouette.
✗ Not aligning openings when closing limbs makes sewing awkward and bulky; press the opening flat, align three stitches side by side, then sew with the long tail for a neat finish.
✗ Forgetting to place safety eyes before closing the head can be difficult to fix later; insert and secure safety eyes between the recommended rounds while there is still access to the inside.