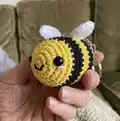
About This Crocheted Bumblebee Amigurumi Pattern
This pattern creates a small, round bumblebee amigurumi perfect for keychains or bag charms. Youll work in continuous rounds with simple increases and decreases and switch colours to form the bee stripes. The wings are small separate pieces that are sewn on for a cute finished look.
Clear, step-by-step rounds make it easy to follow even if youre newer to amigurumi. The finished bee uses safety eyes and minimal sewing for a polished result.
Why You'll Love This Crocheted Bumblebee Amigurumi Pattern
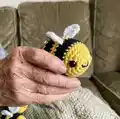
I absolutely love this pattern because it is quick to make and gives consistently adorable results every time. I enjoy the simple colour changes that create striking stripes without complicated colorwork. I also love how small details—like the tiny wings and embroidered mouth—bring so much personality to a pocket-sized toy. Making a set of these for gifts or market stalls always delights both buyers and friends.
Switch Things Up
I love changing the colours to create a set of themed bees; try pastel tones for a softer look or neon hues for bold accents.
If you want a bigger bee, I change to a thicker yarn and a larger hook to make a chunky, cuddly version that sits better on bags.
To make a tiny keychain version, I use sport weight yarn and a 2.0mm hook to shrink the finished size while keeping the same rounds.
I often replace safety eyes with embroidered eyes for a fully washable toy or to make it child-safe without small parts.
Try adding a tiny crocheted scarf or hat by working a few extra rounds in a contrasting colour for seasonal variations.
For a posable hanging charm, I sometimes add a short length of thin wire into the wings before sewing to give them a slight bend.
I also experiment with textured yarns for the stripes to add tactile interest; a boucle or slub yarn can be fun for one stripe.
Embroider different mouth shapes or eyebrow details to change the bee's expression and give each one unique personality.
Convert this into a magnet by stitching a small round piece of felt inside the back and attaching a strong magnet for cute fridge decor.
When making sets, I change only the cheek colour (Colour D) to create coordinating colours while keeping the bee body the same.
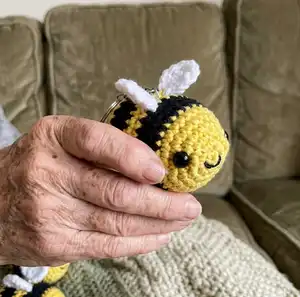
If you like charms, substitute the sewn hanging loop with a small metal keyring or lobster clasp for easy attachment to bags.
I also like to fill a few with lavender or scented stuffing to make fragrant drawer or bag charms that smell lovely over time.
Common Mistakes & How to Fix Them
✗ Placing safety eyes too low or too high will change the face balance; mark the eye position and check placement between rounds 5 and 6 before securing the eyes.
✗ Skipping stitch counts during increases and decreases causes uneven shaping later on; count stitches after each round to ensure you have the correct total.
✗ Overstuffing the bee will distort the stripes and seams; stuff gradually and firmly but stop before the shape bulges, filling the final chamber lightly before closing.
✗ Forgetting to leave long tails when fastening off makes sewing pieces together difficult; always leave a long tail for sewing the final stitches and attaching wings or the hanging loop.