About This CROCHET MESH SLEEVES Pattern
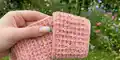
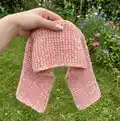
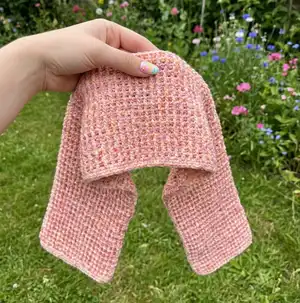
This pattern produces a single-piece pair of mesh sleeves worked flat and seamed to create a cuff-to-cuff coverage. Using a simple dc/ch-2 mesh pattern, the sleeves are lightweight, breathable, and great for layering over tanks or tees. The design is written for two size groups and uses Caron Coconut Cakes for a beautiful color gradient without changing yarn.
Worked back and forth from front to back and finished with a flat slip-stitch join, these sleeves are accessible to beginners. The pattern includes clear stitch counts and finishing instructions so you can assemble the piece neatly and quickly.
Why You'll Love This CROCHET MESH SLEEVES Pattern
I absolutely love this pattern because it turns a simple repeat stitch into a stylish wearable that dresses up any outfit. I adore how the Caron Coconut Cakes yarn creates a soft gradient effect without extra effort. The mesh fabric is light and comfortable, perfect for transitional weather and layering. Making this piece feels fast and rewarding — you get a polished accessory in just a few hours.
Switch Things Up
I love experimenting with color changes in this mesh sleeve design; try alternating two skeins for a striped gradient effect or pick a solid for a more classic look.
You can change the length easily by repeating the mesh row more or fewer times—add a few extra repeats for a longer bolero, or stop earlier for a cropped style.
To make the sleeves wider or narrower, adjust the starting chain in multiples of 3 + 5 and check your gauge as you go to keep proportions balanced.
Swap the recommended Caron Coconut Cakes for a sport or DK weight yarn and a smaller hook to create a more delicate, lightweight version of the mesh sleeves.
Want a chunkier statement? Use a bulky yarn with a larger hook to create a cozy, textured sleeve perfect for cooler weather.
I often finish the join with a single crochet or a decorative picot edge instead of the flat slip-stitch join to add a contrasting trim.
For a dressier option, sew on a narrow lace trim or add a row of beads along the neck opening for subtle sparkle.
If you prefer a fitted cuff, pick up stitches and work a ribbed cuff in front and back loops only for a snug finish at the wrist.
Consider converting the piece into a shrug: add extra width at the center and shorten the arm lengths to create a more traditional shrug silhouette.
I like to experiment with positioning the neck opening—make it wider for a boat-neck effect or narrower for a classic neckline by adjusting the number of stitches skipped when shaping.
Common Mistakes & How to Fix Them
✗ Skipping the chain count for the foundation will change the width of the sleeves; always start with Ch 260 (multiple of 3 + 5) and recount your starting chain before working the first row.
✗ Forgetting that the ch-5 at the beginning of the row counts as a dc and ch-2 space will throw off stitch placement; treat the ch-5 as instructed and maintain the ch-2 spacings consistently.
✗ Not checking gauge can result in a sleeve that is too large or too small; make a 4" [10 cm] swatch with 16 sts and 7 rows in pattern and adjust hook size as needed.
✗ Failing to place the finishing markers correctly will misalign your joins; measure and place the markers 20 (16½)" [51 (42) cm] in from each side along the foundation chain and last row before joining.
✗ Overstuffing or pulling seams too tight during finishing will distort the mesh; fold with WS together and use flat slip stitch joins to keep edges even and flexible.