🧢 Beautiful ✨ Detailed πŸ’ Adorable

Crochet Emotional Support Pickle Amigurumi Pattern

Crochet Emotional Support Pickle Amigurumi Pattern
4.7β˜… Rating
2-3 Hours Time Needed
4.1K Made This
βœ‚οΈ

Intermediate Level

Ideal for those with basic crochet experience, featuring slightly more advanced stitches and techniques to expand your skills.

⏱️

Bite-Sized Project

Finishes in 2-4 hoursβ€”perfect for an afternoon of creative relaxation.

🎁

Tiny Treasure

Small, sweet, and gift-worthy creations that fit perfectly in the palm of your hand with detailed charm.

About This Crochet Emotional Support Pickle Amigurumi Pattern

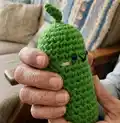
This pattern walks you through crocheting a tiny Emotional Support Pickle with a curled stem, sewn facial features, and tiny hands holding a printed sign. It uses continuous rounds worked from a magic ring and finishes with a closed bottom and sewn details. You get step-by-step photos and clear guidance on placement for eyes, mouth and cheeks.

Crochet Emotional Support Pickle Amigurumi Pattern crochet pattern - detailed view of completed project

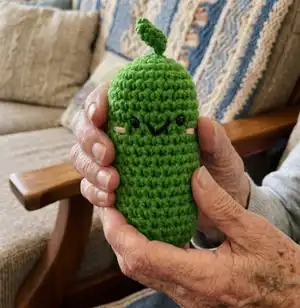
Perfect as a pocket-sized gift or keychain-sized companion, this pickle measures approximately 12cm tall. The pattern includes instructions for stem, body, facial embroidery, hands, and a printable sign.

Why You'll Love This Crochet Emotional Support Pickle Amigurumi Pattern

I absolutely love this pattern because it turns a few simple stitches into a charming little companion that brings joy. I enjoy the way the curled stem adds personality with minimal effort, and the small size means you can finish it quickly. Sewing the face and cheeks gives such satisfying results and really brings the pickle to life. I also love how adaptable it is β€” you can change colors or add tiny accessories to make each pickle unique.

Crochet Emotional Support Pickle Amigurumi Pattern step 1 - construction progress Crochet Emotional Support Pickle Amigurumi Pattern step 2 - assembly progress Crochet Emotional Support Pickle Amigurumi Pattern step 3 - details and accessories Crochet Emotional Support Pickle Amigurumi Pattern step 4 - final assembly and finishing

Switch Things Up

I love how easily this pattern adapts to different colors β€” try pastel greens or even a rainbow stripe for a playful twist.

You can make the pickle bigger by switching to a bulkier yarn and a larger hook, creating a chunky, huggable version.

For a tiny keychain friendly version, use fingering weight yarn with a very small hook and add a keyring loop at the top of the stem.

I often customize the face by changing eye placement or using safety eyes of different sizes to alter personality.

Try embroidered eyelids or tiny eyelashes to give the pickle a sleepy or sassy look depending on your preference.

Add a tiny crocheted accessory like a bow, scarf, or tiny hat to personalize the pickle as a gift.

Use felt instead of yarn for the cheeks for a softer, matte finish; glue or sew them on securely.

If you want posable limbs, insert thin wire into the hand tails before sewing them in place and secure with extra stuffing.

Experiment with textured stitches for the body (for example, half double crochet or bobble accents) to simulate a bumpy pickle skin.

I recommend practicing the invisible decrease on a scrap before working on the body so your shaping remains neat and subtle.

Common Mistakes & How to Fix Them

βœ— Skipping the stitch marker when working continuously causes you to lose track of the round start; place a marker at the beginning of each round to keep perfect alignment. βœ— Pulling the stem too flat will prevent the natural curl from forming; crochet loosely on the stem and allow it to curl naturally without pressing it down. βœ— Forgetting to make the slip stitch smaller leaves an obvious seam; after making the sl st in the magic ring, pull the two strings on the hook tight so the sl st becomes smaller. βœ— Not stuffing gradually creates lumps or misshapen areas; add stuffing a little at a time and shape as you go for a smooth body. βœ— Placing safety eyes too late can misposition them on the face; place the safety eyes between rounds 8 and 9 and ensure three stitches separate them before continuing.

Crochet Emotional Support Pickle Amigurumi Pattern

Create a tiny, squeezable Emotional Support Pickle with this friendly crochet pattern. You will enjoy simple rounds, charming facial details, and a curled stem that gives the pickle personality. The pattern includes step-by-step photos and clear finishing instructions so you can gift or display your finished pickle with pride. Perfect for making a small, handmade pick-me-up.

Intermediate 2-3 Hours

Materials Needed for Crochet Emotional Support Pickle Amigurumi Pattern

β€” Main Fabric

  • 01
    5 Ply cotton yarn (Green) - main color, small amount for a 12cm pickle
  • 02
    Small amount of black yarn (2-ply recommended) for mouth embroidery
  • 03
    Small amount of pink yarn for cheeks
  • 04
    Optional accent yarns for signs or accessories

β€” Tools Required

  • 01
    Crochet hook 3.5 mm
  • 02
    Yarn needle for sewing and weaving in ends
  • 03
    Stitch marker
  • 04
    Scissors
  • 05
    Polyester stuffing
  • 06
    Hot melt glue
  • 07
    6mm diameter safety eyes (2 pieces)
  • 08
    Printer to print the sign and card (You need to know how to print!)

Progress Tracker

0% Complete

β€” Stem and Body :

Info :

Start with a magic circle. Ch7 in MR (pic.1). Grab the top loop of the 2nd chain to make a sc (pic.2). Continue making 5sc (pic.3). Don't press the stem. Make it curl naturally. Make a sl st in MR and pull the two strings on the hook tight so that the sl st will be smaller (see page 4). Ch1 as turning chain (pic.4). The sl st and turning ch do not count as stitches. Then continue to making the body.

Round 1 :

MR of 6sc (pic.5) [6]

Round 2 :

6 inc (12)

Round 3 :

(sc, inc) * 6 (18)

Round 4 :

(sc, inc, sc) * 6 (24)

Round 5-11 :

24 sc (24)

Info :

Place eyes and sew mouth & cheeks (see pages 7-9). Body Part 2 continues on page 9.

β€” Place eyes, sew mouth and cheek :

Step 1 :

Place safety eyes between R8-R9. There are 3 holes (stitches) between the eyes.

Step 2 :

Use 2-ply black yarn to sew the mouth.

Step 3 :

Needle out from the first hole between eyes.

Step 4 :

Needle in from the 3rd hole between eyes (create the first part of the mouth line).

Step 5 :

Needle out from the middle hole of one row below (pull the yarn down to form a "V" shape).

Step 6 :

Needle under the black yarn and then pull the yarn down to form the "V" mouth shape.

Step 7 :

Needle in from the same middle hole of one row below to finish the mouth line and secure stitches.

Step 8 :

Use yarn tails to tie double knots inside the head for security, and weave tails inside.

Step 9 :

Use pink yarn to sew cheeks on both sides by stitching small satin-look patches at the same height as the eyes.

Info :

Make sure eyes are aligned and that there are three stitches between them before sewing the mouth and cheeks.

β€” Body :

Round 12-21 :

24 sc (24)

Info :

Stuff the body gradually as you work through rounds 12-21.

Round 22 :

(sc, dec, sc) * 6 (18)

Round 23 :

(sc, dec) * 6 (12)

Round 24 :

3 dec (9)

Info :

Make a sl st. Stuff a little more. Leave about 15cm (5.9 inches) and cut yarn. Pass the needle through the front loops of all 9 stitches and pull tight to close the hole, then weave in the tail end.

β€” Hand*2 :

Hand (make 2) :

Ch 8, go into the 3rd stitch from the hook and do 6 dc, ch1, leave long tail and cut yarn. Sew them on the body.

β€” Sign and Finishing :

Info :

Print the sign on card and glue it on the body. I print the sign file on 5" x 7" card and cut each sign. Use hot melt glue as needed to attach the sign and position the hands to appear to hold it.

Assembly Instructions

  • Place the 6mm safety eyes between rounds 8 and 9 with three stitches between them, then secure the backs.
  • Sew the mouth using 2-ply black yarn following the pictured needle path: needle out from the first hole between eyes, needle in the third hole, then through the middle hole one row below to pull into a V shape; secure and knot inside.
  • Sew cheeks using pink yarn on both sides at the same level as the eyes, creating small satin patches.
  • Sew the two small hands to the front of the body, positioning them to hold the printed card sign and securing with yarn and hot glue if needed.
  • After final stuffing, pass a yarn needle through the front loops of the remaining 9 stitches, pull tight to close the hole, and weave in the tail to finish.

Important Notes

  • πŸ’‘When working in the round, start with a magic circle and crochet continuously without joining with a slip stitch at the end of each round to avoid an inaes thetic seam.
  • πŸ’‘Use a stitch marker at the beginning or end of each round to keep track of your position, especially when working continuous rounds.
  • πŸ’‘Stuff gradually and evenly; overstuffing can distort the shape while understuffing leaves the pickle floppy.
  • πŸ’‘Make your slip stitch in the magic ring smaller by pulling the two strings on the hook tight so the seam becomes invisible.
  • πŸ’‘Make sure the project is right side out: the right side has neat V stitches and the yarn tail from the magic ring should be inside the work.

This adorable Emotional Support Pickle is a small, handmade companion crafted to make someone smile. It combines easy amigurumi techniques with sweet facial embroidery and a curled stem for character. Perfect for gifting, pocket hugs, or a tiny desk pal. πŸ§ΆπŸ’š

You ask,

we answer.

FAQs

What size will the finished piece be?

The finished amigurumi measures approximately 12 cm (4.7 inches) tall and about 5 cm (1.96 inches) in diameter when using the recommended yarn and 3.5 mm hook.

Can I use different yarn weights for this pattern?

Yes, you can use different yarn weights, but this will affect the final size; adjust your hook accordingly and expect changes in finished dimensions.

Do I need prior crochet experience for this pattern?

This pattern is rated intermediate; basic knowledge of magic ring, single crochet, invisible decrease, and working in continuous rounds is recommended.

How long does this project typically take to complete?

Most crocheters complete this project in 2-3 hours, though time may vary depending on experience and finishing details like sewing and embroidery.

What size safety eyes should I use?

Use 6 mm diameter safety eyes as specified; they are sized to fit the face proportions in this pattern.