About This Cinnamon Swirl Hat and Scarf Set Pattern
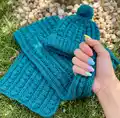
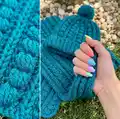
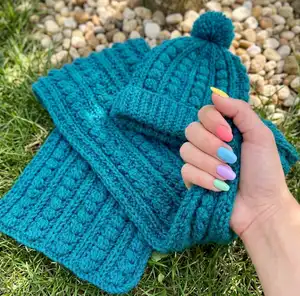
This pattern teaches you to crochet a textured Cinnamon Swirl hat and a long matching scarf using a cable-style stitch. The hat features a ribbed band and a slouchy crown, finished with a medium pom pom. The scarf is worked flat in a repeating two-row cable pattern to create a sumptuous, warm accessory.
Clear instructions include stitch abbreviations, cable pattern charts, and finishing notes. Ideal for intermediate crocheters wanting to learn cable-style post stitches.
Why You'll Love This Cinnamon Swirl Hat and Scarf Set Pattern
I absolutely love this pattern because the cable texture looks much more complex than it actually is, and it adds beautiful depth to both the hat and scarf. I enjoy how the ribbed brim on the hat gives a neat, wearable finish while the slouchy crown stays stylish and comfortable. The long scarf provides a dramatic drape that really shows off the stitch pattern. I also love that this set uses a single worsted-weight yarn so you can complete both pieces in matching colour with confidence.
Switch Things Up
I love how easy it is to customise this pattern with colour changes; try alternating two colours every 8 rows for a striped cable effect.
I sometimes make the scarf shorter or longer by adding or subtracting repeats of the two-row cable pattern until it reaches my desired length.
If you want a chunkier set, I switch to a bulkier yarn and a larger hook—this gives a squishier, warmer finish but remember to check gauge.
I also enjoy adding contrast-colour ribbing to the hat brim for a sporty look; pick a darker or lighter tone to frame the face.
To make a child-sized version I reduce the starting chain for the scarf and work fewer repeats on the hat, keeping the stitch multiple consistent with the cable pattern.
Try embellishing the scarf ends with tassels or tiny pom poms on each end for a playful finish I often add when gifting pieces.
I sometimes embroider a small initial onto the hat brim for personalization, using a matching or contrasting yarn for a subtle monogram.
Swap the pom pom for a faux fur pom for a luxe update that looks store-bought but is handmade by you.
I also experiment with placing the cable repeats closer together or farther apart by adjusting the number of base chains to change the overall texture effect.
Finally, I like to block the finished scarf slightly to open the cable pattern; a gentle steam or damp towel reshape can bring out the stitches beautifully.
Common Mistakes & How to Fix Them
✗ Skipping the gauge swatch can make the finished pieces too small or too large; work a 4in/10cm swatch in the cable pattern and adjust hook size to match 14 sts and 10 rows.
✗ Missing the instruction that Ch 2 does not count as a stitch can shift your stitch placement; always treat the setup chains as instructed and do not count them as stitches.
✗ Not working front and back post stitches from the correct side will distort cables; practise the post stitches on a small swatch and mark the right side to ensure correct execution.
✗ Failing to secure and weave in ends before finishing lets them show through the fabric; secure last stitch, thread yarn through remaining stitches, and weave in all ends neatly.