🧢 Beautiful ✨ Detailed πŸ’ Adorable

Anglerfish SAM Amigurumi Pattern

Anglerfish SAM Amigurumi Pattern
4.8β˜… Rating
12+ Hours Time Needed
3.5K Made This
βœ‚οΈ

Intermediate Level

Ideal for those with basic crochet experience, featuring slightly more advanced stitches and techniques to expand your skills.

⏱️

Multi-Day Project

A rewarding 12+ hour journeyβ€”perfect for dedicated crafters who love detailed work.

🧸

Cute Companion

An adorable friend to cherish, handcrafted with love to bring comfort and joy for years to come.

About This Anglerfish SAM Amigurumi Pattern

This pattern creates 'Anglerfish SAM', an imaginative amigurumi toy that can double as an interior decoration or a night lamp. It combines standard amigurumi shaping with simple wiring to make the lamp and fins poseable. The instructions include step-by-step rounds, diagrams for joining finger-rays and detailed assembly tips to keep everything neat and sturdy.

Anglerfish SAM Amigurumi Pattern crochet pattern - detailed view of completed project

The design uses smooth non-stretch yarn, small hooks and optional tiny LED bulbs for the lamp. Detailed tables and labels for the fins and teeth keep the assembly organized for an accurate finished look.

Why You'll Love This Anglerfish SAM Amigurumi Pattern

I absolutely love this pattern because it blends playful character design with a touch of engineering β€” the tiny lamp and wired fins give SAM a unique, interactive presence. I enjoy how the finger-ray technique transforms simple rounds into sculpted fins that really bring the fish to life. The pattern also encourages careful assembly and reinforcement, which makes the finished toy durable and display-ready. Creating SAM is always rewarding because each step reveals more personality β€” from the teeth to the tiny bead details β€” and I find the process both meditative and fun.

Anglerfish SAM Amigurumi Pattern step 1 - construction progress Anglerfish SAM Amigurumi Pattern step 2 - assembly progress Anglerfish SAM Amigurumi Pattern step 3 - details and accessories Anglerfish SAM Amigurumi Pattern step 4 - final assembly and finishing

Switch Things Up

I love customizing SAM by changing yarn colorways β€” try soft pastels for a whimsical nursery lamp or deep jewel tones for a dramatic decorative piece.

I often make a mini version by using thinner yarn and a smaller hook for a keychain-sized anglerfish; conversely use bulkier yarn and a larger hook for a cuddly oversized version.

I like to swap the tiny LED bulb for a battery-operated tea light to create a warm glow without wiring the lamp; secure it inside a wrapped wire frame so it stays hidden and safe.

I sometimes replace the crochet teeth with polymer clay teeth for a more sculptural smile, or embroider tiny designs on the fins to add personality and detail.

For realistic eyes, I use semi-bead eyes or sew on beads, but you could also embroider eyelids or make felt eye patches for an expressive look.

I recommend experimenting with bead placement on the body β€” you can sew a line of contrasting beads along the side for added shimmer or sew on small sequins for a sparkling effect.

If you want posable limbs, try adding thinner gauge wire inside the fin spines and secure it with tape so you can pose the fins in a natural curve.

I also enjoy creating little accessories like a crocheted book or tiny fish friends to stage with SAM β€” these small props make the finished piece feel like a character with a story.

Don't be afraid to mix yarn textures; pairing a slightly fuzzy yarn for the body with smoother yarn for the teeth and fins can create pleasing contrast and depth.

Finally, I often vary the stitch tension slightly on the muzzle to change the facial expression β€” tighter stitches make a firmer, more defined muzzle while looser stitches soften the look.

Common Mistakes & How to Fix Them

βœ— Skipping stitch markers when joining large pieces can make centering the muzzle and jaw difficult; place a marker and move it as instructed to keep the center and alignment consistent. βœ— Overstuffing the finger-rays makes the fin bulky and ruins the silhouette; stuff the rays lightly and evenly so the wire can be inserted and the fin stays flexible. βœ— Failing to wrap and insulate raw wire ends can lead to sharp points and damage; always wrap the wire ends with fabric plaster or insulation tape before inserting into the crochet. βœ— Not matching increases when joining rays causes awkward seams or holes; follow the diagrams and match increases to increases when joining to avoid gaps and maintain shape. βœ— Changing yarn mid-section without checking stitch count may alter final circumference; when switching to multicolor yarn, count stitches and continue exactly as written to keep gauge consistent.

Anglerfish SAM Amigurumi Pattern

Make a whimsical anglerfish named SAM with this detailed intermediate amigurumi pattern. You will create a textured body, articulated fins and a glowing lamp using wire and a tiny bulb, plus cute teeth and eyes for character. The pattern includes full stitch-by-stitch instructions, illustrations, and reinforcement tips so you can craft a durable, poseable decorative toy or night lamp. Perfect for makers who love imaginative, sculptural crochet projects.

Intermediate 12+ Hours

Materials Needed for Anglerfish SAM Amigurumi Pattern

β€” Main Fabric

  • 01
    Vita Brilliant Print (45% wool, 55% acrylic; 380 m/100 g) - multicolor main color (2604) - approximately 1.5 skeins
  • 02
    Vita Brilliant solid yarn - green (4981) - about half a skein
  • 03
    Vita Pelican yarn (100% mercerized cotton; 330 m/50 g) - white (3951) for eyes and teeth - small leftovers
  • 04
    Vita Pelican yarn (100% mercerized cotton; 330 m/50 g) - yellow (3998), silver gray (3965), black (3952) - just leftovers for light bulb details
  • 05
    Cotton embroidery floss or Iris yarn for details (teeth, lamp threads)
  • 06
    Polyester stuffing (for body and finger-rays; do not overstuff fins)
  • 07
    Beads: 10/0 Flame Dark Topaz and 6/0 Flame Turquoise by Preciosa or similar for adornment

β€” Tools Required

  • 01
    Crochet hook size 1.0 mm or 1.25 mm (for teeth and small details)
  • 02
    Crochet hook size 1.5 mm (main gauge used in pattern)
  • 03
    Wire: 1.0-1.5 mm copper wire - approx. 6 m (for fins and lamp frame)
  • 04
    Small LED mini bulb (keychain flashlight style) - 1-2 items recommended
  • 05
    White fabric plaster or insulation tape (to wrap wire ends)
  • 06
    Toy eyes or beads/semi beads for eyes - 2 items (approx. 12 mm, may vary)
  • 07
    Transparent glue (optional, for gluing eyes)
  • 08
    Nylon thread and small needle (for attaching beads)
  • 09
    Scissors
  • 10
    Wire cutter
  • 11
    Sewing needle for finishing
  • 12
    Stitch markers
  • 13
    Pins for assembly

Progress Tracker

0% Complete

β€” FINS :

Info :

Make two side fins, one lower fin, one dorsal fin and one tail with solid yarn and 1.5 mm crochet hook following the instructions. Start with finger-rays using solid yarn and 1.5 mm crochet hook. The following instructions are given for one fin.

β€” Side fin (finger-rays) A - 2 rays :

1) Make a MR, 6 sc into the ring.

Round 2 :

2) 2 sc in each st around (12)

Round 3 :

3) (3 sc, 2 sc in next st) * 3 (15)

Round 4-5 :

4-5) sc in each st around (15)

Round 6 :

6) (3 sc, 2 sc tog) * 3 (12)

Round 7 :

7) (sc, 2 sc tog) * 4 (8)

Round 8-10 :

8-10) sc in each st around (8)

Info :

After having made one ray, cut off the yarn, but do not cut the yarn after having made the second ray. Continue working from the marker of the second ray.

β€” Side fin (finger-rays) B - 2 rays :

11) 2 sc in next st, 2 sc, (2 sc in next st) * 2, 2 sc, 2 sc in next st (12). Fasten off, weave in the end.

Info :

Join the rays together according to the diagram. The diagram shows where to place fingers 'B' and at what places to join the rays. When joining rays together you DO NOT have to make increases or decreases.

Round 1 (joining) :

Join the rays together: 4 sc around finger 'A' (make the 4th sc as described above to avoid holes - do not forget to do this when joining all the other rays!), 6 sc around finger 'B', 6 sc around finger 'B', 8 sc around finger 'A', turn work and continue in the opposite direction: 6 sc around finger 'B', 6 sc around finger 'B', 4 sc around finger 'A' (40).

Round 2 :

2) 2 sc tog, 16 sc, (2 sc tog) * 2, 16 sc, 2 sc tog (36) + shift st

Round 3 :

3) (16 sc, 2 sc tog) * 2 (34)

Round 4 :

4) (15 sc, 2 sc tog) * 2 (32) + shift st

Round 5 :

5) (14 sc, 2 sc tog) * 2 (30)

Round 6 :

6) (13 sc, 2 sc tog) * 2 (28) + shift st

Round 7 :

7) (12 sc, 2 sc tog) * 2 (26)

Round 8 :

8) (11 sc, 2 sc tog) * 2 (24) + shift st

Round 9 :

9) (10 sc, 2 sc tog) * 2 (22). Change the yarn into the multicolor yarn.

Round 10 :

10) (9 sc, 2 sc tog) * 2 (20) + shift st

Round 11-13 :

11-13) sc in each st around (20) + shift st

Round 14 :

14) (9 sc, 2 sc in next st) * 2 (22)

Round 15 :

15) (10 sc, 2 sc in next st) * 2 (24). Fasten off and weave in the end.

Info :

Stuff the finger-rays with polyester (do not stuff too tightly!). Do not stuff the fin itself.

Info :

Reinforce the fin using at least 120 cm of wire for one fin. Insert even parts of the wire into each finger so the ends coming out of the fin are even. One end of the wire will make the frame of the fishing line and the other end will form the spine of the fish.

β€” Lower fin :

β€” Lower fin (finger-rays) A - 2 rays :

1) Make a MR, 6 sc into the ring.

Round 2 :

2) 2 sc in each st around (12)

Round 3 :

3) (3 sc, 2 sc in next st) * 3 (15)

Round 4-5 :

4-5) sc in each st around (15)

Round 6 :

6) (3 sc, 2 sc tog) * 3 (12)

Round 7 :

7) (sc, 2 sc tog) * 4 (8)

Round 8-9 :

8-9) sc in each st around (8)

Info :

After having made one ray, cut off the yarn and weave in the end, but do not cut the yarn after having made the second ray. Continue working from the marker of the second ray.

β€” Lower fin (finger-rays) B - 1 ray :

10) 2 sc in next at, 2 sc, (2 sc in next st) * 2, 2 sc, 2 sc in next st (12). Fasten off, weave in the end.

Info :

Join the rays together according to the diagram. When joining rays together you DO NOT have to make these increases!

Join rounds :

1) Join the rays together: 4 sc around finger 'A', 6 sc around finger 'B', 8 sc around finger 'A', turn work and continue in the opposite direction: 6 sc around finger 'B', 4 sc around finger 'A' (28).

Round 2 :

2) (2 sc in next st, 13 sc) * 2 (30) + shift st

Round 3 :

3) (2 sc in next st, 14 sc) * 2 (32)

Round 4 :

4) (2 sc in next st, 15 sc) * 2 (34). Fasten off and weave in the end. Do not insert the wire at this step.

Info :

Stuff the finger-rays with polyester (do not stuff too tightly!). Do not stuff the fin itself.

β€” Dorsal fin :

Info :

Make one dorsal fin with solid yarn and 1.5 mm crochet hook following the instructions. Group and label fingers and rays to avoid confusion (see Appendix).

β€” Dorsal fin finger-ray A - 1 ray :

1) Make a MR, 6 sc into the ring.

Round 2 :

2) 2 sc in each st around (12)

Round 3 :

3) (3 sc, 2 sc in next st) * 3 (15)

Round 4-5 :

4-5) sc in each st around (15)

Round 6 :

6) (3 sc, 2 sc tog) * 3 (12)

Round 7 :

7) (sc, 2 sc tog) * 4 (8)

Rounds 8-12 :

8-12) sc in each st around (8)

β€” Dorsal fin finger-ray B - 1 ray :

8-16) sc in each st around (8)

Finish B :

17) 2 sc in next st, 2 sc, (2 sc in next st) * 2, 2 sc, 2 sc in next st (12). Fasten off, weave in the end.

β€” Dorsal fin finger-ray C - 2 rays :

8-15) sc in each st around (8)

Finish C :

16) 2 sc in next st, 2 sc, (2 sc in next st) * 2, 2 sc, 2 sc in next st (12). Fasten off, weave in the end.

β€” Dorsal fin finger-ray D - 3 rays :

8-13) sc in each st around (8)

Finish D :

14) 2 sc in next st, 2 sc, (2 sc in next st) * 2, 2 sc, 2 sc in next st (12). Fasten off, weave in the end.

β€” Dorsal fin finger-ray E - 1 ray :

8-12) sc in each st around (8) - Fasten off, weave in the end.

Info :

Join the rays together according to the diagram shown: 4 sc around finger 'A', 6 sc around finger 'B', 6 sc around finger 'C', 6 sc around finger 'C', 5 sc (2 sc in next st) * 2, 5 sc around finger 'D', turn work and continue opposite: 6 sc around finger 'C', 6 sc around finger 'C', 6 sc around finger 'B', 4 sc around finger 'A' (58).

Join continuation :

2) Join the rays together according to the diagram shown below: 2 sc in next st, 28 sc around the item you have just made, 5 sc, (2 sc in next st) * 2, 5 sc around finger 'D', turn work and continue in the opposite direction: 29 sc around the item you have just made (73) + shift st.

Join continuation 2 :

2) join the rays together according to the diagram shown below: 2 sc in next st, 36 sc around the item you have just made, 5 sc, (2 sc in next st) * 2, 5 sc around finger 'D', turn work and continue in the opposite direction: 36 sc around the item you have just made (88).

Round 4 :

4) Join the rays together according to the diagram shown below: 2 sc in next st, 43 sc around the item you have just made, 3 sc, 2 sc in next st, 4 sc around finger 'E', turn work and continue in the opposite direction: 44 sc around the item you have just made (98).

Round 5 :

5) (2 sc in next st, 48 sc) * 2 (100) + shift st

Round 6 :

6) (2 sc in next st, 49 sc) * 2 (102) + shift st

Round 7 :

7) (2 sc in next st, 50 sc) * 2 (104). Fasten off and weave in the end. Do not insert the wire at this step. Stuff the finger-rays with polyester (do not stuff too tightly!). Do not stuff the fin itself.

β€” Tail :

Info :

Make one tail with solid yarn and 1.5 mm crochet hook following the instructions. A - 2 rays (make them only after you have made all B and C rays), B - 4 rays, C - 1 ray.

Tail finger-rays 1 :

1) Make a MR, 6 sc into the ring.

Tail rounds :

2) 2 sc in each st around (12)

Tail round 3 :

3) (3 sc, 2 sc in next st) * 3 (15)

Tail round 4-5 :

4-5) sc in each st around (15)

Tail round 6 :

6) (3 sc, 2 sc tog) * 3 (12)

Tail round 7 :

7) (sc, 2 sc tog) * 4 (8)

Tail rounds 8-11 :

8-11) sc in each st around (8)

Tail C - 1 ray finish :

13) 2 sc in next st, 2 sc, (2 sc in next st) * 2, 2 sc, 2 sc in next st (12). Fasten off, weave in the end.

Join tail:

1) Join the rays together according to the diagram shown above: 4 sc around finger 'A', 6 sc around finger 'C', 3 sc, 2 sc in next st, 4 sc around finger 'B', turn work and continue in the opposite direction: 6 sc around finger 'C', 3 sc, 2 sc in next st around finger 'A' (30).

Round 2 :

2) (14 sc, 2 sc in next st) * 2 (32)

Round 3 :

3) (15 sc, 2 sc in next st) * 2 (34). Fasten off and weave in the end.

Round continuation :

5-11) sc in each st around (52). Reinforce the tail. Fold the tail in half. Cut 1 m of wire, insert even parts of the wire into the rays so the ends coming out of the tail are even. Wrap the ends of the wire with plaster.

Tail rounds continue :

12) (2 sc tog, 22 sc, 2 sc tog) * 2 (48)

Round 13 :

13) (2 sc tog, 20 sc, 2 sc tog) * 2 (44)

Round 14 :

14) (2 sc tog, 18 sc, 2 sc tog) * 2 (40)

Round 15 :

15) (2 sc tog, 16 sc, 2 sc tog) * 2 (36)

Round 16 :

16) (2 sc tog, 14 sc, 2 sc tog) * 2 (32). Fasten off and weave in the end. Stuff the finger-rays and the tail with polyester. Put 2 'B' fingers aside. You will use them later.

β€” Body :

β€” Lower jaw :

Make one with multicolor yarn and 1.5 mm crochet hook following the instructions. The marker goes along the side edge of the jaw. You do not have to change its position.

Round 1 :

1) Make a MR, 6 sc into the ring.

Round 2 :

2) 2 sc in each st around (12)

Round 3 :

3) (sc, 2 sc in next st) * 6 (18)

Round 4 :

4) sc, 2 sc in next st, (2 sc, 2 sc in next st) * 5, sc (24)

Round 5 :

5) (3 sc, 2 sc in next st) * 6 (30)

Round 6 :

6) 2 sc, 2 sc in next st, (4 sc, 2 sc in next st) * 5, 2 sc (36)

Round 7 :

7) (5 sc, 2 sc in next st) * 6 (42)

Round 8 :

8) 3 sc, 2 sc in next st, (6 sc, 2 sc in next st) * 5, 3 sc (48)

Round 9 :

9) (7 sc, 2 sc in next st) * 6 (54)

Round 10 :

10) 4 sc, 2 sc in next st, (8 sc, 2 sc in next st) * 5, 4 sc (60)

Round 11 :

11) (9 sc, 2 sc in next st) * 6 (66)

Round 12 :

12) 5 sc, 2 sc in next st, (10 sc, 2 sc in next st) * 5, 5 sc (72)

Round 13 :

13) (11 sc, 2 sc in next st) * 6 (78)

Round 14 :

14) 6 sc, 2 sc in next st, (12 sc, 2 sc in next st) * 5, 6 sc (84)

Round 15 :

15) (13 sc, 2 sc in next st) * 6 (90)

Round 16 :

16) sc in each st around (90)

Round 17 :

17) 7 sc, 2 sc in next st, (14 sc, 2 sc in next st) * 5, 7 sc (96)

Round 18 :

18) sc in each st around (96)

Round 19 :

19) (15 sc, 2 sc in next st) * 6 (102)

Round 20 :

20) sc in each st around (102)

Round 21 :

21) 8 sc, 2 sc in next st, (16 sc, 2 sc in next st) * 5, 8 sc (108)

Round 22 :

22) sc in each st around (108)

Round 23 :

23) (35 sc, 2 sc in next st) * 3 (111)

Round 24 :

24) sc in each st around (111)

Round 25 :

25) 18 sc, 2 sc in next st, (36 sc, 2 sc in next st) * 2, 18 sc (114)

Round 26 :

26) sc in each st around (114)

Round 27 :

27) (37 sc, 2 sc in next st) * 3 (117)

Round 28 :

28) sc in each st around (117)

Round 29 :

29) 19 sc, 2 sc in next st, (38 sc, 2 sc in next st) * 2, 19 sc (120)

Round 30 :

30) sc in each st around (120)

Round 31 :

31) (39 sc, 2 sc in next st) * 3 (123)

Round 32 :

32) sc in each st around (123)

Round 33 :

33) 20 sc, 2 sc in next st, (40 sc, 2 sc in next st) * 2, 20 sc (126)

Round 34-35 :

34-35) sc in each st around (126)

Round 36 :

36) (41 sc, 2 sc in next st) * 3 (129)

Round 37 :

37) sc in each st around (129)

Round 38 :

38) 21 sc, 2 sc in next st, (42 sc, 2 sc in next st) * 2, 21 sc (132)

Round 39 :

39) ((2 sc in next st) * 2, 64 sc) * 2 (136)

Round 40 :

40) sc, (2 sc in next st) * 2, 66 sc, (2 sc in next st) * 2, 65 sc (140)

Round 41 :

41) 2 sc, (2 sc in next st) * 2, 68 sc, (2 sc in next st) * 2, 66 sc (144)

Round 42 :

42) 3 sc, (2 sc in next st) * 2, 70 sc, (2 sc in next st) * 2, 67 sc (148), ss. Fasten off, weave in the end.

Info :

You now have the lower jaw completed.

β€” Muzzle :

Make one with multicolor yarn and 1.5 mm crochet hook following the instructions. The marker goes along the back.

Muzzle Round 1 :

1) Make a MR, 7 sc into the ring.

Round 2 :

2) 2 sc in each st around (14)

Round 3 :

3) (sc, 2 sc in next st) * 7 (21)

Round 4 :

4) sc, 2 sc in next st, (2 sc, 2 sc in next st) * 6, sc (28)

Round 5 :

5) (3 sc, 2 sc in next st) * 7 (35)

Round 6 :

6) 2 sc, 2 sc in next st, (4 sc, 2 sc in next st) * 6, 2 sc (42)

Round 7 :

7) 3 sc, 2 sc in next st, (6 sc, 2 sc in next st) * 5, 3 sc (48)

Round 8 :

8) (7 sc, 2 sc in next st) * 6 (54)

Round 9 :

9) 4 sc, 2 sc in next st, (8 sc, 2 sc in next st) * 5, 4 sc (60)

Round 10 :

10) (9 sc, 2 sc in next st) * 6 (66)

Round 11 :

11) 5 sc, 2 sc in next st, (10 sc, 2 sc in next st) * 5, 5 sc (72)

Round 12 :

12) (11 sc, 2 sc in next st) * 6 (78)

Round 13 :

13) 6 sc, 2 sc in next st, (12 sc, 2 sc in next st) * 5, 6 sc (84)

Round 14 :

14) sc in each st around (84)

Round 15 :

15) (13 sc, 2 sc in next st) * 6 (90)

Round 16 :

16) sc in each st around (90)

Round 17 :

17) 7 sc, 2 sc in next st, (14 sc, 2 sc in next st) * 5, 7 sc (96)

Round 18 :

18) sc in each st around (96)

Round 19 :

19) 29 sc, 2 sc tog, 59 sc, 2 sc tog, 29 sc (119)

Round 20 :

20) 15 sc, 2 sc tog, 85 sc, 2 sc tog, 15 sc (117)

Round 21 :

21) 2 sc tog, 115 sc (116)

Round 22 :

22) 28 sc, 2 sc tog, 56 sc, 2 sc tog, 28 sc (114)

Round 23 :

23) 15 sc, 2 sc tog, 80 sc, 2 sc tog, 15 sc (112)

Round 24 :

24) 2 sc tog, 110 sc (111)

Round 25 :

25) 27 sc, 2 sc tog, 53 sc, 2 sc tog, 27 sc (109)

Round 26 :

26) 14 sc, 2 sc tog, 77 sc, 2 sc tog, 14 sc (107)

Round 27 :

27) 2 sc tog, 105 sc (106)

Round 28 :

28) 26 sc, 2 sc tog, 50 sc, 2 sc tog, 26 sc (104)

Round 29 :

29) 13 sc, 2 sc tog, 74 sc, 2 sc tog, 13 sc (102)

Round 30 :

30) 2 sc tog, 80 sc, 2 sc tog, 13 sc (102)

Info :

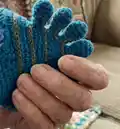
At this step you have to reinforce the jaw to make the fish keep shape and fix the teeth. If you crochet tightly enough, it is not necessary to make the wire frame.

How to assemble the muzzle and the lower jaw - Step 1 :

1) 28 sc around the muzzle, then insert the hook into 29th st of the muzzle and between 1st and 2nd sts of the lower jaw (near the first increase), join the inner part of the lower jaw and the muzzle, make 72 sc inserting the hook through the sts of the muzzle and the jaw at the same time (you have to put the items RS facing each other and insert the hook from inside of the jaw), 29 sc around the muzzle till the marker (129).

How to assemble the muzzle and the lower jaw - Step 2 :

2) 28 sc from the marker around the muzzle, insert the hook between 1st and 2nd sts near the increase of the lower jaw, 76 sc around the outer part of the lower jaw, 29 sc around the muzzle till the marker (133).

Info :

Then continue working around the outer contour only (muzzle and the outer side of the lower jaw). Do not forget to change the position of the marker from time to time by making shift sts so it always goes along the center of the back.

Assembly Instructions

  • Join the muzzle and the lower jaw by placing the items RS together and working 28 sc around the muzzle, then insert the hook through both muzzle and jaw as instructed to make 72 sc joining the inner contours (total 129 st).
  • Reinforce fins and tail by inserting cut lengths of copper wire into the finger-rays; make ends even and wrap with white fabric plaster or insulation tape before inserting into the crocheted rays.
  • Attach the tail and fins to the body by positioning the wire ends and pinning the frames in place, then sewing the bases securely with yarn and whipstitch to the designated rounds.
  • Make two sets of teeth and position them on the lower jaw; use a wire frame inside the jaw (or a wired contour) to hold the teeth in a steady toothy smile and pin the frame before sewing.
  • Place eyes (beads or toy eyes) into eye sockets before final stuffing and closing; you may glue them or sew them in securely as preferred and weave in ends thoroughly.

Important Notes

  • πŸ’‘Use stitch markers to keep track of rounds and to mark the center of the back; move the marker using shift sts when instructed to keep alignment.
  • πŸ’‘Stuff the finger-rays lightly and evenly; do not stuff the fin body itself to maintain a flat flexible fin shape suitable for wiring.
  • πŸ’‘Wrap all raw wire ends with fabric plaster or insulation tape to prevent injuries and avoid damage to the crochet fabric before inserting wires.

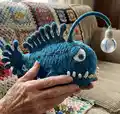
This anglerfish amigurumi pattern is perfect for makers who love whimsical, sculptural toys with personality. It combines careful shaping with simple wiring so your SAM is both poseable and decorative. Follow the full step-by-step instructions, reinforce wire frames carefully, and enjoy the rewarding build. 🧢✨

You ask,

we answer.

FAQs

What size will the finished piece be?

The toy is approximately 18 x 35 cm when made with the recommended yarn and hook sizes, though size may vary with different yarns or tension.

Can I use different yarn weights for this pattern?

Yes, you can, but changing yarn weight will affect the final size and may require adjusting hook sizes and wire frames to fit the new proportions.

Do I need prior crochet experience for this pattern?

This pattern is rated intermediate and uses small hooks, joining techniques and wire reinforcement; basic amigurumi skills and experience with increases/decreases are recommended.

How long does this project typically take to complete?

This is a multi-day project and typically takes 12+ hours depending on your experience and how much time you spend on assembly and wire reinforcement.