About This Anatomical Heart Amigurumi Pattern
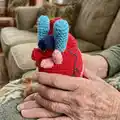
This pattern creates a realistic-style anatomical heart amigurumi with separate crocheted arteries and veins for attaching to the heart body. The instructions are written round-by-round so you can follow each increase, decrease and shaping step precisely. It includes small details for the aortic arch, pulmonary arteries, veins, and guidance for sewing everything together.
Great for stitchers who enjoy small toy construction and detailed finishing work. The pattern uses simple single crochet shaping and clear assembly photos to help you place each vessel accurately.
Why You'll Love This Anatomical Heart Amigurumi Pattern
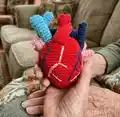
I absolutely love this pattern because it turns a scientific subject into a playful crochet project that still respects anatomical shapes. I enjoy how each small tube and arch is crocheted separately and then assembled — it makes the process relaxing and modular. I love the way embroidery lines add realistic arteries and veins to the finished piece. Making this pattern always feels like creating a tiny piece of art that also teaches and delights.
Switch Things Up
I love how easy it is to customize this pattern by changing yarn colors—try pastel shades for a softer, whimsical heart or high-contrast colors for a graphic look.
You can make a mini keychain version by switching to thinner yarn and a smaller hook for a pocket-sized heart.
If you want a larger display piece, use bulkier yarn and a larger hook; remember to adjust stuffing to keep the shape smooth and proportional.
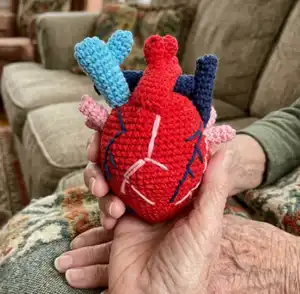
I often add embroidered veins in a slightly darker or lighter shade to emphasize detail—use simple straight stitches with a yarn needle to follow photo guides.
Try adding a little loop at the top to hang your heart as an ornament or educational model; a short chain and a few slip stitches make a tidy hanging loop.
For a tactile version, I sometimes insert a small bell or crinkle material inside before closing to create a sensory toy (securely enclose so nothing escapes).
I like experimenting with metallic or variegated yarn for a unique finish—this gives a different visual texture to the arteries and veins.
You can sew on tiny felt labels or embroidered initials for a personalized gift that also teaches anatomy.
Consider stuffing more firmly for a sturdier display or less for a softer, squeezable toy—adjust based on how you plan to use the heart.
For posability, I have tried adding a short wire inside longer vessels (carefully wrapped) so they hold a curve; use this sparingly and ensure ends are hidden for safety.
Common Mistakes & How to Fix Them
✗ Skipping use of a stitch marker causes losing track of the round start; place a marker in the first stitch of every round to stay on track and avoid miscounts.
✗ Not stuffing as you go leads to lumps or an uneven heart shape; stuff small amounts gradually and shape the piece with your fingers as you go for a smooth finish.
✗ Pulling the magic ring tail too tightly before a few rounds can distort the opening; close the ring tightly after a couple of rounds or tighten again after a round or two to ensure a neat center.
✗ Forgetting to hide and secure tails results in loose ends; leave tails for sewing, weave them into the fabric, and hide them inside the piece before final assembly.