🧢 Beautiful ✨ Detailed πŸ’ Adorable

Among Us Amigurumi Pattern

Among Us Amigurumi Pattern
4.1β˜… Rating
2-4 Hours Time Needed
1.6K Made This
βœ‚οΈ

Intermediate Level

Ideal for those with basic crochet experience, featuring slightly more advanced stitches and techniques to expand your skills.

⏱️

Bite-Sized Project

Finishes in 2-4 hoursβ€”perfect for an afternoon of creative relaxation.

🧸

Cute Companion

An adorable friend to cherish, handcrafted with love to bring comfort and joy for years to come.

About This Among Us Amigurumi Pattern

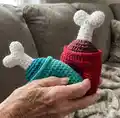
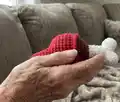
This pattern creates a small Among Us style amigurumi with a split-leg body and a removable bone top. The design includes a decorative collar and instructions for joining two legs, shaping the bone, and finishing neatly. Youll get clear round-by-round directions and photos to help with assembly and finishing.

Among Us Amigurumi Pattern crochet pattern - detailed view of completed project

Perfect for gifting or as a playful desktop companion, this amigurumi uses worsted weight yarn and a 3.25 mm hook. It includes tips on tension, stuffing, and adjusting details if you change yarn size.

Why You'll Love This Among Us Amigurumi Pattern

I absolutely love this pattern because it turns a simple shape into a character with personality using very few pieces. I enjoy the satisfying shaping when joining the two legs into a single body β€” its a smart little construction trick. Sewing the bone into the top is a fun finishing touch that makes the piece instantly recognizable and playful. I also love that the pattern is compact enough to make multiple color variations quickly for gifts or craft markets.

Among Us Amigurumi Pattern step 1 - construction progress Among Us Amigurumi Pattern step 2 - assembly progress Among Us Amigurumi Pattern step 3 - details and accessories Among Us Amigurumi Pattern step 4 - final assembly and finishing

Switch Things Up

I love swapping colors to make a whole crew of different characters; choose bold, neon, or pastel palettes to change the mood of each crewmate.

You can easily make a larger or smaller version by changing yarn weight and hook size β€” try bulky yarn for a plush chunky crewmate or fingering yarn for mini keychain versions.

I often add small embroidered patches or felt accessories like tiny hats, scarves, or backpacks to personalize each character for birthdays or holidays.

Try using safety eyes, embroidering eyes, or using French knots for different expressions and levels of durability for toys intended for small children.

For a different texture, substitute cotton for acrylic or a textured blend; just remember to tighten your stitches or use a smaller hook to keep stuffing hidden.

I sometimes add a tiny loop at the top and a keyring to turn a mini version into a zipper pull or bag charm β€” it makes a great little gift.

Play with the collar color and width β€” a contrasting collar creates a fun frame for the bone detail and can be made taller or shorter for different looks.

Want a portable version? Make the piece hollow with an opening and add a small pocket or Velcro closure to store tiny treasures inside.

I recommend experimenting with embroidery for facial details; a slightly different eye placement can completely change the character's personality.

Finally, I sometimes embroider small logos or initials on the back for custom, personalized crew members β€” it's a great way to make each amigurumi unique.

Common Mistakes & How to Fix Them

βœ— Not keeping stitches tight enough when using worsted weight yarn; use a slightly smaller hook or tighten your tension so stuffing does not show through the stitches. βœ— Forgetting to leave the second leg un-fastened before joining; do not slip stitch off the second leg so you can join legs seamlessly with the chain-3 bridge. βœ— Not stuffing gradually while shaping; stuff small amounts at a time for smooth, even shaping and to avoid lumps in the legs and body. βœ— Miscounting stitches after increases and decreases leads to misshapen pieces; count stitches after each increase/decrease round to ensure the correct stitch count. βœ— Ignoring the note about adjusting eyes and embroidery when changing yarn weight; always test eye placement and embroidery on a swatch or loosely assembled piece before final attachment.

Among Us Amigurumi Pattern

Make a charming Among Us crewmate amigurumi with clear intermediate-level instructions and helpful photos to guide your assembly. This pattern features a split leg body, a removable bone top, and a decorative collar β€” great for gifts or display. Youll learn small amigurumi shaping, joining two legs, and attaching the bone detail for a finished, playful look.

Intermediate 2-4 Hours

Materials Needed for Among Us Amigurumi Pattern

β€” Main Fabric

  • 01
    Worsted Weight Yarn (#4) - I Love This Cotton! color 6 White (used for bone and bumps)
  • 02
    Worsted Weight Yarn (#4) - I Love This Cotton! color 32 Aubergine (example accent shown)
  • 03
    Worsted Weight Yarn (#4) - I Love This Cotton! color 60 Red (main body color shown)

β€” Tools Required

  • 01
    D3/3.25 mm Crochet Hook
  • 02
    Polyester Fiberfill
  • 03
    Darning Needle
  • 04
    Scissors

Progress Tracker

0% Complete

β€” Head :

Info :

Refer to the crochet diagram provided for the head/visor shaping and stitch placement (see pattern diagram page).

β€” Body :

Info :

Create a "magic ring" using main yarn (main color).

Round 01 :

[SC] x5 inside ring (10)

Round 02 :

[INC] x5 (10)

Round 03 :

[SC, INC] x5 (15)

Round 04-09 :

[SC] across (15)

Info :

Slip stitch off.

Info :

Create a second leg, this time do not slip stitch off.

Round 10 :

Chain 3 and attach first leg to second. SC all stitches from 2nd leg, SC across three chains, SC all stitches from 1st leg, SC across the back of the three chains. (36)

Round 11-15 :

[SC] around.

Info :

Fasten off.

β€” Bone Top :

Info :

Create a "magic ring" using white yarn.

Round 01 :

[SC] x6 inside ring (6)

Round 02 :

[INC] x6 (12)

Round 03-04 :

[SC] across (12)

Info :

Slip stitch off.

Info :

Create a second bone bump, this time do not slip stitch off.

Round 05 :

[SC] across both bumps together. (24)

Round 06 :

[DEC] x12 (12)

Round 07-11 :

[SC] around.

Info :

Change to secondary yarn.

Round 12 :

[SC1, INC] x6 inside ring (18)

Round 13 :

[SC1, INC, SC1] x6 (24)

Round 14 :

[SC3, INC] x6 (30)

Round 15 :

[SC2, INC, SC2] x6 (36)

Info :

Slip stitch off and sew through back stitches from row 14 of the body.

β€” Assembly :

Info :

Sew the bone/collar assembly into the top opening by aligning the collar with the back stitches at row 14 of the body and sewing securely.

Assembly Instructions

  • Slip stitch off and sew through back stitches from row 14 of the body to attach the collar/bone assembly securely.
  • Stuff the body firmly but not overstuffed before closing the top; add filling gradually until you reach the desired firmness.
  • When joining the two legs, chain 3 to bridge the legs then SC around as instructed in round 10 to create a smooth join between both legs.
  • Pin the secondary yarn collar to the top of the body aligned with row 14 before sewing to ensure even placement and consistent coverage.
  • Weave in all ends securely with the darning needle and check the join seams to prevent stuffing from escaping.

Important Notes

  • πŸ’‘Hook size is not as important as having your stitches tight so as to not show the stuffing inside.
  • πŸ’‘If you change your yarn size, be sure to adjust your eyes and embroidery accordingly.
  • πŸ’‘Stuff firmly but not too tightly for the best shape and structure - overstuffing can distort your work.
  • πŸ’‘Create the second leg without slip stitching off so you can join legs together seamlessly with the chain 3 bridge.

This Among Us amigurumi pattern is a quick and fun make that will add personality to your handmade collection. 🧢 It combines clever shaping with simple assembly to create a charming crewmate and bone detail. 🎁 Perfect for gifting, table decor, or a playful shelf buddy β€” happy stitching! ✨

You ask,

we answer.

FAQs

What size will the finished piece be?

The finished amigurumi measures approximately 8-12 cm tall depending on yarn and hook tension; using the recommended worsted yarn and 3.25 mm hook will give a compact result.

Can I use different yarn weights for this pattern?

Yes, you can use different yarn weights but this will change the final size; if you change yarn size, adjust hook, eye sizes, and embroidery placement accordingly.

Do I need prior crochet experience for this pattern?

This pattern is rated intermediate and assumes familiarity with magic ring, single crochet, increases, decreases, and joining pieces in the round.

How long does this project typically take to complete?

Most crocheters complete this project in 2-4 hours, though time may vary based on experience level, color changes, and finishing details.