About This Starfish Amigurumi Pattern
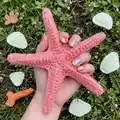
This pattern creates a delicate crocheted starfish available in a thin and a large version. Youll work in rounds to form the center and then create five arms with chain foundations and surface stitches. The pattern also explains how to shape your starfish using a simple glue-and-water technique for a realistic, sculpted finish.
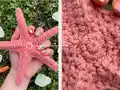
Clear round-by-round instructions make this project approachable for beginners, while shaping tips let you personalize stiffness and texture. Photos and materials details are included so you can match the example or experiment with your own yarn choices.
Why You'll Love This Starfish Amigurumi Pattern
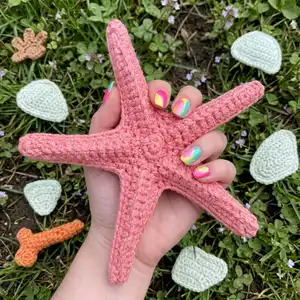
I absolutely love this pattern because it combines simple crochet with an enjoyable finishing technique that brings the starfish to life. I enjoy how a few basic stitches and short rounds transform into a recognizable sea creature with charming arms. The shaping method is satisfying — you can control stiffness and silhouette with a glue-water mix to get exactly the look you want. Making both thin and large versions gives me options for gifts, decor, or little wearable charms.
Switch Things Up
I love how easy it is to customize this starfish pattern by changing yarn color and weight — pastel shades make soft decor while bright colors create playful toys.
I often switch to a slightly thicker cotton and a larger hook to make a chunkier starfish that looks great as a decor piece.
If you want mini keychains, use thinner thread and a 1.25 mm hook to make very small versions and attach a keyring before finishing.
I like to experiment with surface embroidery or tiny seed beads stitched onto the arms before shaping for an ocean-sparkle effect.
Try different glue-to-water ratios when shaping: 2:1 gives a moderate stiffness while 1:1 produces a firmer, more sculptural star.
To keep the starfish soft rather than stiff, skip glue and block the piece gently with water, shaping it and letting it air dry on a towel instead.
I sometimes paint light washes of diluted acrylic paint after drying to add subtle shading along the arms for extra realism.
For a seasonal twist, make a set in metallic or variegated yarns and hang them as ornaments or a garland.
I also enjoy creating a family of starfish in graduated sizes to display together — change hook sizes and yarn weights to scale each one.
If you want posable arms, sew a thin wire into each arm before shaping; cover and shape as usual, taking care when drying and sealing.
Common Mistakes & How to Fix Them
✗ Skipping the magic ring setup can make the center hole too large; always start with a proper magic ring and pull tightly to close the center.
✗ Using a large hook recommended on the yarn label will create loose stitches and floppy arms; use a smaller hook like 1.5 mm to get tight, neat stitches.
✗ Not counting stitches after the increase rounds leads to misaligned arms; count your stitches at the end of each round to confirm the expected stitch count.
✗ Rushing the shaping before the piece is fully wet or evenly saturated causes uneven stiffness; soak thoroughly in the glue-water mix and squeeze out excess before shaping.