๐Ÿงถ Beautiful โœจ Detailed ๐Ÿ’ Adorable

Standing and Sitting Goofy Amigurumi Pattern

Standing and Sitting Goofy Amigurumi Pattern
4.5โ˜… Rating
5-7 Hours Time Needed
2.8K Made This
โœ‚๏ธ

Intermediate Level

Ideal for those with basic crochet experience, featuring slightly more advanced stitches and techniques to expand your skills.

โฑ๏ธ

Weekend Treat

Takes 5-7 hours, making it an enjoyable project to finish over a couple of days.

๐Ÿงธ

Cute Companion

An adorable friend to cherish, handcrafted with love to bring comfort and joy for years to come.

About This Standing and Sitting Goofy Amigurumi Pattern

This pattern creates both a standing and a sitting version of Goofy as a small amigurumi toy. It includes step-by-step rounds for head, ears, arms, legs, body, jacket, nose and hat so you can assemble a complete character. Techniques include magic ring, increases, decreases and working in FLO for facial shaping.

Standing and Sitting Goofy Amigurumi Pattern crochet pattern - detailed view of completed project

You can make both the standing and sitting versions using the same instructions and change yarn weight to adjust size. The pattern includes photos and helpful placement notes for sewing parts together.

Why You'll Love This Standing and Sitting Goofy Amigurumi Pattern

I absolutely love this pattern because it captures Goofy s playful look while staying compact and easy to follow. I enjoy the way the FLO rounds create the facial mask and expression, giving the finished doll a lot of personality. I love that you can make either a standing or sitting version from the same instructions, making the pattern versatile and fun. The jacket and hat give great opportunities to add your own color choices and creative details.

Standing and Sitting Goofy Amigurumi Pattern step 1 - construction progress Standing and Sitting Goofy Amigurumi Pattern step 2 - assembly progress Standing and Sitting Goofy Amigurumi Pattern step 3 - details and accessories Standing and Sitting Goofy Amigurumi Pattern step 4 - final assembly and finishing

Switch Things Up

I love swapping yarn colors to make different character moods; changing the jacket and hat colors gives the doll a fresh personality every time.

I often change yarn weight and hook size to make a tiny keychain version or a larger cuddle-sized Goofy; thicker yarn and a bigger hook create a chunky doll.

I like to embroider extras like eyebrows or a mouth to change expressions; small stitched lines or felt pieces can dramatically change the character s face.

I sometimes add soft wire into the ears or arms to make them poseable; this works well when you want a more animated stance for display.

Try swapping the nose for a safety nose or a tiny crocheted beak for a custom look; you can also put a small bell inside the hat for charm.

I recommend mixing textures by using a slightly fuzzy yarn for the jacket while keeping the main body in smooth cotton for contrast.

For gift sets, I make matching mini accessories like a tiny scarf or bag using leftover yarn; these look adorable with the jacket and hat.

I sometimes add blush with pink makeup powder or acrylic paint for a delicate cheek tint; apply sparingly and set if needed.

I enjoy making a pair: one standing and one sitting, then altering outfit colors so they look like a coordinated duo on a shelf.

If you want to simplify assembly, I will crochet the jacket directly onto the body in one piece; this reduces sewing time and creates a clean finish.

Common Mistakes & How to Fix Them

โœ— Skipping stitch markers at the start and end of rounds causes confusion during shaping; use a stitch marker or a contrasting piece of yarn to mark the last stitch of each round. โœ— Overstuffing the head or body leads to distortion and flattened shaping; add stuffing gradually and shape as you go to keep even curves and proportions. โœ— Failing to count stitches after increases or decreases results in incorrect shaping; count your stitches at the end of each round and correct mistakes immediately. โœ— Not securing color changes or loose ends properly can create sloppy seams and gaps; weave in ends neatly and secure color transitions with small, tight stitches for a tidy finish.

Standing and Sitting Goofy Amigurumi Pattern

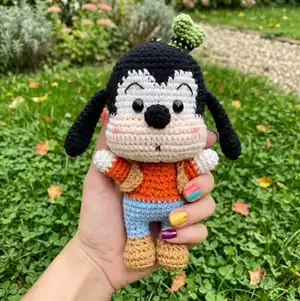
Create your own Standing or Sitting Goofy amigurumi using simple supplies and clear step-by-step rounds. This pattern guides you through head, ears, arms, legs, body, jacket, nose and hat so you can make a full character. You can customize colors and size by changing yarn weight or hook size. Perfect as a gift or collectible to display or play with.

Intermediate 5-7 Hours

Materials Needed for Standing and Sitting Goofy Amigurumi Pattern

โ€” Main Fabric

  • 01
    4 Ply cotton yarn (main requirement)
  • 02
    Black yarn - small amount for head hair, ears and nose (approx. 10-25g)
  • 03
    White yarn - small amount for face details (approx. 10-20g)
  • 04
    Skin colour yarn (light beige/peach) - approximately 20-30g for face and muzzle
  • 05
    Brown yarn - small amount for jacket details (approx. 10-20g)
  • 06
    Blue yarn - approximately 20-30g for trousers/body (standing or sitting)
  • 07
    Orange yarn - small amount for jacket/arms (approx. 10-20g)
  • 08
    Green yarn - small amount for hat (approx. 5-10g)

โ€” Tools Required

  • 01
    Crochet hook size 1.8mm
  • 02
    Oval plastic eyes 0.6x0.8 cm (pair)
  • 03
    Nose 1.4 cm (or crochet nose with black yarn)
  • 04
    Scissors
  • 05
    Yarn needle for sewing
  • 06
    Stitch markers or a piece of yarn to mark rounds
  • 07
    Polyester stuffing (cotton fill)
  • 08
    Soft wire for inserting into ears or limbs (optional)
  • 09
    Pink blush makeup powder or pink acrylic paint for cheeks

Progress Tracker

0% Complete

โ€” Head :

Round 1 :

Magic Ring 6X (6)

Round 2 :

6V (12)

Round 3 :

6 (X, V) (18)

Round 4 :

6 (X, V, X) (24)

Round 5 :

6 (3X, V) (30)

Round 6 :

6 (2X, V, 2X) (36)

Round 7 :

6 (5X, V) (42)

Round 8 :

6 (3X, V, 3X) (48)

Round 9 :

48X (48)

Round 10 :

18X, 4X, 4X, 4X, 18X (48)

Round 11 :

17X, 6X, 2X, 6X, 17X (48)

Round 12-15 :

16X, 16X, 16X (48)

Round 16 :

17X, 14X, 17X (48)

Round 17 :

12X, A, 20X, A, 12X (46)

Round 18 :

12X, FLO X, FLO 3V, FLO 7 (X, V), FLO 3V, FLO X, 12X (59)

Round 19 :

12X, 35X, 12X (59)

Round 20 :

12X, X, 33T, X, 12X (59)

Round 21-22 :

12X, 35X, 12X (59)

Round 23 :

12X, X, 3A, 7 (X, A), 3A, X, 12X (46)

Round 24 :

X, 3 (X, A, X), 5 (X, A, X), X, A, X, 2 (X, A, X), X (35)

Info :

On R24, begin to cotton in. BLACK TEXT indicates standard stitches, RED TEXT indicates WHITE sections, BLUE TEXT indicates SKIN COLOUR yarn in the original pattern photos.

Round 25 :

X, 3 (X, A), 5 (X, A), X, A, 2 (X, A), X (24)

Round 26 :

6 (X, A, X) (18)

โ€” Ear (MAKE 2) :

Round 1 :

Magic Ring 5X (5)

Round 2 :

5V (10)

Round 3-5 :

10X (10)

Round 6 :

A, 3X, A, 3X (8)

Round 7-10 :

8X (8)

Round 11 :

A, 2X, A, 2X (6)

Round 12-14 :

6X (6)

Info :

BLACK YARN used for ears in pattern photos. You don t have to cotton in the ears. You may insert soft wire for structure if desired.

โ€” Arms (MAKE 2) :

Round 1 :

Magic Ring 6X (6)

Round 2 :

3 (X, V) (9)

Round 3 :

9X (9)

Round 4 :

4X, In one stitch: 3HDC, 4X (9)

Round 5 :

9X (9)

Round 6 :

A, 7X (8)

Round 7-8 :

8X (8)

Info :

For the arms, you don t have to cotton them too full. HDC = Half Double Crochet in pattern notes. BLACK text = WHITE yarn in photos and ORANGE text = ORANGE yarn for arm sections.

โ€” Leg + Body (STANDING) :

Round 1 :

5CH, working on 2nd stitch: 3X, W, 2X, V (10)

Round 2 :

V, 2X, 3V, 2X, 2V (16)

Round 3-4 :

16X (16)

Round 5 :

4X, 4A, 4X (12)

Round 6 :

A, 2X, 2A, 2X, A (8)

Round 7-8 :

8X. Fasten Off first leg. Repeat R1-8 to make second leg; you don t have to fasten off second leg. (8)

Round 9 :

4CH, connect both leg. On Legs 8X+ On CH 4X+ On Legs 8X+ On CH 4X (24)

Round 10 :

6X, 4 (X, V), 6X, 2 (X, V) (30)

Round 11 :

30X (30)

Round 12 :

6 (2X, V, 2X) (36)

Round 13-14 :

36X (36)

Round 15 :

6 (2X, A, 2X) (30)

Round 16 :

6X, 4 (X, A), 6X, 2 (X, A) (24)

Round 17 :

24X (24)

Round 18 :

6 (X, A, X) (18)

Round 19-20 :

18X (18)

Info :

BLACK TEXT = BROWN YARN. BLUE TEXT = BLUE YARN. ORANGE TEXT = ORANGE YARN in original photos and notes.

โ€” Leg (SITTING) :

Round 1 :

5CH, working on 2nd stitch: 3X, W, 2X, V (10)

Round 2 :

V, 2X, 3V, 2X, 2V (16)

Round 3-4 :

16X (16)

Round 5 :

4X, 4A, 4X (12)

Round 6 :

A, 2X, 2A, 2X, A (8)

Round 7-8 :

8X (8)

Info :

BLACK TEXT = BROWN. BLUE TEXT = BLUE YARN for sitting leg photos and color cues.

โ€” Body (SITTING) :

Round 1 :

Magic Ring 8X (8)

Round 2 :

8V (16)

Round 3 :

8 (X, V) (24)

Round 4 :

24X (24)

Round 5 :

X, V, 6X, 4 (X, V), 7X, V (30)

Round 6 :

30X (30)

Round 7 :

6 (2X, V, 2X) (36)

Round 8 :

36X (36)

Round 9 :

6 (2X, A, 2X) (30)

Round 10 :

X, A, 6X, 4 (X, A), 7X, A (24)

Round 11 :

24X (24)

Round 12 :

6 (X, A, X) (18)

Round 13-14 :

18X (18)

Info :

On R11, begin to cotton fill. Once done, leave long tail for sewing.

โ€” Jacket (WORK IN LINES) :

Round 1 :

25CH, working on 2nd stitch: 24X (24)

Round 2 :

1CH Flip over, 6 (3X, V) (30)

Round 3 :

1CH Flip over, 3X, 6CH, Empty 6 stitches, X, 10T, X, 6CH, Empty 6 stitches, 3X (30)

Round 4 :

1CH Flip over, 9X, TV, 10T, TV, 9X (32)

โ€” Nose (You may replace with 1.4cm plastic eyes or nose) :

Round 1 :

Magic Ring 6X (6)

Round 2 :

6V (12)

Info :

BLACK YARN used for the nose in the photos; you may instead use a 1.4cm plastic nose or eye as noted.

โ€” Hat :

Round 1 :

Magic Ring 6X (6)

Round 2 :

6X. Fasten off the first one. Repeat R1-R2 to make a second one. (6)

Round 3 :

Insert hook into the first one to connect both pieces: 6X+6X (12)

Round 4 :

2 (2X, A, 2X) (10)

Round 5 :

10X (10)

Round 6 :

10X (10)

Info :

GREEN TEXT = GREEN yarn sections and BLACK TEXT = BLACK in original photos for the hat details.

โ€” Assembly :

Info :

Position for the ears as shown in photos; place symmetrically on the head top. Position sewing legs for the sitting Goofy with distance between both legs around 4 or 5 stitches at the center.

Info :

You can join rounds with slip stitch or turn. Use a stitch marker or a piece of yarn to mark the ending of each round. Read through the pattern completely before beginning to crochet.

Info :

Attach arms on either side of the body between the rows that align to the shoulders; sew head to body with long tail left from body R11 or head finishing and make sure to stuff before closing.

Assembly Instructions

  • Position the ears on the top sides of the head and sew them securely, matching the placement shown in the pattern photos for symmetry.
  • Position and sew the legs for the sitting Goofy with a distance of about 4 or 5 stitches between the legs at the center to ensure proper balance and posture.
  • Attach the head to the body using the long tail left from finishing rounds; stuff the head and body firmly before closing and use a whipstitch or mattress stitch to secure.
  • Sew the arms to the body on either side, slightly angling them forward; do not over-stuff the arms to keep a natural shape.
  • Attach the jacket and hat after all sewing is complete, positioning the jacket around the torso and the hat on the top of the head; secure with small whipstitches and weave in ends.

Important Notes

  • ๐Ÿ’กUse stitch markers or a piece of yarn to mark the end of rounds, especially when working in continuous rounds to keep track of stitch counts.
  • ๐Ÿ’กStuff gradually and evenly; overstuffing can distort shaping while under-stuffing can leave gaps and floppiness.
  • ๐Ÿ’กPin parts in place before sewing to ensure correct positioning and symmetry, then sew with small, secure stitches for durability.
  • ๐Ÿ’กWork at consistent tension for even shaping and stitch definition; changing hook size or yarn weight will alter the finished size and gauge.

This Standing and Sitting Goofy pattern makes a charming handmade friend you can customize with color and tiny details.๐Ÿงถ Perfect for gifting, collecting, or displaying โ€” make a matching pair in different sizes for extra charm.๐ŸŽ Have fun personalizing the jacket and hat for a unique, playful finish.โœจ

You ask,

we answer.

FAQs

What size will the finished piece be?

The finished amigurumi height varies with yarn and hook size, but using 4-ply cotton yarn and a 1.8mm hook will produce a small toy roughly 12-18 cm depending on standing or sitting configuration.

Can I use different yarn weights for this pattern?

Yes, you can use different yarn weights, but the final size and stitch counts will change; choose an appropriate hook for your yarn and expect a larger or smaller finished doll.

Do I need prior crochet experience for this pattern?

This pattern is rated intermediate, so familiarity with magic ring, increases, decreases and working in FLO is recommended for best results.

How long does this project typically take to complete?

Most crocheters complete this project in 5-7 hours, though time will vary based on experience level, assembly complexity, and whether you make standing and/or sitting versions.