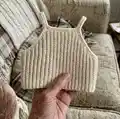
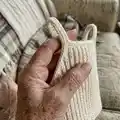
This is the written pattern for the Roza top, Version B — a cropped racerback crochet top designed to be close-fitting and stylish. You will find step-by-step instructions, gauge info, materials list and helpful video links to guide you through every stage. The pattern is adaptable across sizes XS to 5XL and easy to customize for length or strap style. Make it in breathable cotton for a comfortable summer staple you will love to wear.
Progress Tracker
0% Complete
— Materials :
Info :
Crochet hook 3.00 mm (or hook needed to meet gauge). Cotton or cotton blend yarn, fingering weight. For sizes XS,S,M,L,XL,2XL,3XL,4XL,5XL you will need 100,100,150,150,200,200,250,250,300 g (approximated). Suggestions: Rainbow 8/4 Cotton from Hobbii, or Mandarin from Sandnes Garn. Measuring tape. Scissors. Tapestry needle to weave in ends. Blocking board/towel and pins. Elastic band 5 mm width (optional). Sewing needle and thread. 4 x stitch markers.
— Stitches and Abbreviations :
Info :
Chain(s) – ch(s). Stitch(es) – st(s). Half double crochet(s) – hdc(s). Yarn over slip stitch(es) – yoslst(s). Slip stitches – slst(s).
— Gauge :
Info :
10x10 cm or 4x4 inches = 28 sts x 20 rows. Make a gauge swatch before starting to ensure correct finished measurements; measure swatch while unstretched.
— Read this before you start! :
Infos :
Take a good look at the size chart above so you can determine if you want to make any changes to the length of the top, for example. Take some time to study the Excel sheet and make sure you understand the stitch counts. The same stitch combination will be used throughout the entire pattern: alternate between a row of hdc (BLO) and a row of yoslst (FLO). We will always increase/decrease on the same edge; the other edge continues straight. To check your stitch count refer to the Excel sheet under the tabs called "Stitch count X". The "ch 1" between each row does not count as a stitch; assume you make ch 1 after each row even if not stated.
— Video Tutorials :
Info :
Half double crochet & Yarn over slip stitch tutorial w Increases and Decreases. Seaming and creating the bottom edge of the Roza top. Making the edges of the Roza top.
— Body :
Round 1 :
Start by chaining (41,45,49,53,57,61,65,69,73). This number will determine the length of the top, specifically the length in the back. If you want it to be longer than stated in the size chart for measurement B and C, you can write in a different number for the starting chains in the Excel sheet just above your size.
Round 2 :
Row 1: In the second and third ch from the hook, make one hdc (one decrease). In the next two chs, make one hdc (one decrease). Hdc once in each remaining ch. Ch 1 and turn.
Round 3 :
Row 2: Yoslst into the front loop of each stitch until you have four stitches left. Make one yoslst in the first two stitches (one decrease) and one yoslst in the last two stitches (one decrease). Ch 1 and turn.
Round 4 :
Row 3: Make one hdc in the first two stitches (one decrease) and another hdc in the following two stitches (one decrease). Hdc once in each remaining ch. Ch 1 and turn.
Round 5 :
For sizes S-5XL: Row 4 – (4,5,6,7,8,9,10,11): Repeat row 2 and 3 until you’ve made the number of rows stated above for your size (for size S, you only repeat row 2). Ch 1 and turn after each row.
Round 6 :
For all sizes: Row (4,5,6,7,8,9,10,11) – (6,8,10,12,14,16,18,20,22): Continue alternating between a row of hdc in the back loop and a row of yoslst in the front loop but decrease one on every row. Decrease at the beginning of every row of hdc and at the end of every row of yoslst. Ch 1 and turn after each row.
Round 7 :
Row (7,9,11,13,15,17,19,21,23) – (11,14,17,20,23,26,29,32,35): Continue alternating between a row of hdc and a row of yoslst. Make no increases or decreases. Ch 1 and turn after each row.
Round 8 :
Row (12,15,18,21,24,27,30,33,36) – (26,30,35,42,46,51,56,61,66): Continue alternating between hdc and yoslst but make one increase on every row. Increase at the beginning of every row of hdc and increase at the end of every row of yoslst. Ch 1 and turn after each row.
Round 9 :
Row (27,31,36,43,47,52,57,62,67) – (40,48,56,64,72,80,88,96,104): Keep alternating between hdc and yoslst but increase two on every row.
Round 10 :
Row (41,49,57,65,73,81,89,97,105) – (42,50,58,66,74,82,90,98,106): Make one row of hdc and one row of yoslst. No increases or decreases.
Round 11 :
Row (43,51,59,67,75,83,91,99,107) – (48,58,68,76,87,97,106,116,126): Decrease one on every row.
Round 12 :
Row (49,59,69,77,88,98,107,117,127) – (52,62,72,82,93,103,114,124,134): No increases or decreases. We have now made it past the halfway point!
Round 13 :
Row (53,63,73,83,94,104,115,125,135) – (58,70,82,92,106,118,130,142,154): Increase one on every row.
Round 14 :
Row (59,71,83,93,107,119,131,143,155) – (60,72,84,94,108,120,132,144,156): No increases or decreases.
Round 15 :
Row (61,73,85,95,109,121,133,145,157) – (74,90,105,116,134,149,164,179,194): Decrease two on every row.
Round 16 :
Row (75,91,106,117,135,150,165,180,195) – (89,106,123,138,157,174,191,208,225): Decrease one on every row.
Round 17 :
Row (90,107,124,139,158,175,192,209,226) – (94,112,130,146,166,184,202,220,238): No increases or decreases.
Round 18 :
Row (95,113,131,147,167,185,203,221,239) – (97,116,135,152,173,192,211,230,249): Increase one on every row.
Round 19 :
Row (98,117,136,153,174,193,212,231,250) – (99,119,139,159,179,199,219,239,259): Increase two on every row.
Round 20 :
Row (100,120,140,160,180,200,220,240,260): No increases or decreases.
Info :
Great! We are now finished with the body of the top, but do not cut the yarn just yet. The next step is to block the top (this is not absolutely necessary, but highly recommended as the ribbed rows might otherwise look a bit skewed).
— Blocking :
Info :
Make the last loop a bit bigger to keep it from unravelling while blocking. Submerge the top in lukewarm water and let it sit for 15-20 minutes so it is completely wet before taking it out. Wring out excess water carefully so you don’t unravel anything. Place the top on a blocking board or towel and pin it into the shape and size you want. Use the measurements in the chart; you can stretch slightly if you want it bigger. Let it fully dry before moving on.
— Seaming :
Info :
Start by folding your top in half with right sides facing each other (right side is the "ribbed" side). Insert your hook into the first loop of both edges and make a slip stitch. Repeat the process for the rest of the edge until it is fully attached. You should now be at the bottom edge.
— Bottom edge :
Info :
Turn the top inside out so you have the right sides facing out. Two options for bottom edge: single row of sc or several rows with elastic band inserted.
Round 21 :
If you only want a single row of sc, make one sc for every row on the body of the top. Sl st to the first sc you made and cut the yarn and fasten the loose end.
Round 22 :
If you want to include the elastic band: make one sc for every row of yoslsts and two scs for every row of hdc. Sl st to the first sc you made, then ch 1. Make additional rows of sc (sc once into each stitch from the previous round) until the length is a little over double the width of the elastic band. The author’s band was 5 mm wide and required about 5 rows (edge ≈12 mm). Tie a knot to secure, measure ~1 m yarn and cut. Cut the elastic so it’s narrower than the edge; the author cut elastic 7 cm smaller than waist circumference and overlapped ends ~1.5 cm. Sew elastic ends together to form a closed loop. Fold the bottom edge inwards with band inside and use a tapestry needle to sew the folded edge shut with hemming or overcast stitch. Fasten and cut yarn.
— Edges and straps :
Round 23 :
With right sides facing out we will make the remaining edges and straps. Start by placing the top with its back facing up. We are going to start on the right side of the middle (you can start either side). Locate approximately where the armpit would be. Insert your hook into the top edge, yarn over and pull through.
Round 24 :
Sc along the edge placing two sc for every row of hdc and one sc for every row of yoslst until you reach the middle back. Make sure to stop when you are right on top of the seam.
Round 25 :
We will now create the strap that will attach to the front of the top using chains. The number of chains is individual; the author made 80 chains for size S as a reference. Attach to the stitch mark on the opposite side with an sc and try on to check fit.
Round 26 :
After you are happy with the number of chains (write this number down), and you have sc into the stitch with the second stitch marker placed in the front, you should now have a strap. Continue toward the armpit until you have made it back to where you first started. Sl st to the first sc you made.
Round 27 :
Ch 2 and do not turn. Hdc into every stitch from the previous round, including the chains. Then sl st to the first ch 2.
Round 28 :
Ch 1 and turn. Make yoslst into the front loop of every stitch from the previous round. Then sl st to the first ch 1.
Round 29 :
Ch 2 and turn. Hdc into the back loop of every stitch from the previous round. Sl st to the first ch 2.
Round 30 :
Repeat round 28 (yoslst round). Then cut the yarn and fasten the loose end.
Round 31 :
Locate the opposite armpit and insert your hook into the top edge. Sc along the edge until you reach the other stitch marker in the front. Place on sc into this stitch then start chaining to make the other strap. The second strap will be slightly shorter if you plan to connect them in the center; the author subtracted 15 chains from the first strap and connected the last 15 chains of both straps together by slip stitching into each of those 15 stitches to reach the middle seam.
Round 32 :
After the strap is made and the two straps are connected at the bottom, continue with sc along the edge until you’re back at the armpit again. Sl st to the first sc.
Round 33 :
Repeat rounds 27-30 for the opposite strap (hdc row, yoslst row, hdc row, yoslst row) as before to finish the strap construction.
— Front edge (Version B) :
Round 34 :
We are now going to make the front edge. For Version B keep the edge along the front and crochet back and forth. Lay your top down with the front facing up.
Round 35 :
Insert your hook into the top right corner, right next to where the strap is connected to the body. Yarn over and pull through, then ch 1. Carefully remove the loop from your hook and insert your hook into the first stitch of the strap, grab the loop again and pull through.
Round 36 :
Sc along the front edge until you reach the strap on the opposite side. Sl st to the first stitch on the strap, ch 1 and turn.
Round 37 :
Carefully remove the loop from your hook and insert your hook into the next stitch on the strap, grab the loop and pull through. Make yoslst into each sc from the previous row (insert into main loops, not just the front loop) until you reach the opposite strap. Sl st to the next stitch on the strap, then ch 2 and turn.
Round 38 :
Remove the loop from your hook, insert your hook into the next stitch on the strap, grab the loop again and pull through. Hdc into the back loop of each stitch until you reach the other strap. Sl st to the next stitch on the strap, ch 1 and turn.
Round 39 :
For the final row make yoslst sts. Repeat the process of attaching to the next stitch of the strap and then yoslst st to the other side. Sl st to the strap. Cut the yarn and fasten the loose end.
Info :
You are now finished with your top!!
This Roza Version B racerback crop top is a versatile and flattering summer staple you can make yourself. It uses an elegant hdc + yoslst rib stitch for a snug, textured finish that looks great in cotton. Customize length, strap style, and edging to make it uniquely yours. 🧶 Happy crocheting and enjoy your new handmade top! ✨