🧢 Beautiful ✨ Detailed πŸ’ Adorable

Little Elephant Amigurumi Pattern

Little Elephant Amigurumi Pattern
4.4β˜… Rating
5-7 Hours Time Needed
1.5K Made This
βœ‚οΈ

Intermediate Level

Ideal for those with basic crochet experience, featuring slightly more advanced stitches and techniques to expand your skills.

⏱️

Weekend Treat

Takes 5-7 hours, making it an enjoyable project to finish over a couple of days.

🧸

Cute Companion

An adorable friend to cherish, handcrafted with love to bring comfort and joy for years to come.

About This Little Elephant Amigurumi Pattern

This pattern creates a charming little elephant amigurumi with removable bow and a little skirt. It uses amigurumi yarn and a 2.25 mm hook to achieve tight stitches and neat shaping. You will make separate pieces (head, trunk, ears, body, arms, legs, skirt and bow) and sew them together for a delightful finished toy.

Little Elephant Amigurumi Pattern crochet pattern - detailed view of completed project

The pattern includes explicit round-by-round instructions, photos for reference, and finishing tips for facial details and assembly. Ideal for gifting or decorating a nursery.

Why You'll Love This Little Elephant Amigurumi Pattern

I absolutely love this pattern because it combines sweet, feminine details with classic amigurumi shaping that really brings the elephant to life. I enjoy the clear step-by-step rounds that make shaping predictable and easy to follow. The mix of color changes for the dress, shoes and bow adds personality and makes the finished toy feel special. Sewing the pieces together and adding the tiny embroidery details is very satisfying and gives the finished elephant a handmade charm I adore.

Little Elephant Amigurumi Pattern step 1 - construction progress Little Elephant Amigurumi Pattern step 2 - assembly progress Little Elephant Amigurumi Pattern step 3 - details and accessories Little Elephant Amigurumi Pattern step 4 - final assembly and finishing

Switch Things Up

I love personalizing amigurumi and this Little Elephant is perfect for customization: change the skirt color to make seasonal outfits or try pastel shades for a nursery-friendly version.

You can adjust the final size by switching yarn weight and hook size; use bulky yarn and a larger hook for a chunky, cuddly elephant or finer yarn for a mini keepsake.

I often add embroidered details like a tiny heart on the skirt or a monogram on the bow to give each toy a unique touch.

Try different eye sizes β€” smaller safety eyes or embroidered eyes β€” to alter the expression and safety level for babies.

Swap the bow for a tiny hat or flower applique to match themes like birthdays or baby showers; glue or sew them on depending on the look you want.

I recommend experimenting with texture by using boucle or fuzzy yarn for a soft, teddy-like finish on the body while keeping smooth yarn for the skirt and bow.

If you want posable limbs, I sometimes add a thin craft wire inside the arms for gentle shaping, taking care to seal wire ends safely inside stuffing.

Make a collection by varying color palettes β€” neutral gray with mustard accents or bold jewel tones for a contemporary look.

I also enjoy creating matching accessories, such as a tiny blanket or a miniature stuffed mouse, to photograph as a set or to sell as a bundle.

Finally, feel free to scale the pattern up into a larger toy by multiplying yarn and hook size; plan for extra stuffing and stronger seams for larger scales.

Common Mistakes & How to Fix Them

βœ— Skipping stitch markers during rounds can cause miscounted stitches and uneven shaping; place a stitch marker at the first stitch of each round and move it as you go to stay accurate. βœ— Forgetting to place safety eyes at the specified round will shift facial placement; insert the safety eyes between round 22 of the head with 15 sc between to match the pattern photos. βœ— Not stuffing gradually leads to lumps and flattened areas; add stuffing little by little while shaping and check symmetry frequently for a smooth finish. βœ— Changing colors without securing ends neatly can cause unraveling or messy joins; weave in color change tails securely and carry yarn where appropriate to hide ends. βœ— Overtightening your tension can make pieces too small and stiff, making assembly difficult; maintain relaxed, even tension to achieve the correct gauge for all parts.

Little Elephant Amigurumi Pattern

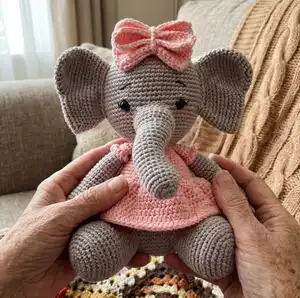
Make an adorable Little Elephant amigurumi with full step-by-step instructions, clear photos, and assembly notes. This sweet pattern uses soft neutral and pink tones to create a cuddly toy perfect for nurseries or gifts. Detailed rounds, materials, and finishing tips help you complete a professional-looking handmade companion.

Intermediate 5-7 Hours

Materials Needed for Little Elephant Amigurumi Pattern

β€” Main Fabric

  • 01
    Amigurumi yarn (brand Cirlculo) - grey (main body) - amount as needed for head, body and limbs
  • 02
    Light Pink yarn - for skirt, bow, and dress details - amount as needed
  • 03
    Dark Pink yarn - for small accents (optional)
  • 04
    White yarn - small accents
  • 05
    Black yarn - for embroidery of eyelashes and eyebrows
  • 06
    1 pair of 9 mm safety eyes

β€” Tools Required

  • 01
    Crochet hook Clover 2.25 mm
  • 02
    Tapestry needle
  • 03
    Embroidery needle
  • 04
    Scissors
  • 05
    Pins for assembly
  • 06
    Blush for cheeks
  • 07
    Universal glue (optional for securing bow ends)
  • 08
    Fiberfill stuffing
  • 09
    Crochet stitch marker

Progress Tracker

0% Complete

β€” Head :

Round 1 :

8sc in the MR [8]

Round 2 :

inc in each st around [16]

Round 3 :

(1sc, inc) x 8 [24]

Round 4 :

1sc, inc, (2sc, inc) x 7, 1sc [32]

Round 5 :

(3sc, inc) x 8 [40]

Round 6 :

40sc [1 round]

Round 7 :

2sc, inc, (4sc, inc) x 7, 2sc [48]

Round 8 :

48sc [1 round]

Round 9 :

(5sc, inc) x 8 [56]

Round 10 :

56sc [1 round]

Round 11 :

3sc, inc, (6sc, inc) x 7, 3sc [64]

Round 12 :

64sc [1 round]

Round 13 :

(7sc, inc) x 8 [72]

Round 14-23 :

72sc [10 rounds]

Round 24 :

(7sc, dec) x 8 [64]

Round 25 :

64sc [1 round]

Round 26 :

3sc, dec, (6sc, 1 dec) x 7, 3sc [56]

Round 27-28 :

56sc [2 rounds]

Info :

Place safety eyes between round 22 with 15 sc between.

Round 29 :

(5sc, dec) x 8 [48]

Round 30 :

48sc [1 round]

Round 31 :

2sc, dec, (4sc, dec) x 7,2sc [40]

Round 32 :

40sc [1 round]

Round 33 :

(3sc, dec) x 8 [32]

Round 34 :

(2sc, dec) x 8 [24]

Info :

Fill some more. Cut the Yarn and hide.

β€” Ears 2x :

Info :

Use grey yarn

Round 1 :

6sc in the MR [6]

Round 2 :

2sc in each st around [12]

Round 3 :

(1sc, inc) x 6 [18]

Round 4 :

1sc, inc, (2sc, inc) x 5, 1sc [24]

Round 5 :

(3sc, inc) x 6 [30], continue without cutting the yarn and do: 11 chains, back doing 10sc in the second chain from the hook.

Round 6 :

30sc in the circle, and in the chains of the lower ear: 9sc, inc, 9sc [50]

Info :

Insert the Crochet stitch marker

Round 7-9 :

50sc [3 rounds]

Round 10 :

4sc, dec, (8sc, dec) x 4, 4sc [45]

Round 11-12 :

45sc [2 rounds]

Round 13 :

(7sc, dec) x 5 [40]

Round 14 :

3sc, dec, (6sc, dec) x 4, 3sc [35]

Round 15 :

(5sc, dec) x 5 [30]

Round 16 :

30sc [1 round]

Info :

Do not fill and leave a long yarn to sew. See the photos below.

β€” Trunk :

Info :

Use grey yarn

Round 1 :

6sc in the MR [6]

Round 2 :

2sc in each st around [12]

Round 3 :

(1sc, inc) x 6 [18]

Round 4 :

18sc (back loop only)

Round 5-13 :

18sc [9 rounds]

Round 14-19 :

inc, 8sc, dec, 7sc [6 rounds]

Round 20 :

(2sc, inc) x 6 [24]

Round 21-24 :

24sc [4 rounds]

Info :

Fill and leave a long yarn to sew.

β€” Body :

Info :

Use grey yarn

Round 1 :

6sc in the MR [6]

Round 2 :

2sc in each st around [12]

Round 3 :

(1sc, inc) x 6 [18]

Round 4 :

1sc, inc, (2sc, inc) x 5, 1sc [24]

Round 5 :

(3sc, inc) x 6 [30]

Round 6 :

2sc, inc, (4sc, inc) x 5, 2sc [36]

Round 7 :

(5sc, inc) x 6 [42]

Round 8 :

3sc, inc, (6sc, inc) x 5, 3sc [48]

Round 9 :

(7sc, inc) x 6 [54]

Round 10 :

4sc, inc, (8sc, inc) x 5, 4sc [60]

Round 11 :

(9sc, inc) x 6 [66]

Round 12-20 :

66sc [9 rounds]

Round 21 :

(9sc, dec) x 6 [60]

Round 22-23 :

60sc [2 carr]

Round 24 :

4sc, dec, (8sc, dec) x 5, 4sc [54]

Info :

Change color to pink.

Round 25 :

54sc [1 round]

Round 26 :

54sc (back loop only)

Round 27 :

(7sc, dec) x 6 [48]

Round 28 :

48sc [1 round]

Round 29 :

3sc, dec, (6sc, dec) x 5, 3sc [42]

Round 30-31 :

42sc [2 rounds]

Round 32 :

(5sc, dec) x 6 [36]

Round 33 :

36sc [1 round]

Round 34 :

2sc, dec, (4sc, dec) x 5, 2sc [30]

Round 35 :

30sc [1 round]

Round 36 :

(3sc, dec) x 6 [24]

Info :

Fill and leave a long yarn to sew.

β€” Arms 2x :

Info :

Start with light pink yarn.

Round 1 :

6sc in the MR [6]

Round 2 :

inc each st around [12]

Round 3 :

(1sc, inc) x 6 [18]

Round 4 :

1sc, inc, (2sc, inc) x 5, 1sc [24]

Info :

Change color to grey.

Round 5 :

24sc (back loop only)

Round 6-10 :

24sc [5 rounds]

Round 11 :

(4sc, dec) x 4 [20]

Round 12-18 :

20sc [7 rounds]

Round 19 :

(3sc, dec) x 4 [16]

Round 20-22 :

16sc [4 rounds]

Info :

Change color to pink.

Round 23 :

16sc [1 round]

Round 24 :

16sc (back loop only)

Round 25-27 :

16sc [3 rounds]

Info :

Fill the arm halfway. Sc in the front loops of round 24 with pink color. Fold the arm in half and make 8 sc joining both sides.

β€” Bow :

Info :

Use pink yarn.

First Part :

Do 17 chains. 1: starting at the second chain from the hook with 16sc, 1 chain and turn the work. 2-12: 16 sc, 1 chain and turn [11 rounds]. 13: Do slts all around the bow.

Second Part :

Do 17 chains. 1: starting at the second chain from the hook with 16sc, 1 chain and turn the work. 2-5: 16sc, 1 chain and turn [3 rounds]. 6: Do slts all around the bow. See picture.

Chains :

Leave a piece of yarn before you start, do 12 chains, leave a piece of yarn to pass around the bow.

β€” Foot 2x :

Info :

Start with light pink yarn. Do 7 chains and starting at the second chain from the hook: Spiral work:

Round 1 :

5sc, inc, 5sc [12]

Round 2 :

(1sc, inc) x 6 [18]

Round 3 :

1sc, inc, (2sc, inc) x 5, 1sc [24]

Round 4 :

(3sc, inc) x 6 [30]

Round 5 :

2sc, inc, (4sc, inc) x 5, 2sc [36]

Info :

Change color to grey.

Round 6 :

36sc (back loop only)

Round 7-11 :

36sc [5 rounds]

Round 12 :

14sc, (dec) x 4, 14sc [32]

Round 13 :

14sc, (dec) x 2, 14sc [30]

Round 14-15 :

30sc [2 rounds]

Round 16 :

(3sc, dec) x 6 [24]

Round 17-18 :

24sc [2 rounds]

Info :

Fill and leave a long yarn to sew.

β€” Skirt :

Info :

Start with light pink yarn.

Round 1 :

front loop only in the round 26: HDC inc [108] (see picture).

Round 2 :

1 slt in the first stitch of the round 1, 1 chain, 108 HDC [108]

Round 3-7 :

repeat 108 HDC working spiral.

Round 8 :

108 slts all round.

β€” Assembly :

Info :

Follow the Assembly and Finishing section for face details, ears placement, bow placement, sewing legs and arms, and joining the body to the head.

Assembly Instructions

  • Embroider the eyelashes with black yarn and embroider eyebrows three rounds above the eyes with three stitches wide going up one round; paint the cheeks with blush.
  • Sew the trunk on round 22 of the head, centering it in the middle of the eyes, and secure firmly using matching yarn and hidden stitches.
  • Sew the ears on the twelfth round from top to bottom on both sides of the head, leaving 7 stitches away from the corner of the eye for proper placement.
  • Sew the legs on the sides of the body's tenth round from the bottom up to the eighteenth round with 10 stitches between the legs for correct spacing.
  • Sew the arms on the sides of the elephant at the first row of the body from top to bottom and attach the body to the head using a sturdy whipstitch.

Important Notes

  • πŸ’‘Use stitch markers to mark the beginning of each round to keep your counting accurate especially when working in spirals or changing rounds.
  • πŸ’‘Stuff pieces gradually and evenly for smooth shaping; leave a long tail to sew pieces together securely at assembly.
  • πŸ’‘Change colors neatly at the specified rounds (body round 24 to pink and arm color changes) and weave in ends to avoid loose tails.

This Little Elephant amigurumi is a sweet, handmade companion perfect for nurseries and gift giving. It combines classic amigurumi shaping with delicate dress and bow details for extra charm. Enjoy the satisfying process of crocheting, stuffing, and assembling this little friend. 🧢🐘✨

You ask,

we answer.

FAQs

What size will the finished piece be?

The finished amigurumi measures approximately 20 cm in height when made with the recommended amigurumi yarn and 2.25 mm hook.

Can I use different yarn weights for this pattern?

Yes, you can use different yarn weights but the finished size will change; choose an appropriate hook for your yarn and expect a different final height.

Do I need prior crochet experience for this pattern?

This pattern is rated intermediate and assumes basic knowledge of amigurumi and stitches like single crochet, half double crochet and double crochet.

How long does this project typically take to complete?

Most crocheters complete this project in 5-7 hours, though time may vary depending on experience and assembly speed.