🧢 Beautiful ✨ Detailed πŸ’ Adorable

Ladybug Keychains Amigurumi Pattern

Ladybug Keychains Amigurumi Pattern
4.3β˜… Rating
2-3 Hours Time Needed
2.1K Made This
βœ‚οΈ

Beginner Friendly Level

Perfect for those just starting their crochet journey, with clear instructions and simple techniques

⏱️

Bite-Sized Project

Finishes in 2-4 hoursβ€”perfect for an afternoon of creative relaxation.

🎁

Tiny Treasure

Small, sweet, and gift-worthy creations that fit perfectly in the palm of your hand with detailed charm.

About This Ladybug Keychains Amigurumi Pattern

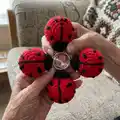
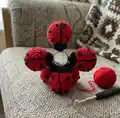
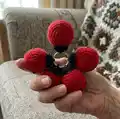
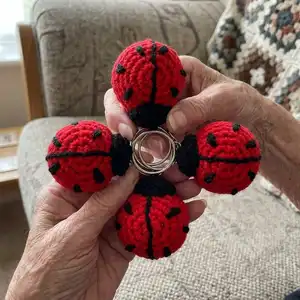
This pattern creates delightful little ladybug keychains with simple crochet rounds and embroidered details. You get both UK and US term versions so you can follow whichever you prefer. The pieces are small, quick to make, and perfect for gift-making or craft fairs. The instructions guide you through sewing, stuffing, and attaching the keychain.

Ladybug Keychains Amigurumi Pattern crochet pattern - detailed view of completed project

Includes full materials list, abbreviations, and step-by-step rounds for each part. Embroidery and assembly steps are provided to finish the ladybug neatly.

Why You'll Love This Ladybug Keychains Amigurumi Pattern

I absolutely love this pattern because it turns a few simple rounds into a charming little keepsake that is both functional and adorable. I enjoy how quickly one can make a complete ladybug keychain, perfect for gifts or last-minute craft ideas. The mix of basic shaping and small embroidered details lets me practice stitching variation while still finishing in a short time. I also love that the pattern includes both UK and US terms so more crocheters can use it comfortably.

Ladybug Keychains Amigurumi Pattern step 1 - construction progress Ladybug Keychains Amigurumi Pattern step 2 - assembly progress Ladybug Keychains Amigurumi Pattern step 3 - details and accessories Ladybug Keychains Amigurumi Pattern step 4 - final assembly and finishing

Switch Things Up

I love personalizing these little ladybugs by changing the color palette; try pastel pinks or greens for a softer look or neon shades for a fun modern twist.

I often change the yarn weight and hook size to make different sizes; using a bulkier yarn with a larger hook gives a chunky keychain while thinner yarn creates tiny charms.

I like embroidering different spot patterns β€” you can vary the number, size, and placement of spots to give each ladybug a unique personality.

Try adding tiny felt wings or a little crocheted bow for an accessory that adds charm and character to your keychain.

To make a safety-friendly toy for younger children, skip the keychain hardware and add a loop instead for attaching to a pram or bag; ensure all attachments are sewn securely.

I sometimes make a matching set with a few color variations to sell as a bundle at craft fairs β€” it’s a quick way to create an appealing product range.

If you want a more durable option, use a nylon or cotton DK yarn and reinforced stitching around the keychain attachment so it withstands daily use.

I recommend practicing the embroidery on a spare scrap first to decide spot placement and stripe thickness before stitching on your finished piece.

To create a miniature collection, experiment with different stitch textures for the tummy versus the back by swapping one round to a different stitch (for example, try a round of single crochet tighter in the US terms).

I also enjoy making holiday-themed versions β€” use white and red for Christmas, or black and orange for a Halloween-inspired charm.

For gifts, consider adding a small crocheted tag with initials or a tiny felt heart sewn to the back for a personalized touch.

If you want to make a brooch instead, simply sew a brooch pin to the back instead of a keychain and add a felt backing for neatness.

Common Mistakes & How to Fix Them

βœ— Skipping stitch markers at the beginning of rounds leads to lost stitch counts; place and move a stitch marker at the last stitch of each round to stay accurate. βœ— Overstuffing the ladybug causes bulging and uneven shape; stuff gradually so the piece can be easily squeezed and shaped without distorting. βœ— Cutting ends flush too early can make sewing and attachment difficult; leave the specified long ends (15cm or 50cm) for sewing and assembling before trimming. βœ— Not aligning the two halves correctly before joining makes the body lopsided; place wrong sides together and pin or hold the halves to check symmetry before slip stitching. βœ— Maintaining inconsistent tension will produce uneven rounds and mismatched sizes; keep a consistent, moderate tension throughout the project for uniform results.

Ladybug Keychains Amigurumi Pattern

Make charming ladybug keychains with this easy-to-follow crochet pattern. You will enjoy clear step-by-step rounds, both UK and US terms, and simple assembly instructions. Perfect for quick handmade gifts or a fun small project you can finish in an afternoon. The design includes embroidery details and a secure keychain attachment for durability.

Beginner Friendly 2-3 Hours

Materials Needed for Ladybug Keychains Amigurumi Pattern

β€” Main Fabric

  • 01
    Hayfield Bonus (DK) Ladybird 0698 - 5g
  • 02
    Hayfield Bonus (DK) Black 0965 - oddment (small amount for head, stripe, and spots)
  • 03
    Hi-Loft quality toy stuffing - small amount
  • 04
    Keychain - 1 per finished ladybug

β€” Tools Required

  • 01
    3mm crochet hook
  • 02
    Wool needle (for sewing and embroidery)
  • 03
    Stitch marker (to mark last stitch of each round)
  • 04
    Scissors (for cutting yarn)
  • 05
    Polyester stuffing (Hi-Loft quality recommended)
  • 06
    Keychain hardware

Progress Tracker

0% Complete

β€” Ladybug Back (UK Terms) :

Round 1 :

ch2, dc 6 into 2nd st from hook (alternatively dc 6sts into magic ring) (6)

Round 2 :

inc x6 (12)

Round 3 :

(dc into next st, inc) x6 (18)

Round 4 :

dc (18)

Round 5 :

(dc into next 2sts, inc) x6 (24)

Round 6 :

dc (24)

Info :

F/O leaving a short end. Weave short end through back of bun. DO NOT CUT FLUSH.

β€” Ladybug Tummy (UK Terms) :

Round 1 :

ch2, dc 6 into 2nd st from hook (alternatively dc 6sts into magic ring) (6)

Round 2 :

inc x6 (12)

Round 3 :

(dc into next st, inc) x6 (18)

Round 4 :

(dc into next 2sts, inc) x6 (24)

β€” Joining Row (UK Terms) :

Round 5 :

place the 2 halves of the ladybug wrong sides together and sl st to join, ch1, htr into next 23sts (24, ch1 counts as 1st st) sl st to join

Info :

F/O leaving a 15cm end. Secure ends with a couple of small sts. Weave end through body and cut flush to finish.

β€” Ladybug Back (for head attach) (UK Terms) :

Round 1 :

leaving a 15cm end, ch2, dc 6 into 2nd st from hook (alternatively sc 6sts into magic ring) (6)

Round 2 :

flip 15cm end to front of work, inc x6 (12)

Round 3 :

dc (12)

Info :

F/O leaving a 50cm end.

β€” Attaching Head (UK Terms) :

Info :

Using 50cm end from head, thread through tummy section just behind the F/O join. Then working straight up from entry point, come out through the ladybugs back, 3 rows above the htr join row. Catch in opposite edge of head and pull tight to position. Using small mattress sts attach head to body. DO NOT CUT END.

β€” Back Stripe and Spots (UK Terms) :

Info :

Using remainder of 50cm end and small running sts, embroider a straight line down the ladybug's back making sure that you go across the starting circle. Now using a split st (small running sts that catch in each end of previous running st), work back along the back finishing up at head join. Using small embroidery daisy (ch) sts sew 3 spots on each side of back making sure that they are fairly symmetrical. Weave ends through inside of ladybug's body and cut flush to finish.

β€” Attaching Keychain (UK Terms) :

Info :

Thread keychain onto 15cm end. Do 3 small back sts to attach the keychain to top of head. Secure end with a couple of small sts. Weave end through body and cut flush to finish.

β€” Ladybug Back (US Terms) :

Round 1 :

ch2, sc 6 into 2nd st from hook (alternatively sc 6sts into magic ring) (6)

Round 2 :

inc x6 (12)

Round 3 :

(sc into next st, inc) x6 (18)

Round 4 :

sc (18)

Round 5 :

(sc into next 2sts, inc) x6 (24)

Round 6 :

sc (24)

Info :

F/O leaving a short end. Weave short end through back of bun. DO NOT CUT FLUSH.

β€” Ladybug Tummy (US Terms) :

Round 1 :

ch2, sc 6 into 2nd st from hook (alternatively sc 6sts into magic ring) (6)

Round 2 :

inc x6 (12)

Round 3 :

(sc into next st, inc) x6 (18)

Round 4 :

(sc into next 2sts, inc) x6 (24)

β€” Joining Row (US Terms) :

Round 5 :

place the 2 halves of the ladybug wrong sides together and sl st to join, ch1, hdc into next 23sts (24, ch1 counts as 1st st) sl st to join

Info :

F/O leaving a 15cm end. Secure ends with a couple of small sts. Weave end through body and cut flush to finish.

β€” Ladybug Back (for head attach) (US Terms) :

Round 1 :

leaving a 15cm end, ch2, sc 6 into 2nd st from hook (alternatively sc 6sts into magic ring) (6)

Round 2 :

flip 15cm end to front of work, inc x6 (12)

Round 3 :

sc (12)

Info :

F/O leaving a 50cm end.

β€” Attaching Head (US Terms) :

Info :

Using 50cm end from head, thread through tummy section just behind the F/O join. Then working straight up from entry point, come out through the ladybugs back, 3 rows above the hdc join row. Catch in opposite edge of head and pull tight to position. Using small mattress sts attach head to body. DO NOT CUT END.

β€” Back Stripe and Spots (US Terms) :

Info :

Using remainder of 50cm end and small running sts, embroider a straight line down the ladybug's back making sure that you go across the starting circle. Now using a split st (small running sts that catch in each end of previous running st), work back along the back finishing up at head join. Using small embroidery daisy (ch) sts sew 3 spots on each side of back making sure that they are fairly symmetrical. Weave ends through inside of ladybug's body and cut flush to finish.

β€” Attaching Keychain (US Terms) :

Info :

Thread keychain onto 15cm end. Do 3 small back sts to attach the keychain to top of head. Secure end with a couple of small sts. Weave end through body and cut flush to finish.

Assembly Instructions

  • Place the two ladybug halves wrong sides together and slip stitch around to join, then work the joining round (hdtr/hdc as indicated) and fasten off leaving a 15cm tail for securing and finishing.
  • Using the long 50cm tail from the head piece, thread it through the tummy section behind the join and bring it out through the back three rows above the join; use small mattress stitches to attach the head and pull tight to position.
  • Embroider a straight back stripe and add three daisy-style spots on each side using small running and split stitches, making sure markings are fairly symmetrical before securing ends inside the body.
  • Thread the keychain onto the 15cm tail and secure it to the top of the head with three small back stitches, then secure with a couple more small stitches and weave the end through the body before cutting flush.
  • Weave all remaining ends through the inside of the ladybug body to hide them and trim flush only after all attachments are secure to prevent weakening the joins.

Important Notes

  • πŸ’‘Unless stated, work in continuous rounds and mark the last stitch of each round with a stitch marker before proceeding with the next round.
  • πŸ’‘When stuffing parts, do not overstuff them because too much stuffing will show through and distort the piece; each part should be filled so it can be easily squeezed when pinched firmly.
  • πŸ’‘Do not cut long ends flush until after sewing and attachments are finished; leave the specified 15cm or 50cm ends for sewing and assembly.
  • πŸ’‘Pin or hold parts in place to check alignment before sewing, especially when joining the two body halves and attaching the head and keychain.

This sweet Ladybug Keychain pattern is perfect for quick handmade gifts and craft markets. It includes both UK and US terms and clear step-by-step rounds for every piece. Make a batch in different colors and spread a little handcrafted joy! 🧢✨

You ask,

we answer.

FAQs

What size will the finished piece be?

The finished keychain measures approximately 4-6 cm in diameter depending on your tension and yarn, using DK weight yarn and a 3mm hook.

Can I use different yarn weights for this pattern?

Yes, you can use different yarn weights, but this will affect the final size; choose an appropriate hook for your yarn and expect a change in finished dimensions.

Do I need prior crochet experience for this pattern?

This pattern is beginner friendly and uses basic stitches; familiarity with working in rounds, increases, and simple embroidery will be helpful.

How long does this project typically take to complete?

Most crocheters can complete a single keychain in 2-3 hours, depending on experience and how much time you spend on embroidery and assembly.