🧢 Beautiful ✨ Detailed πŸ’ Adorable

Herringbone Texture Crochet Blanket Pattern

Herringbone Texture Crochet Blanket Pattern
4.2β˜… Rating
12-15 Hours Time Needed
1.6K Made This
βœ‚οΈ

Beginner Friendly Level

Perfect for those just starting their crochet journey, with clear instructions and simple techniques

⏱️

Multi-Day Project

A rewarding 12+ hour journeyβ€”perfect for dedicated crafters who love detailed work.

πŸ€—

Soft Hug

Gentle, plush, and full of warmth, creating a sense of comfort and coziness wherever they find a home.

About This Herringbone Texture Crochet Blanket Pattern

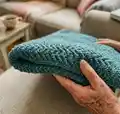
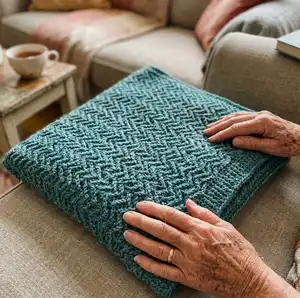
This pattern creates a large, textured herringbone-style crochet blanket using jumbo ribbon yarn for a plush finish. The stitch pattern alternates rows of trebles and double crochets to form a striking chevron texture. It is designed to be approachable while producing a professional-looking, drapey blanket. The pattern includes a simple two-round edging to finish the blanket neatly.

Herringbone Texture Crochet Blanket Pattern crochet pattern - detailed view of completed project

Worked in an easy 4-row repeat, this blanket grows quickly with bulky yarn and a large hook. A stitch diagram and reverse single crochet instructions are provided to guide you through the texture and edging.

Why You'll Love This Herringbone Texture Crochet Blanket Pattern

I absolutely love this pattern because the herringbone texture looks intricate yet is simple to work, making every row satisfying. The jumbo ribbon yarn creates an irresistibly soft and cozy fabric that drapes beautifully. I enjoy how quickly the blanket grows using a large hook, so you see progress fast and stay motivated. It’s versatile for gift-making or home decor and the clean edging gives a polished final look that I’m proud to display.

Herringbone Texture Crochet Blanket Pattern step 1 - construction progress Herringbone Texture Crochet Blanket Pattern step 2 - assembly progress Herringbone Texture Crochet Blanket Pattern step 3 - details and accessories Herringbone Texture Crochet Blanket Pattern step 4 - final assembly and finishing

Switch Things Up

I love changing up the yarn to create different looks; I often use a variegated ribbon or tweed yarn for added visual interest.

I sometimes switch yarn weight and hook size to make a baby or lap-sized blanketβ€”use lighter yarn and a smaller hook for a finer fabric.

I like to experiment with color blocking by switching colors every 10-20 rows to create bold stripes that highlight the herringbone texture.

You can replace the simple edging with a scalloped or picot border for a more decorative finish if you prefer a delicate look.

I sometimes add a row of contrasting color before the edging to create a framed effect that makes the blanket pop.

If you want a sturdier blanket, I add a second round of single crochet edging worked tightly to give a firmer edge.

I recommend trying braided tassels in each corner for a playful, boho vibe; they make great personalization details for gifts.

For a luxurious feel, I’ll substitute a soft chenille or velvet-style bulky yarn, but always check gauge since the texture will change.

I occasionally use the pattern to make cushion covers by working to the desired width and creating two panels to seam together.

I enjoy combining embroidered accents or sewn-on appliques after finishing; it’s an easy way to add a monogram or decorative motif.

When I want a reversible look, I experiment with alternate stitch directions and test small samples to see how the herringbone motif appears on both sides.

You can also make smaller matching accessories like a cowl or scarf using the same stitch sequence to create a coordinated set.

Common Mistakes & How to Fix Them

βœ— Skipping the instruction to work all tr and tr2tog in front of the work can cause the texture to look inconsistent; always bring your hook to the front before working these stitches. βœ— Not checking the gauge with the recommended hook and yarn may result in a blanket that is much smaller or larger than the stated measurements; make a 4" x 4" swatch and adjust your hook size as needed. βœ— Forgetting to turn and place the turning chain correctly leads to uneven edges and stitch counts; always follow the ch counts at the start of each row and turn as instructed. βœ— Failing to fasten off and weave ends securely at the end of the project can cause the edging to catch or come undone; weave in ends neatly and securely after blocking or finishing.

Herringbone Texture Crochet Blanket Pattern

Create a cozy, textured throw with this Herringbone Texture Crochet Blanket pattern. You will love the deep, chevron-like stitches that form a warm, stylish blanket perfect for draping over a sofa or gifting. Clear step-by-step instructions and a simple edging make assembly easy. The pattern uses jumbo yarn for a quick, satisfying finish.

Beginner Friendly 12-15 Hours

Materials Needed for Herringbone Texture Crochet Blanket Pattern

β€” Main Fabric

  • 01
    Caron Jumbo Twirl (12 oz/340 g; 578 yds/528 m) Canal Ribbon (83001) - 4 balls or 2300 yds/2090 m

β€” Tools Required

  • 01
    Size U.S. K/10 K/10. 6.5 mm Susan Bates Silvalume crochet hook or size needed to obtain gauge.
  • 02
    Susan Bates yarn needle

Progress Tracker

0% Complete

β€” Instructions :

Info :

Note: Work all tr and tr2tog in front of work (not around sts).

Info :

Ch 120. See diagram on page 2.

1st row :

(RS). 1 sc in 2nd ch from hook. 1 sc in each of next 2 ch. *Ch 1. Skip next ch. 1 sc in each of next 3 ch. Rep from * to end of chain. 119 sts.

2nd row :

Ch 3 (counts as dc). 1 dc in each st and ch-1 sp to end of row. Turn.

3rd row :

Ch 1. 1 sc in first dc. 1 tr in next skipped ch 2 rows below. Skip next dc (behind tr). *1 sc in next dc. Ch 1. Skip next dc. 1 sc in next dc. Tr2tog. Skip next dc (behind Tr2tog). Rep from * to last 5 sts. 1 sc in next dc. Ch 1. Skip next dc. 1 sc in next dc. 1 tr in same skipped ch 2 rows below as last tr. Skip next dc (behind tr). 1 sc in top of ch 3. Turn.

4th row :

As 2nd row.

5th row :

Ch 1. 1 sc in first dc. 1 tr in next skipped dc 2 rows below. Skip next dc (behind tr). *1 sc in next dc. Ch 1. Skip next dc. 1 sc in next dc. Tr2tog. Skip next dc (behind Tr2tog). Rep from * to last 5 sts. 1 sc in next dc. Ch 1. Skip next dc. 1 sc in next dc. 1 tr in same skipped dc 2 rows below as last tr. Skip next dc (behind tr). 1 sc in top of ch 3. Turn.

Info :

Rep 2nd to 5th rows for pat until work from beg measures approx 56" [1425 cm], ending on a 3rd or 5th row of pat. Fasten off.

β€” Edging :

1st rnd :

(RS). Join yarn with sl st in any corner of Blanket. Ch 1. Work 3 sc in same sp. Work sc evenly around outer edges, working 3 sc in each corner. Join with sl st in first sc.

2nd rnd :

Ch 1. Working from left to right instead of from right to left as usual, work 1 reverse sc in each sc around. Join with sl st in first sc. Fasten off.

Info :

REVERSE SC DIAGRAM

Assembly Instructions

  • Weave in all loose ends securely along the wrong side of the blanket using the Susan Bates yarn needle, hiding tails within the stitches.
  • Join the edging by starting in any corner and working 3 sc in the corner space, then work evenly across edges to maintain a neat border.
  • When working the 2nd rnd of edging, work reverse single crochet from left to right to create a clean, rope-like finish along the outer edge.
  • Block the finished blanket gently if desired to even out the stitch pattern and enhance drape; pin corners square and lightly steam or wet-block according to yarn recommendations.
  • Fasten off and secure ends after the edging round is complete, then trim any excess yarn and tidy up with a final pass of weaving in ends.

Important Notes

  • πŸ’‘Work all treble stitches (tr) and treble two together (tr2tog) in front of the work as instructed to maintain the herringbone texture.
  • πŸ’‘Check your gauge of 11 sc and 12 rows = 4" [10 cm] before starting to ensure the blanket finishes at the approximate measurements.
  • πŸ’‘When joining for the edging, place 3 single crochets in each corner space to prevent the edges from pulling in and to keep corners square.

This Herringbone Texture Crochet Blanket Pattern gives you a cozy, stylish throw that feels luxurious and looks professional. The jumbo ribbon yarn works up quickly to create a plush, textured fabric you will want to wrap up in every evening. Perfect for gifting or brightening your own home, this pattern is satisfying and rewarding to make. 🧢✨😊

You ask,

we answer.

FAQs

What size will the finished piece be?

The finished blanket measures approximately 44" x 56" [112 x 142 cm] when using the recommended yarn and hook size.

Can I use different yarn weights for this pattern?

You can substitute yarns, but the final size and texture will change; using a lighter weight yarn will produce a smaller, less dense blanket and you should adjust hook size accordingly.

Do I need prior crochet experience for this pattern?

This pattern is rated Beginner Friendly (Easy), so basic knowledge of single crochet, double crochet, treble crochet and reading simple pattern repeats is recommended.

How long does this project typically take to complete?

Most crocheters will take around 12-15 hours to complete the blanket using jumbo yarn, though time may vary depending on your speed and experience.