About This Crochet Granny Cross-Body Bag Pattern
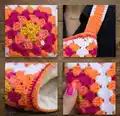
This pattern teaches you to make a colorful cross-body bag from 3 granny square motifs plus edging and a strap using self-striping yarn. It uses classic granny square rounds, simple joining, and basic edging to create a functional, wearable accessory. The finished bag is approximately 17" wide x 6½" deep, excluding the strap.
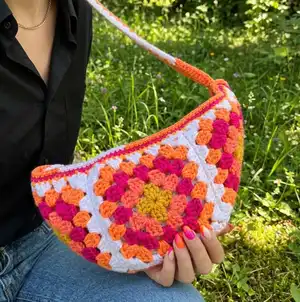
Easy skill level with full step-by-step written instructions and diagrams for the granny motif. Uses one ball of Red Heart All in One Granny Square yarn in Citrus Twist for a bright, self-striping effect.
Why You'll Love This Crochet Granny Cross-Body Bag Pattern
I absolutely love this pattern because it transforms a classic granny square into a modern, wearable accessory that feels fresh and fun. The self-striping yarn takes care of the colorwork for you, so you get vibrant results with minimal color changes. The assembly uses simple sewing and single crochet joins, which keeps the finishing approachable and tidy. I enjoy that the bag is fast to make but still looks like a thoughtful, handmade piece that people notice.
Switch Things Up
I love experimenting with different yarn choices for this bag; try a tonal or solid worsted weight yarn paired with a contrast border for a more classic look.
I sometimes make the bag larger by adding an extra round to each motif and using a bigger hook to create a roomy tote-style version.
I often change the strap length to make a shorter shoulder bag or a longer cross-body by adding or reducing chains when starting the strap.
I like to swap the zipper for a magnetic snap or button closure if I prefer a softer finish without hardware.
I add embroidered initials or a small applique to one granny square before joining for a personalized touch that makes the piece unique.
I use a contrasting solid color for the edging to frame the motifs and make the granny squares pop visually.
I recommend using a sturdier cord or adding interfacing inside the strap for extra durability if you plan to carry heavier items.
I sometimes create a lined version by sewing a fabric lining inside the bag for a polished interior and to protect seams; you can machine sew or hand stitch the lining in place.
I enjoy substituting different hook sizes and yarn weights to create mini versions suitable for gifts or keychain accessories—adjust the strap accordingly.
I also experiment with joining methods, such as whipstitch or join-as-you-go, to see which finish I prefer for the seams and overall stability.
Common Mistakes & How to Fix Them
✗ Not measuring gauge before starting; check that one motif measures approx 6" [15 cm] square to ensure the finished bag measures correctly.
✗ Starting the motif from the wrong end of the pull-skein and running out of color; begin with Color 1 (shortest color rep) from center of pull-skein and leave a 4" [10 cm] tail to weave in.
✗ Failing to align motifs before joining causes uneven seams; hold wrong sides together and align stitches before slip stitching corners and working single crochet through both thicknesses.
✗ Skipping the instruction to work in back loops only when joining can obscure the granny motif edge; work single crochet in back loops only for a neat join as instructed.
✗ Not using the white sections for joining can create a mismatched seam; join motifs together using just the white sections of yarn for a consistent look.
✗ Sewing the zipper without pinning first may make the opening crooked; pin or baste the zipper in place and check alignment before sewing with thread and needle.