About This Basic Crochet Basket Pattern
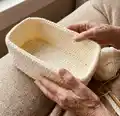
This pattern creates a rectangular basic crochet basket using aran weight yarn and a 10mm hook. You will work a flat base in half treble stitches, then work the sides in rounds using double crochet for a neat finish. The design is sturdy and quick to make, ideal for storage or gifting. Simple shaping instructions are included to finish and secure the sides.
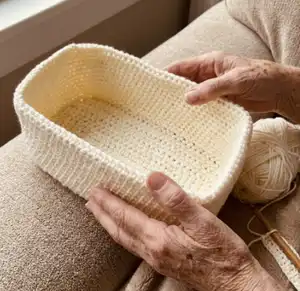
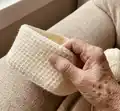
Clear step-by-step instructions guide you through the base, sides, and finishing. Minimal sewing is required — fold and secure the sides for a tidy result.
Why You'll Love This Basic Crochet Basket Pattern
I absolutely love this pattern because it transforms a few simple stitches into a useful, beautiful storage piece. I enjoy how quickly the basket grows using aran yarn and a large hook, giving a satisfying result in a short time. The straight edges and neat texture make it versatile for any room, and it feels great to make something both decorative and practical. I also love that it is forgiving for beginners yet offers room for creative customisation.
Switch Things Up
I love swapping colors to create a striped or color-block basket; try alternating every few rows for a modern look.
I often change yarn weight and hook size to make larger storage baskets or tiny ones for gift boxes.
I sometimes use cotton or rope yarn for extra structure and durability, especially for utility baskets.
I add a fabric lining to make the basket washable and to create a smooth inner surface for delicate items.
I like to embellish the rim with a decorative edge, such as a round of slip stitch or a scalloped border, for a polished finish.
I experiment with handles by leaving gaps in the dc rounds or adding crocheted straps for carrying convenience.
I sometimes make sets in graduated sizes so they nest neatly and look coordinated on shelves.
I recommend trying different finishes like crocheting a cord and wrapping it around the top edge for a rope-like trim.
I also personalize baskets with embroidered initials, sewn-on patches, or small crocheted flowers for gifts.
I find that blocking the basket lightly after assembly can really sharpen the corners and improve overall shape and appearance.
I encourage you to mix textures and materials — pairing aran yarn with ribbon or faux leather tags gives the basket a designer touch.
Common Mistakes & How to Fix Them
✗ Skipping the second chain when starting will produce the wrong stitch count; be sure to work the first htr into the 2nd chain from the hook.
✗ Failing to count the base stitches can make the sides uneven and mismatched; count the 30 stitches after the initial chain to confirm accuracy.
✗ Working with inconsistent tension can change the final size and shape of the basket; maintain a steady, relaxed tension throughout the base and sides.
✗ Not leaving a long yarn tail when fastening off makes sewing the sides difficult later; fasten off with a long thread to secure and sew neatly.
✗ Skipping blocking or shaping after assembly can leave the basket looking misshapen; fold and shape the sides before securing to ensure neat edges.